-
Notifications
You must be signed in to change notification settings - Fork 4
mesoSPIM_galvo_selection
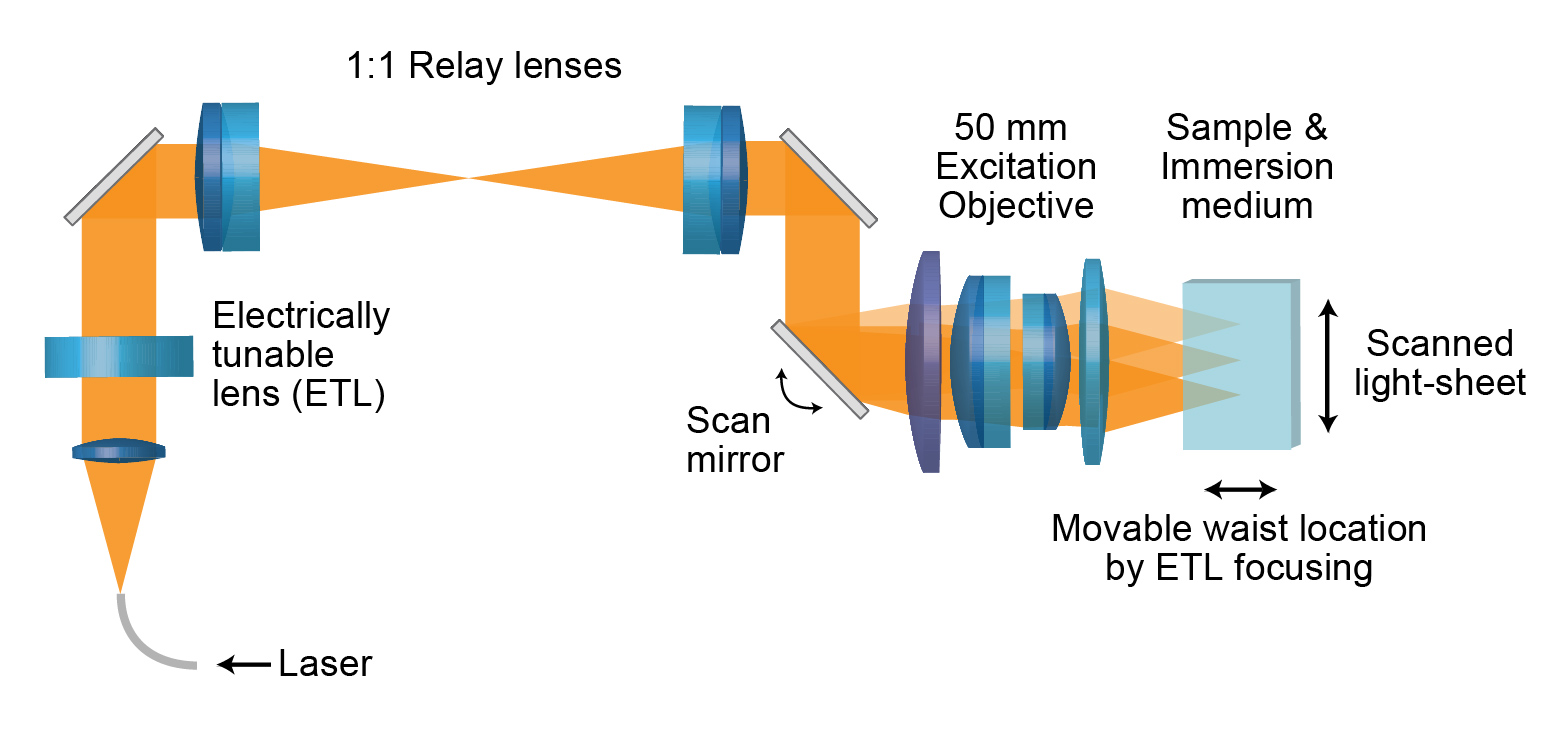
 Simplified overview of the mesoSPIM excitation arm (several additional fold mirrors
are missing here).
The mesoSPIM uses a galvo scanner in each arm to create the light-sheet by scanning a Gaussian beam up and down.
The Galvos can be selected for 10 mm or 15 mm beam diameter with the following advantages and disadvantages:
➕ standard diameter for scanners, short delivery times as it is a stock item
➕ higher galvo frequencies possible (i.e. 199 Hz for Zoom 1) which leads to better uniformity of the axial resolution
➖ the mesoSPIM is designed for 15 mm beam size, therefore, using a 10 mm beam will lead to a lower excitation NA (0.1 instead of 0.15) and possibly a marginally thicker light-sheet due to the lower NA
➖ lower NA means slightly worse shadow reduction (the lower the NA, the longer the shadow cone behind absorbing objects)
➕ standard diameter for scanners, utilizes full excitation NA
➕ excellent shadow reduction due to higher excitation NA (see above)
➖ requires custom scanners from Scanlab or Cambridge Instruments with long lead times
➖ needs custom electronics to be built
➖ larger scan mirrors are slower, this can lead to lower feasible galvo frequencies before overheating (i.e. 99 Hz for Zoom 1)
-
Background
- mesoSPIM history
- Optical design
- Electronics
-
Setting up a mesoSPIM
- First steps
- Preparing the software and electronics
- Preparing the microscope optics
-
Setting the microscope up
- General alignment tips and tricks
- Installing the microscope base
- Setting up the detection path
- Alignment of the detection path
- Setup of the sample XYZ stages
- Setup of the excitation path
- Immersion cuvettes
- Set up a microscope config file
- Light-sheet co-alignment
- Set up initial ETL parameters
- Setting up lasers with the GUI
- Sample Handling
- Test Samples
- Troubleshooting
- Upgrades and custom variants