Easily add a split-screen interface to your 2D game in Godot, with support for up to 8 players.
SplitScreen2D requires at least Godot 4.2. It may work with earlier versions, but they have not been tested.
Let's install SplitScreen2D into your Godot project:
- Download the
.ziportar.gzfile for your desired SplitScreen2D version here. - Extract the
addonsfolder from this file. - Move the
addonsfolder to your Godot project folder.
Now, let's verify you have correctly installed SplitScreen2D:
- You have this folder path
res://addons/split_screen. - Head to
Project > Project Settings. - Click the
Pluginstab. - Tick the
enabledbutton next to SplitScreen2D. - Restart Godot.
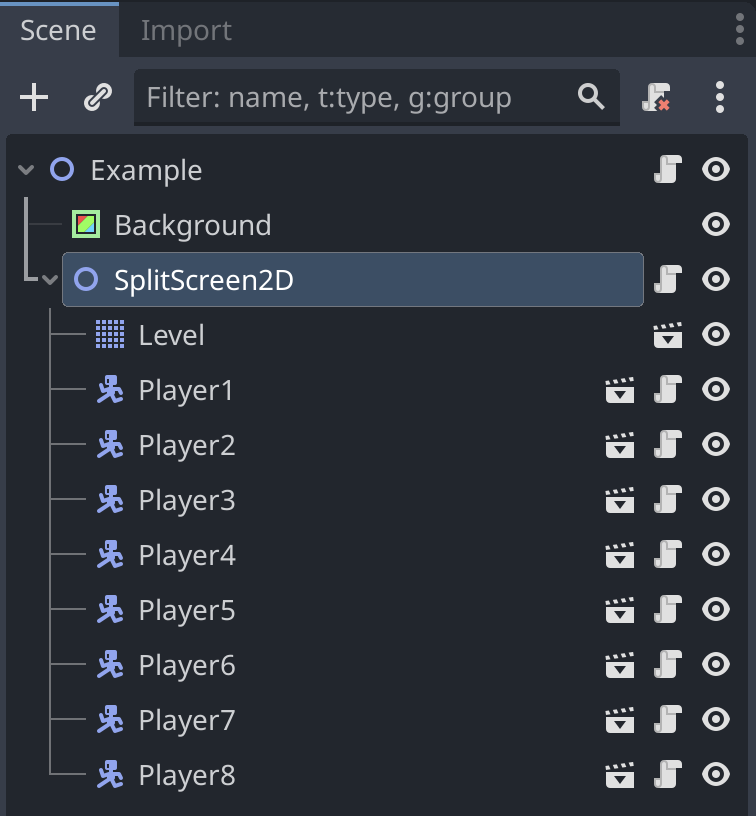
To get started, add a SplitScreen2D node to your scene tree. Then, add a node that represents your 2D play area,
as well as any nodes that represents your players, as children of the SplitScreen2D node in the scene tree.
Typically, the play area will be a TileMap (or an instance of a scene containing a TileMap); and players will be
CharacterBody2D instances, but that is not required. They can be of any node type that is derived from Node2D.
Finally, you'll need to configure the SplitScreen2D by assigning it a Play Area, as described in the
Configuration section below.
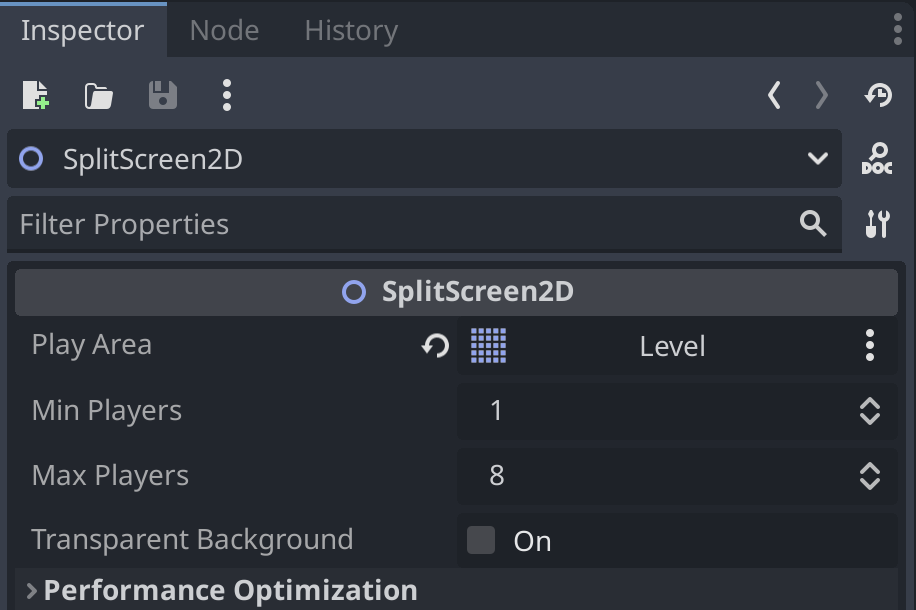
The following exported values can be modified in the Godot Editor Inspector, or programmatically by directly accessing the properties of the node.
| Inspector Label | Property Name | Type | Default |
|---|---|---|---|
| Play Area | play_area |
Node2D | null |
| Min Players | min_players |
int | 1 |
| Max Players | max_players |
int | 8 |
| Transparent Background | transparent_background |
bool | false |
In the inspector, you can set these properties like so:
Alternatively, you can set them in code:
class_name Example
extends Node2D

@onready var split_screen: SplitScreen2D = $SplitScreen2D
@onready var level: TileMap = $SplitScreen2D/TileMap

func _ready():
	# The play area can be any Node2D that is a child of SplitScreen2D, such as a TileMap.
	split_screen.play_area = level
	# Set the minimum and maximum number of players (default is 1 to 8).
	split_screen.min_players = 2
	split_screen.max_players = 4
	# Give the viewports transparent backgrounds (default is `false`).
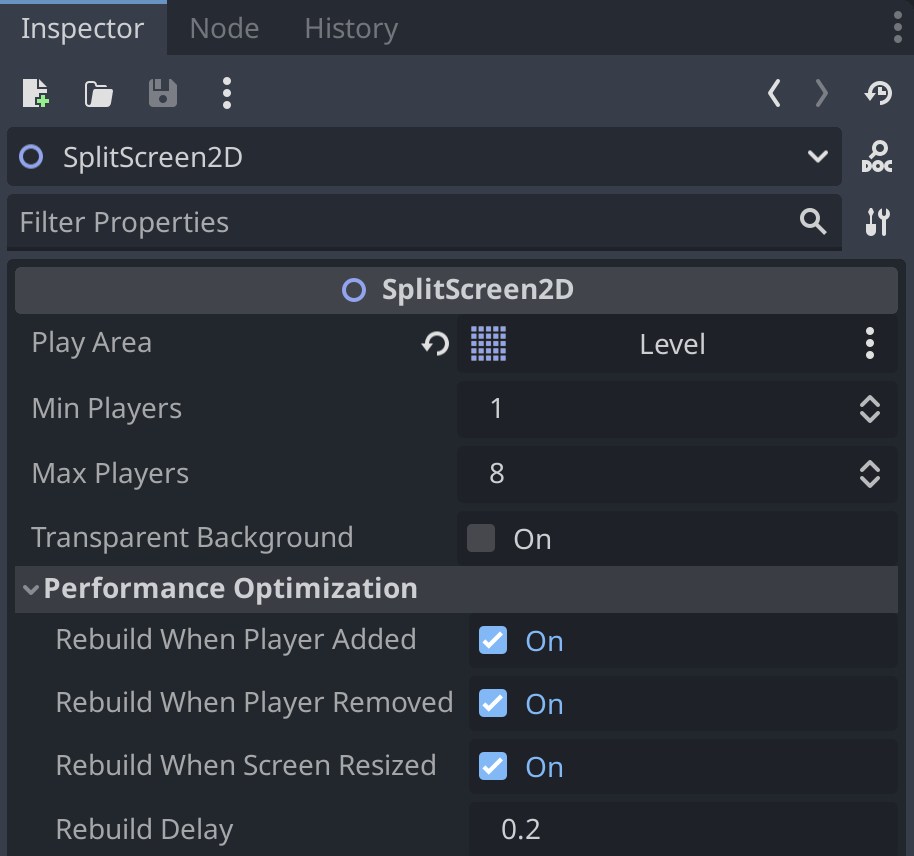
split_screen.transparent_background = trueThe SplitScreen2D node will automatically rebuild its node tree whenever a player is added or removed, or when the
screen size changes. This should be fine, but if you need to disable it for performance reasons, you can adjust the
following Performance Optimization settings:
| Inspector Label | Property Name | Type | Default |
|---|---|---|---|
| Rebuild When Player Added | rebuild_when_player_added |
bool | true |
| Rebuild When Player Removed | rebuild_when_player_removed |
bool | true |
| Rebuild When Screen Resized | rebuild_when_screen_resized |
bool | true |
| Rebuild Delay | rebuild_delay |
float | 0.2 |
In the inspector, you can set these properties like so:
If you need to manually rebuild the SplitScreen2D tree, you can call the rebuild() method. A code example
can be found in the Methods > rebuild() section below.
Again, this should not be necessary for most projects, but it is available if you need it—or if you're just a control freak.
You can also use the SplitScreen2DConfig class to configure a SplitScreen2D node programmatically:
class_name Example
extends Node2D

# Assuming `TileMap` is your play area and your players are `CharacterBody2D` nodes.
@onready var level: TileMap = $TileMap
@onready var players: Array[CharacterBody2D] = [$Player1, $Player2]

@onready var split_screen: SplitScreen2D

func _ready():
	var config := SplitScreen2DConfig.new()
	config.play_area = level
	config.min_players = 2
	config.max_players = 4
	config.transparent_background = true
	config.rebuild_when_player_added = false
	config.rebuild_when_player_removed = false
	config.rebuild_when_screen_resized = false
	config.rebuild_delay = 0.1

	split_screen = SplitScreen2D.from_config(config)
	config.queue_free()  # Release this object from memory after using it.

	for player in players:
		split_screen.add_player(player)

	add_child(split_screen)
The SplitScreen2DConfig class has all the same exported properties and default values as SplitScreen2D.
The SplitScreen2D node has the following methods:
add_player(player: Node2D)get_player_camera(player: Node2D)get_primary_viewport()get_screen_size()make_camera_stop_tracking_player(camera: Camera2D, player: Node2D)make_camera_track_player(camera: Camera2D, player: Node2D)rebuild()remove_player(player: Node2D, queue_free: bool = true)
This method can be used to add a player to the split screen interface.
class_name Example
extends Node2D

@onready var split_screen: SplitScreen2D = $SplitScreen2D

func _input():
	if Input.is_action_just_pressed("ui_accept"):
		# Assuming `Player` is a class you created for your players.
		var player = Player.new()
		# Add the player to the split screen.
split_screen.add_player(player)This method returns the Camera2D that is assigned to a given player.
This method returns the primary viewport, which is the first viewport that gets added when the
SplitScreen2D tree is built/rebuilt. This is also the viewport that the play_area node gets
reparented to.
This helper method returns the size of the screen, as a Vector2. It is the equivalent of calling
get_viewport().get_visible_rect().size.
This method will clear the remote node path of the RemoteTransform2D node assigned to a given
player. This is useful if, for example, you want to stop the camera from tracking a player when they
fall off a cliff. You can then reposition the player and call make_camera_track_node() to resume
tracking the player.
class_name Example
extends Node2D

@onready var player: Player = $Player
@onready var split_screen: SplitScreen2D = $SplitScreen2D

func _ready():
	# Assuming you have a `Player` class that emits a `fell_off_cliff` signal.
	player.fell_off_cliff.connect(_on_player_fell_off_cliff)

func _on_player_fell_off_cliff():
	var camera = split_screen.get_player_camera(player)
	split_screen.make_camera_stop_tracking_player(camera, player)
	player.position = Vector2.ZERO  # Move back to starting position.
split_screen.make_camera_track_player(camera, player)This method is used internally to make each split screen viewport camera track the corresponding
player. If you make use of the make_camera_stop_tracking_node() described above, you can use this
method to re-enable camera tracking for the player (see code example above).
This method is used to manually rebuild the split screen interface. With the default configuration, it is not necessary to call this. However, if you have modified the Performance Optimization settings, you may need to call it when players are added or removed, or when the screen size changes.
class_name Example
extends Node2D

@onready var split_screen: SplitScreen2D = $SplitScreen2D

func _ready():
	# Disable automatic rebuilding of the `SplitScreen2D` tree.
	split_screen.rebuild_when_player_added = false
	split_screen.rebuild_when_player_removed = false
	split_screen.rebuild_when_screen_resized = false

func add_player(new_player: Player):
	# Add the player to the split screen.
	split_screen.add_player(new_player)
	# Rebuild the `SpitScreen2D` tree.
	split_screen.rebuild()

func remove_player(player: Player):
	# Set to true (default) if the player node should be deleted; otherwise, set to false.
	var should_queue_free: bool = false
	# Remove the player from the split screen.
	split_screen.remove_player(player, should_queue_free)
	# Rebuild the `SpitScreen2D` tree.
	split_screen.rebuild()
	# Optionally, do something with the player node if you kept it.
player.reparent(inactive_players) # Assuming `inactive_players` is a Node2D in your scene.This method can be used to remove a player from the split screen interface. By default, it will call
queue_free() on the player node. This can be prevented by passing false as the second parameter
value.
class_name Example
extends Node2D

@onready var split_screen: SplitScreen2D = $SplitScreen2D

func _input():
	if Input.is_action_just_pressed("ui_cancel"):
		# Assuming `Player` is a class you created for your players.
		var player = get_node("Player")
		# Remove the player from the split screen.
split_screen.remove_player(player)The SplitScreen2D node emits the following signals:
max_players_reached(player_count: int): Emitted when the maximum number of players is reached or exceeded.min_players_reached(player_count: int): Emitted when the minimum number of players is reached or exceeded.player_added(player: Node2D): Emitted when a player is added to the split screen.player_removed(player: Node2D): Emitted when a player is removed from the split screen.split_screen_rebuilt(reason: RebuildReason): Emitted when theSplitScreen2Dtree is rebuilt.
The RebuildReason enum has the following values:
PLAYER_ADDED: A new player was added.PLAYER_REMOVED: A player was removed.SCREEN_RESIZED: The screen size changed.EXTERNAL_REQUEST: Therebuild()method was called directly, from code outside the plugin.
For an example of how to connect to these signals, see the example project.
If your play area is not visible, ensure that it is a child of the SplitScreen2D node in the scene tree and that it
is assigned to the Play Area property in the inspector (or the play_area property in code).
If your players are not visible, ensure that they are children of the SplitScreen2D node in the scene tree.
If your players fly off the screen, ensure that you have placed them in unique positions within the play area. This is not an issue with SplitScreen2D, but it's easy to overlook when setting up your scene and is definitely a mistake that was made while developing this add-on. 😆
One thing to be aware of is that, under the hood, SplitScreen2D will reparent the play area and player nodes to be children of the primary viewport. This is necessary to achieve the split-screen effect, but in theory it could cause issues if you are doing something unusual with your nodes. If you encounter unexpected behavior, try to simplify your scene and isolate the issue.
Ensure that the rebuild_when_player_added and rebuild_when_player_removed properties are set to true (default) in
the inspector or in code.
Ensure that the rebuild_when_screen_resized property is set to true (default) in the inspector or in code.
The split screen borders are not drawn; they are just transparent empty space between the viewports. You can place a
ColorRect node above the SplitScreen2D node in your scene tree to colorize the space between, as was done in the
example project.
If you want to be able to see whatever is behind the split screen panels, set the transparent_background property to
true in the inspector or in code. This setting gets applied to the transparent_bg property of each SubViewport.
This project is licensed under the terms of the MIT license.


