-
Notifications
You must be signed in to change notification settings - Fork 19
JClic Reports Server with Tomcat and MySQL on Ubuntu
We have now a Docker image for JClic Reports, so manual deploying is no longer needed!
The operations described on this page are now also valid for Windows, Mac OS and all Linux systems (Ununtu, Linkat, Debian, Fedora, CentOS...)
Apache Tomcat is a free Java application server for applications based on Servlets and JSP.
MySQL and MariaDB are professional database systems, available under open source licenses for different types of computers and operating systems.
The advanced JClic reports server is more versatile and powerful than the standard one, but requires some basic knowledge about administration of Linux systems. The standard mode, based on Java WebStart, can be launched from a graphic environment and it's easy to configure and mantain.
Install Docker and launch the provided container following the directions in: dist/docker/reports/README.md
After doing this, launch the JClic reports system navigating to this URL with your favorite browser:
http://localhost:8080/reports
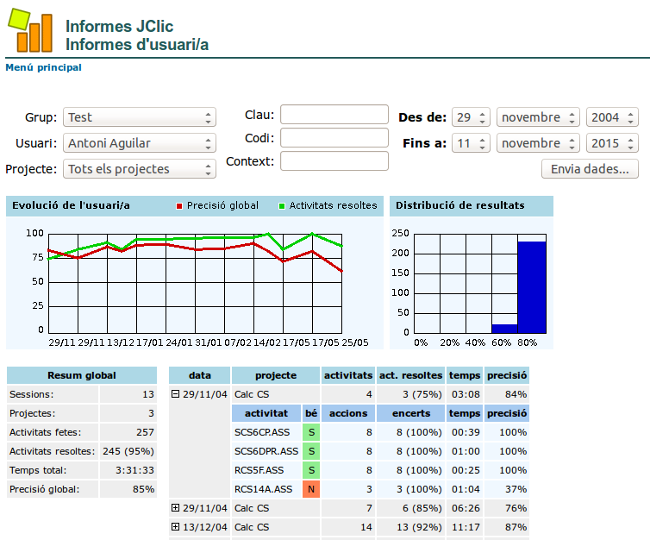
If all was OK, a menu will be shown. Enter on User reports and click twice on Send data... You must see a page similar to this one:

You can also take a look to Group reports and Activity reports.
To clear the sample data and leave the database ready for new groups and users, just go to Group admin, enter on the Test group and click on delete reports. This will clear all user data associated to this group. Finally, click on delete to drop the Test group. The database is then empty and ready for new groups and users.
You can also navigate to the Administration page and perform two important operations:
- Set a password, so only authorized people will be able to access the application.
- To decide a user's policy. You have three options:
- To allow any user to create groups and register with any login name.
- To manually create the groups and let the students to register on them when accessing JClic for first time.
- To manually create all groups and users, or import it from another database. To import users, please consult the table schema of JClic Reports.
In most cases the second option is the best. Later, you can block the creation of new users when all students have been registered.
The reports server is now alive, but in order to start collecting data you must instruct all JClic clients about where to send the results of the activities done by the students:
- First of all, you must know the IP address (or name) of the reports server, and the port used by Tomcat (usually
8080) - Start JClic Player from any computer connected to the local network. This can be done using the button located in the download page of JClic, or from the shortcuts created in the desktop and the start menu when JClic is installed locally.
- In JClic Player, go to Tools >> Settings... >> Reports and check Write scores to a database. Then select Connect to JClic report server and write in Host:
xxxx:8080/reports... wherexxxxis the name or IP of the server, and8080is the port number used by Tomcat. Don't write "http://" nor any other prefix before the server's name or IP. - Confirm the changes and restart JClic Player. If all is OK, you will have to select a group, then a user from this group and, optionally, enter the user's password. When logged in, JClic player will start reporting the results of all the activities played during the session.
- Repeat these steps in all computers where the JClic Reports System will be used.
The URL used to read and manage reports from any computer will be: http://xxxx:8080/reports (where xxxx is the name or IP address of the server)
- User's guide of JClic
- JClic startup parameters
- How to make a CD-ROM with JClic activities
- How to translate JClic into your language
- JClic Reports Server with Tomcat and MySQL on Ubuntu
- Publish JClic projects on Internet with Netlify