-
Notifications
You must be signed in to change notification settings - Fork 1
Working with Layers
You may know layers from drawing and image editing tools like Photoshop. In InspectIO they work quite the same, but have a slightly different purpose. Let's imagine your team did a High Level Event Storming on InspectIO and now you would like to sketch out some first model design ideas. You'd like to do that next to the High Level Storming to use it as a reference. Anyway, next time your team wants to continue with the High Level Storming and design-level ideas would distract other team members. With layers you can have both! Sketch ideas on dedicated layers, but hide them when the team works together on the event map.
That's just one example of using layers to better organize ongoing work on an event map.

Each board has a default layer which is called Board by default. You'll find it in the left sidebar on the board workspace. You can rename the layer, but it is not possible to delete it (other layers are deletable, though).
Layers define the top level of the workspace (sub layers are not supported yet). Beneath them the structure is automatically derived from your activities on the board. You have two frame types available (we'll add more in the future) that are related to typical software design concepts:
This term is derived from Domain-Driven Design. We're not going to explain the exact DDD meaning of it, since there are whole books filled with explanation. Depending on the scope of the board, a Bounded Context in InspectIO refers to a Team, a DDD Bounded Context, a Sub-Domain, a Business Capability or a (Micro)service. It's meant to group information, concepts and design that belong together. And it's the next level in the layer tree.
Within a Bounded Context Frame you can further group elements that document a specific feature or belong to the same use case. Features are the second level below layers in the tree.
This means, that you can nest Features Frames in Bounded Context Frames, and put Cards and other elements into them. This structure is then visible in the layers tree and gives you an higher level overview when zooming out.

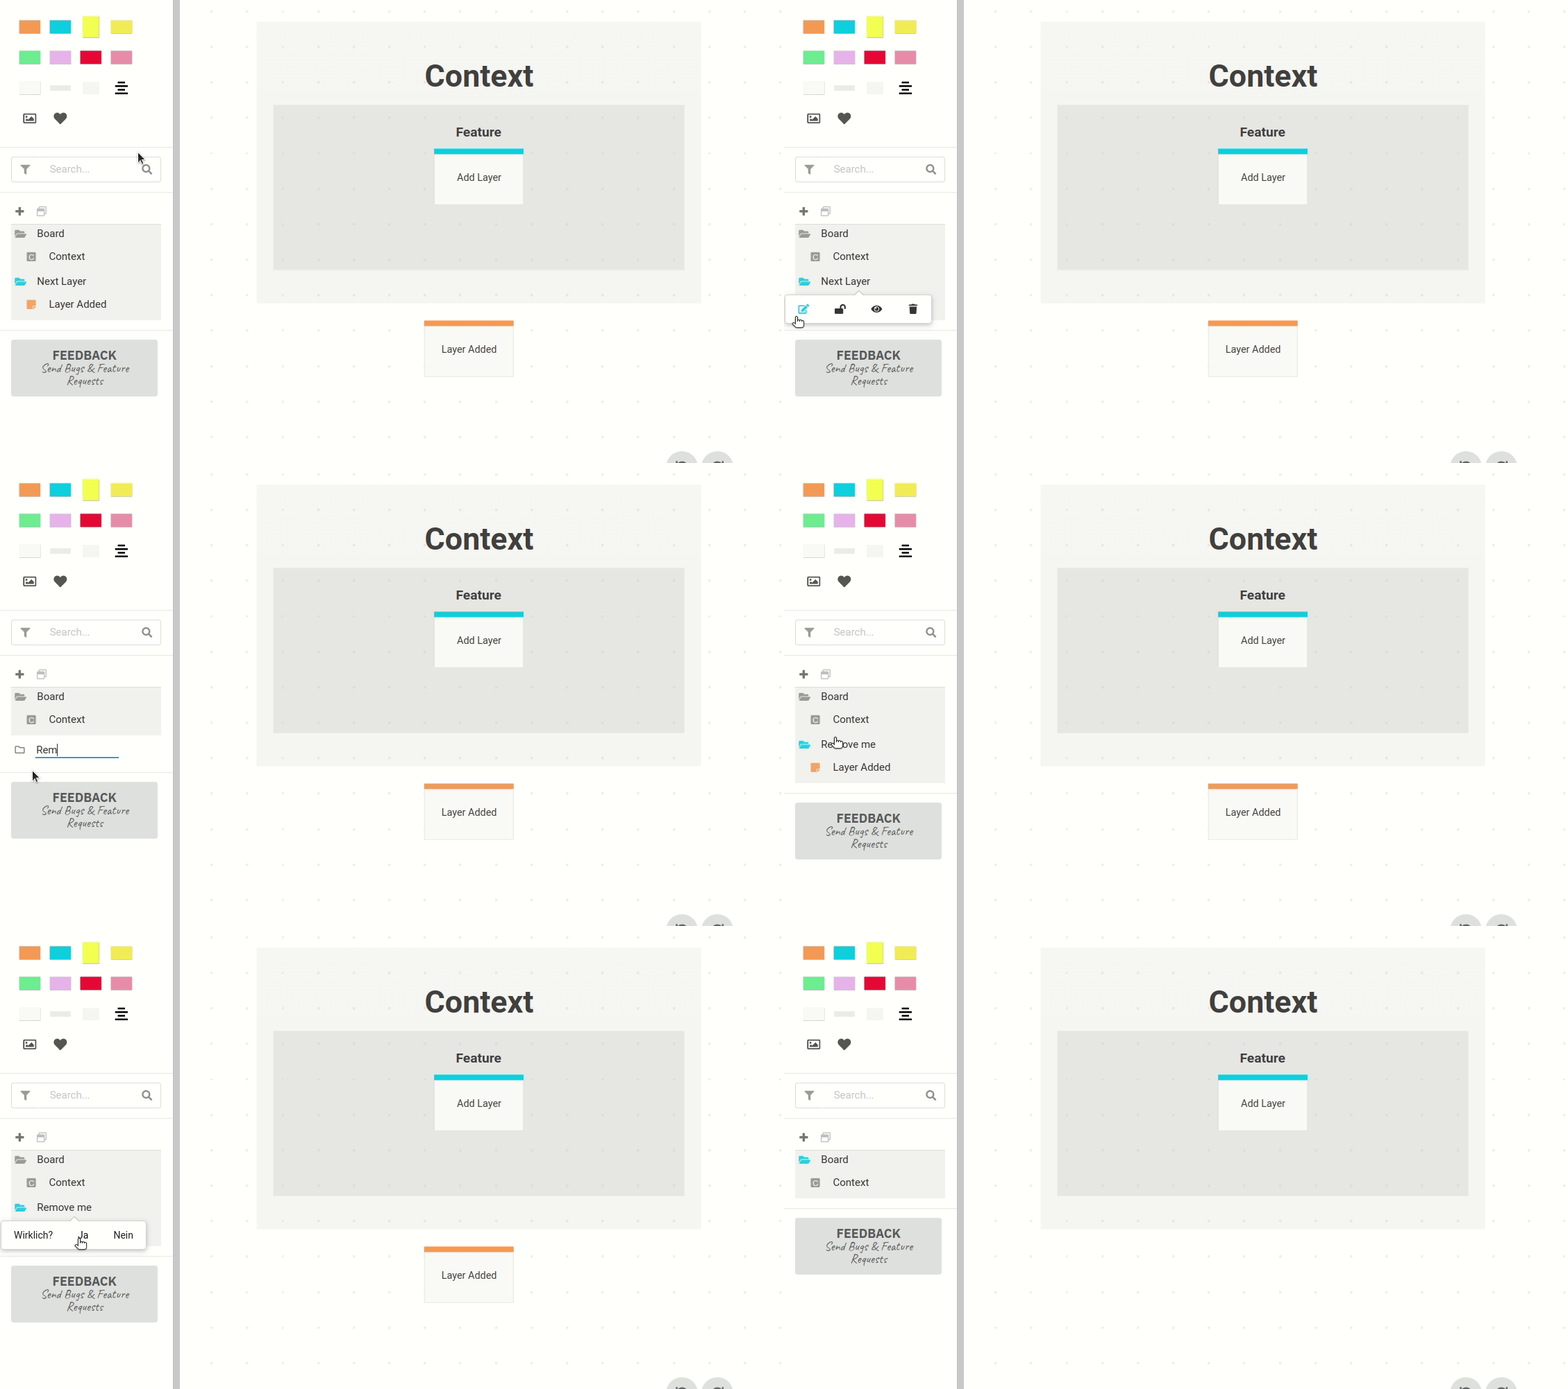
When hovering over a layer in the tree a context menu appears with some options. You can lock or unlock layers, which means that no one can edit elements on that layer while it's locked.
If you hide a layer, this only effects your lokal board (while locking is immediately synced with remote boards). Otherwise it would be too confusing if two people work on the same board at the same time and one just hides a layer the other person is currently working with. Of course this can also happen with locking, but it is less likely and hopefully also less confusing. But yeah, use both options wisely and talk to your peers! Anyway, if you want to hide layers for all team members, you can use the share button on the right side above the layer tree. The button is only active if you have visibility settings different to the global settings currently active on the board.

Adding a layer is quickly done. Click on the plus icon above the layer tree. A new layer gets added to the tree and you can set a name for it. Pressing ESC will abort the operation and pressing Enter completes it.
The layer tree is sorted alphabetically, so your new layer is moved to it's final position in the tree after pressing enter. It becomes the active layer (see below, for more information) and is therefor marked with a blue folder icon (instead of black).

The folder icon has several related functions. A single click on a folder icon opens (or closes) it. A double click on a layer folder icon marks the layer as active. The icon color switches to blue. New elements added to the board are basically added to the currently active layer.
Existing elements can be moved from another layer to the active one by selecting the elements on the board and double click the folder icon of the active layer again. The folder icon becomes orange for a second to signal success of the operation. You'll now find the moved elements beneath the active layer.
If you double click an active layer without any selection on the board, the folder icon becomes red for a second to give you feedback that this operation did not cause any effect.

The edit button in the layer context menu actives an inline edit for the layer name. Rename it and press Enter or abort the operation with ESC.
Layers can also be deleted if you no longer need them, except the default one (see above). A quick confirmation saves you from fast unwanted clicks without getting to much in your way.

Wondering what the confirmation question is when deleting a layer? Don't worry, recording was done while working in browser with German language configured. We also have an English translation that is: Really? YES NO
Join the community chat on Gitter.
No beta user yet? Request access in the community chat.