-
Notifications
You must be signed in to change notification settings - Fork 97
DctPerspective
Purpose: Database Creation Tool for EPICS-Databases Prerequisites: This is not an introduction to EPICS but to the DCT perspective of the Control System Studio, therefore some experience with EPICS-based systems is necessary.
Usually during the creation of EPICS-Databases a lot of redundant information has to be entered. The DCT perspective offers an editor and three views to aid in this task. A DCT-source file (this is an xml-file with the ending .css-dct) contains information about so-called prototypes', '''instances''' and '''records'''. The '''records''' are parameterized versions of EPICS records. The '''instances''' are used to create an EPICS-Database file, the 'prototypes are used to allow for easy construction of the instances. Prototypes are a means for structuring the system by grouping sets of parameters. Prototypes may be nested which gives you a lot of flexibility at hand. Based on the prototypes, instances are created. Instances represent EPICS-records. They are created by binding values to the parameters of the prototypes. Well, now we are about to try it ...
A brief introduction for using the DCT perspective follows
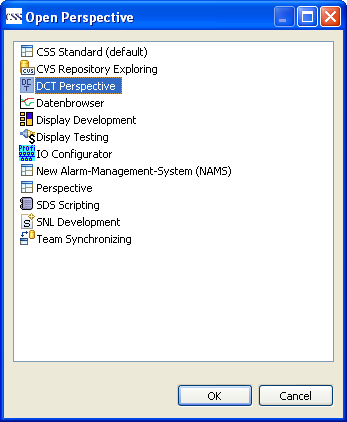
After some work, the DCT perspective will look like this (reset the perspective if it does not show up with these views):

Most likely you will not have a DCT-source file at hand, so we will have to create one from scratch.
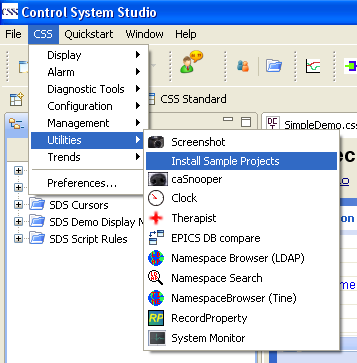
To set up your working environment, you should install the sample projects. They will be used as the location for your own results and contain a DCT file as fallback where the result of this tutorial is provided.
Now we are going to build the DCT file. Create a new file

name it MyDCT.css-dct and store it in the sample project folder.

To provide the DCT with the metadata for the current EPICS version, you have to tell the DCT file which database definition file it shall use. Simply click into the value field of the DBD File Path' property. The Resource Finder will open. Pick the 'test.dbd file:

This step must not be forgotten. You will not be able to create any kind of item other than a folder, if you omit this step.
In general you work from the outline view, using the context menu with the mouse.

There are four kinds of items you may create: Folders', '''Instances''', '''Prototypes''' and 'Records.
Folders are the usual means for organizing your items, there is nothing special about them. For a larger system you may want to create folders to separate Prototypes and Instances, so let us start this way for this demo too. The following outline already contains these folders.
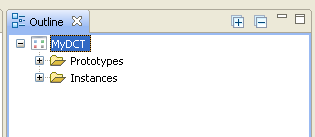
In the prototype folder, you create a prototype using the context menu. In the editor several form fields grouped in sections will show up. You should enter a telling name in the Name field (in the Common Settings section), this will be used for identifying your prototype inside DCT. For the time being, nothing will be entered in the Properties section, so it may be left collapsed.
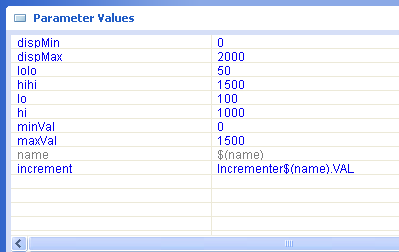
The Parameter section makes up the essential section. Here you enter the names of the parameters which you may later give values to to create instances. Sounds complicated? Not at all. We are going to create a simple generator for a sawtooth function. The following parameters will come in handy:
- dispMin, dispMax give the bounds of the display
- lolo, hihi give the bounds of the major alarm zone
- lo, hi give the bounds of the minor alarm zone
- minVal, maxVal give the bounds of the value of the sawtooth function
- name is what you might expect
- increment defines the step for the sawtooth function Now enter the parameter names, using the button with the plus sign at the bottom left.

How will it fit together? We just defined a prototype containing several parameter names. We are just about to define a record which will make use of the parameters. Later on we will create instances (resulting in EPICS records) by giving values to the parameters. This way the same prototype is used for the creation of several EPICS records.
Ok, let us go. Add a record for the prototype using the context menu of the outline view. You have to chose the type of the record. Select a calc record type.

Now we have to define the calc record based on the parameters. Most important are the Name and the Epics Name, the latter being based on the name parameter of the prototype. Enter them like shown here

Now you may enter the other fields. First define the DESC field, let us give it the Epics Name too. You will notice the autocompletion after entering the $-sign.

Please enter the following values to the appropriate fields (for the calculation part) as shown here

and for the alarm parameters as shown here

You end up with a fully specified prototype which you may use to create instances.
Add an instance to the Instance folder
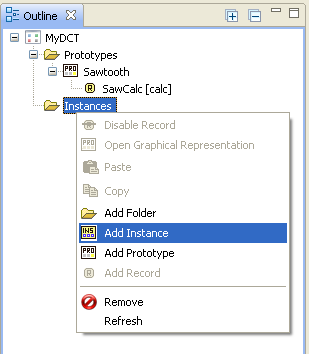
You will be asked which prototype your instance will be based on

Select the only one which is currently available. The unbound parameters of the prototype are shown in the Parameter Values section of the editor.

You have to bind values to the parameters (tab key proceedes to the next value field) like this:

Don’t forget to give a name to the instance, it will show up in the outline view.
Now we will make use of the prototype by creating a similar instance. Select Copy in the outline view.

and paste the instance alongside the existing instance.

Whoops. An error is shown:
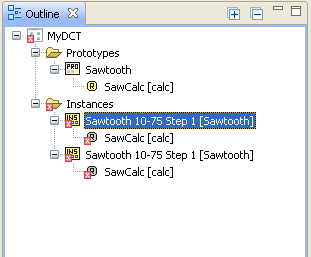
You will find help. There is an explanation in the problem view

Quite right, there may not be two EPICS records with the same name. We are going to correct this, thereby providing different parameter values and a different name as well.

Now everything looks ok.
In the Instance View (bottom right) you can see, which instances rely on the selected prototype. This is great for a reasonably sized system.

Finally we are going to create the EPICS database file. Simply select the Preview DB-File' tab at the bottom of the editor pane. Skim through the EPICS database and save it using the 'Save To File-button.
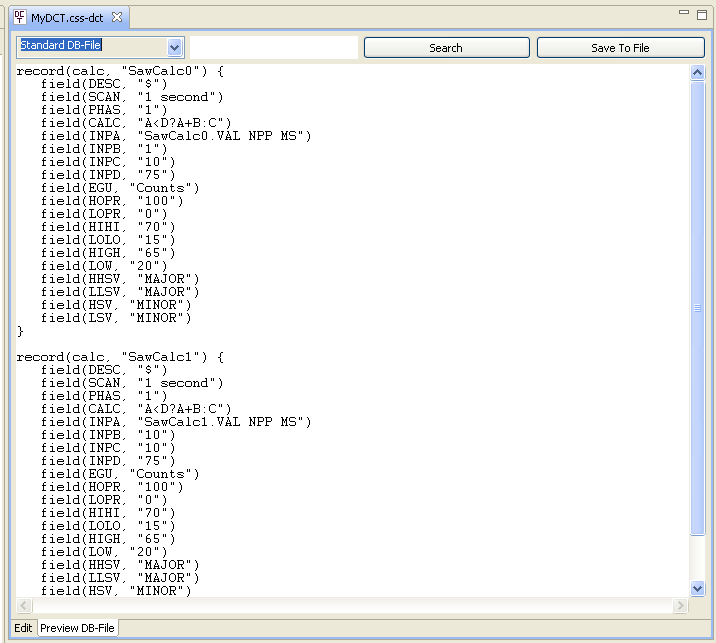
Usually the extension .db is used for EPICS database files so we will give the result the name AlarmDemo.db. Please don't use a different name here, because this name is expected in the EPICS configuration of the Soft-IOC used later.

This database can be run in a so-called SoftIOC (this is supported only under Windows). Copy SoftIOC.zip' from the Sample Project Folder to some other place (e.g. C:\SoftIOC) and unzip it. Now copy '''AlarmDemo.db''' into the demo folder. Then start the SoftIOC with the ''[[RunSoft]]IOC.bat''' command. To stop it, simply type 'exit at its prompt.
Now you can take a look at the two sawtooth generators. Select the CSS Standard perspective' and start two '''Probe''' views (the second one will open when you press the control key too) and an '''EPICS PV Hierarchy''', all from the '''CSS'''->'''Diagnostic Tools''' menu. The EPICS-Names are well known to you (SawCalc0/1 resp.). If not, have a look at the names with the selection '''Record Names''' from the combobox in the upper left corner of the 'Preview DB-File tab

You will need to arrange the views properly to achieve the following layout:
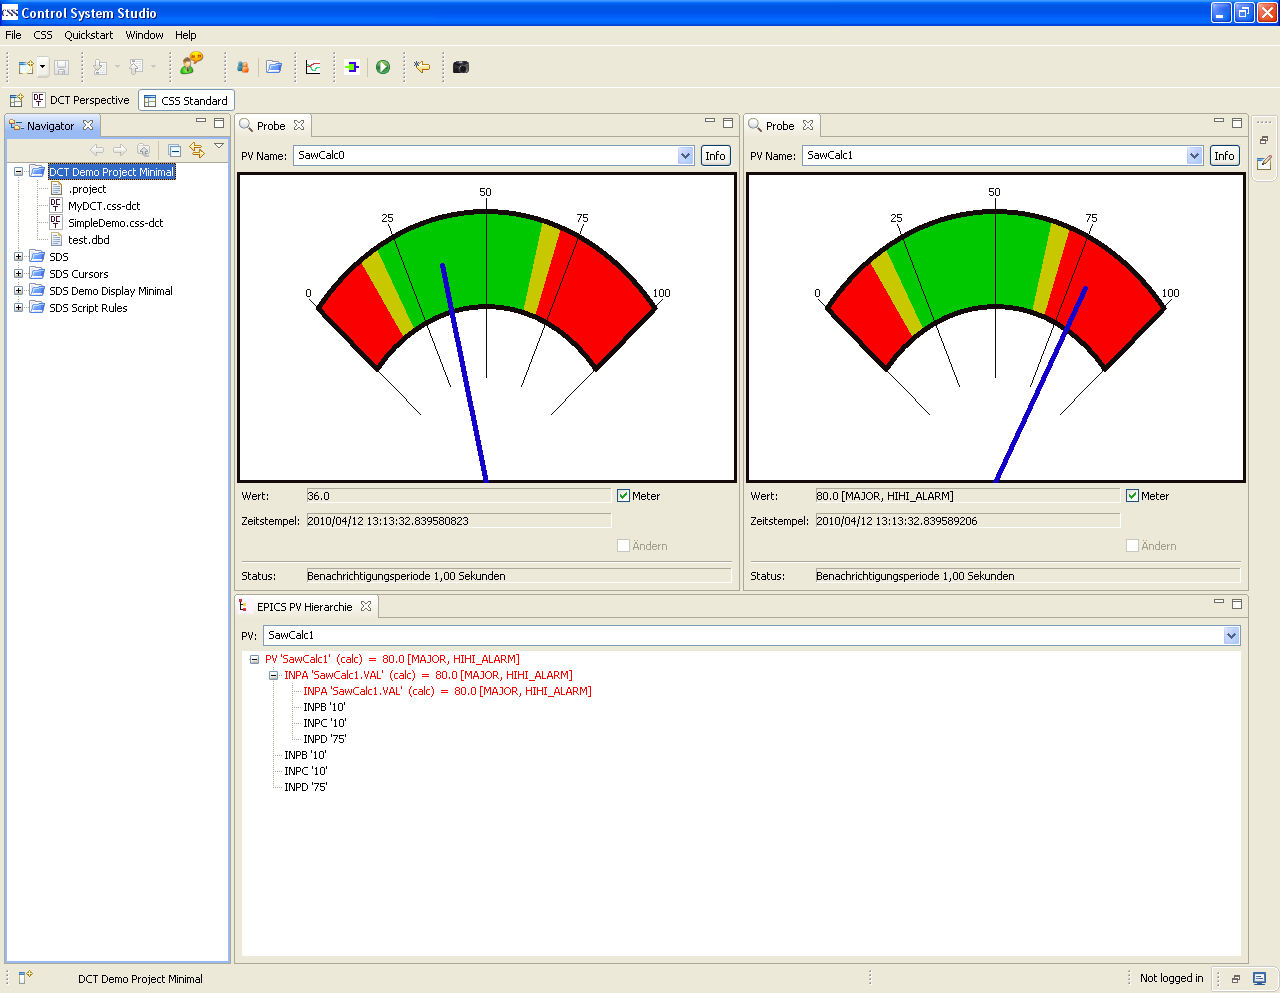
Watching the generators do their work will hopefully be a reward for all your activities.
If something fails, you may use the demo database named SimpleDemo.db'. It is already contained in the SoftIOC, so you only have to start the SoftIOC running ''[[RunSoft]]IOC.bat''' as explained above. There is a file named 'st.cmd in the demo subfolder, which contains the initialization for the SoftIOC. Here is a snippet from that file:
# Loading the demo databases
dbLoadRecords("./SimpleDemo.db")
dbLoadRecords("./AlarmDemo.db")
The database SimpleDemo.db' is already at its correct place. If you have trouble installing 'AlarmDemo.db you may comment out the line
#dbLoadRecords("./AlarmDemo.db")
To find out about the existing EPICS record names you may load the demo database into the editor. It will tell you this:

Now you may use Probe' and 'EPICS PV Hierarchy again to inspect the running SoftIOC.
There is also a file named MyDCTReady.css-dct, which contains the result of this tutorial so far.
Now we are going to take a look at the SimpleDemo.css-dct'. Please load it into the editor, if not already done. You will notice another prototype with the name '''!SawAndIncr''' and two instances named '*!SawAndIncr0/1*.
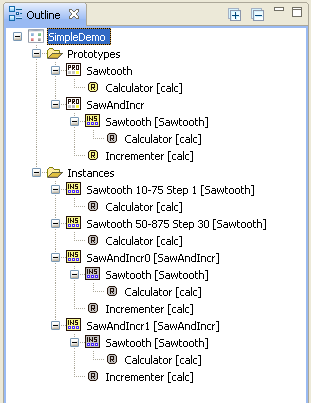
Select the prototype !SawAndIncr in the outline. The instance view will tell you, that indeed the two new instances are derived from this prototype.

To define such a structured beast, proceed in the following way:
- Add a new prototype and give it a name.
- Now add an instance to the new prototype. You will be asked, which prototype the instance should be based on.
- For this example, the Sawtooth prototype has been selected.
- Along with the newly created instance of Sawtooth, a record (called Incrementer') is added. It will give us a sequence of numbers. This record is again of type '''calc'''. Inspect its fields, esp. the '''Epics Name''' in the 'Common Settings section and the calculation (delivering 1, 3, 7, 15 and so on).
- In the !SawAndIncr0 instance, only the instance name is defined.
- In the local Sawtooth instance, the usual parameters are defined, setting the ranges.
- The name is bound to the name from the outer scope.
- But the increment no longer is given as a constant as in the previously defined instances, but uses the local incrementer as a function.
Finally you may want to watch these EPICS records in the Probe' and 'EPICS PV Hierarchy view.