-
Notifications
You must be signed in to change notification settings - Fork 1
How to create the AWS IoT device certificate?
AWS IoT is a component of the AWS cloud. You can create a free account to start using the service. Since the traffic of this application is quite low, the cost should be covered by its free-tier pricing.
A lot of other cloud service providers have the similar MQTT service component. We will use AWS IoT as an example.
After you log in the AWS cloud, go to AWS IoT.
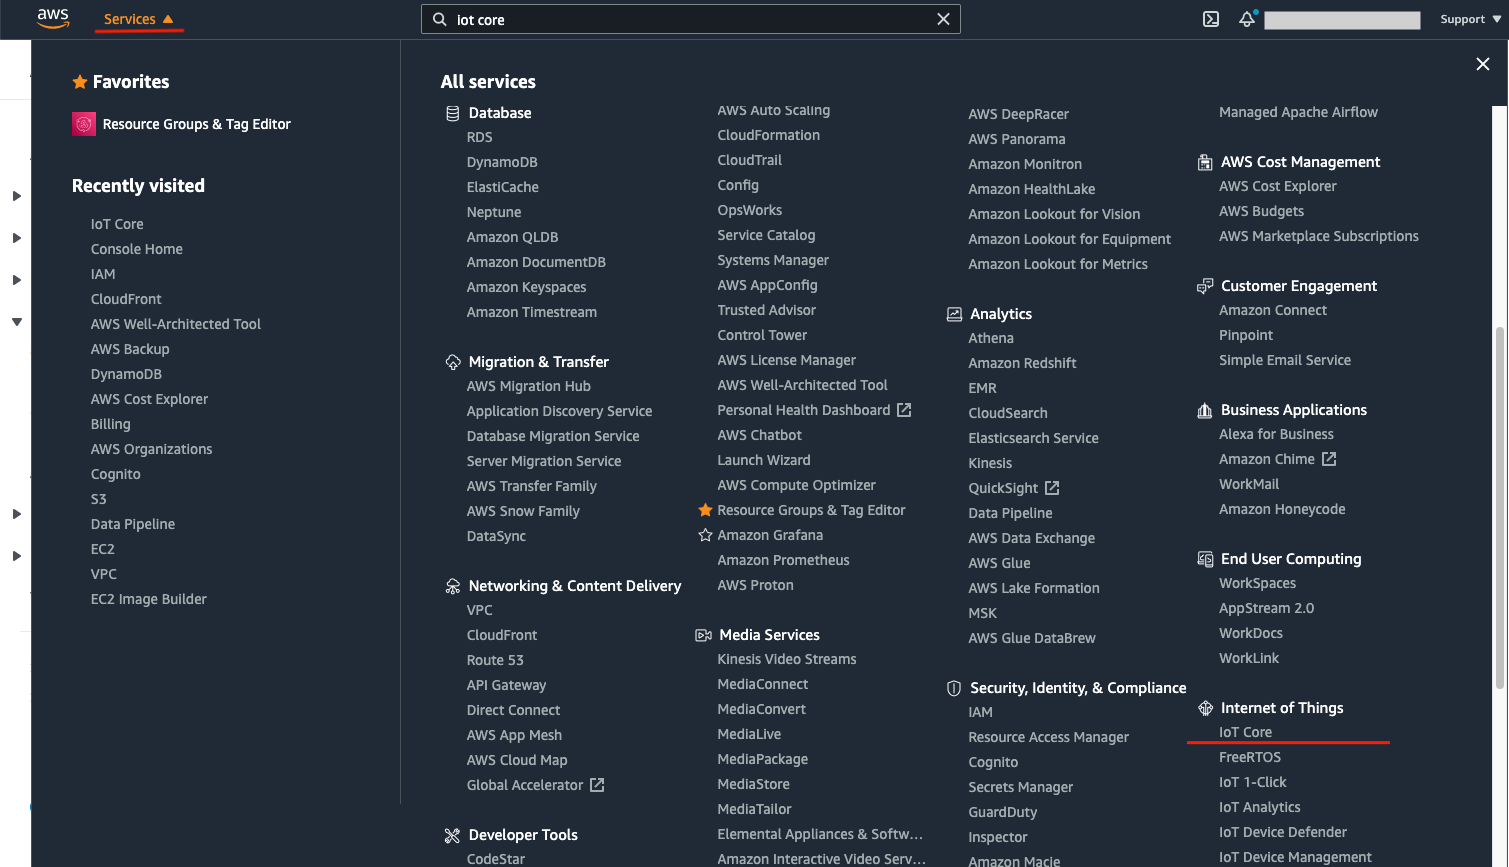
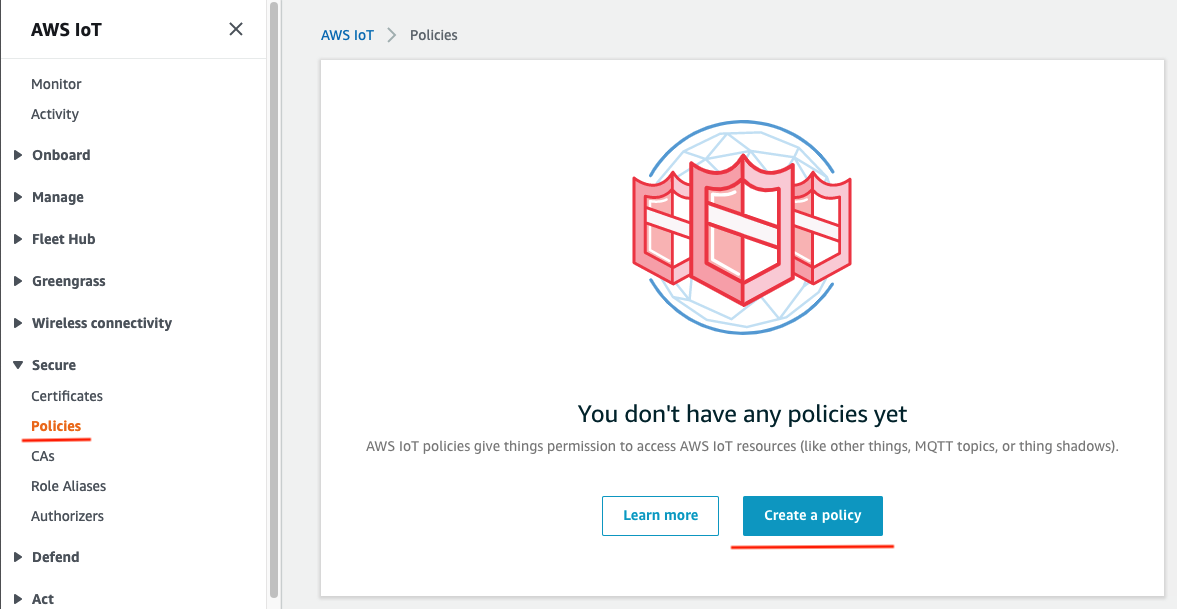
Go to Policies -> Create a policy.
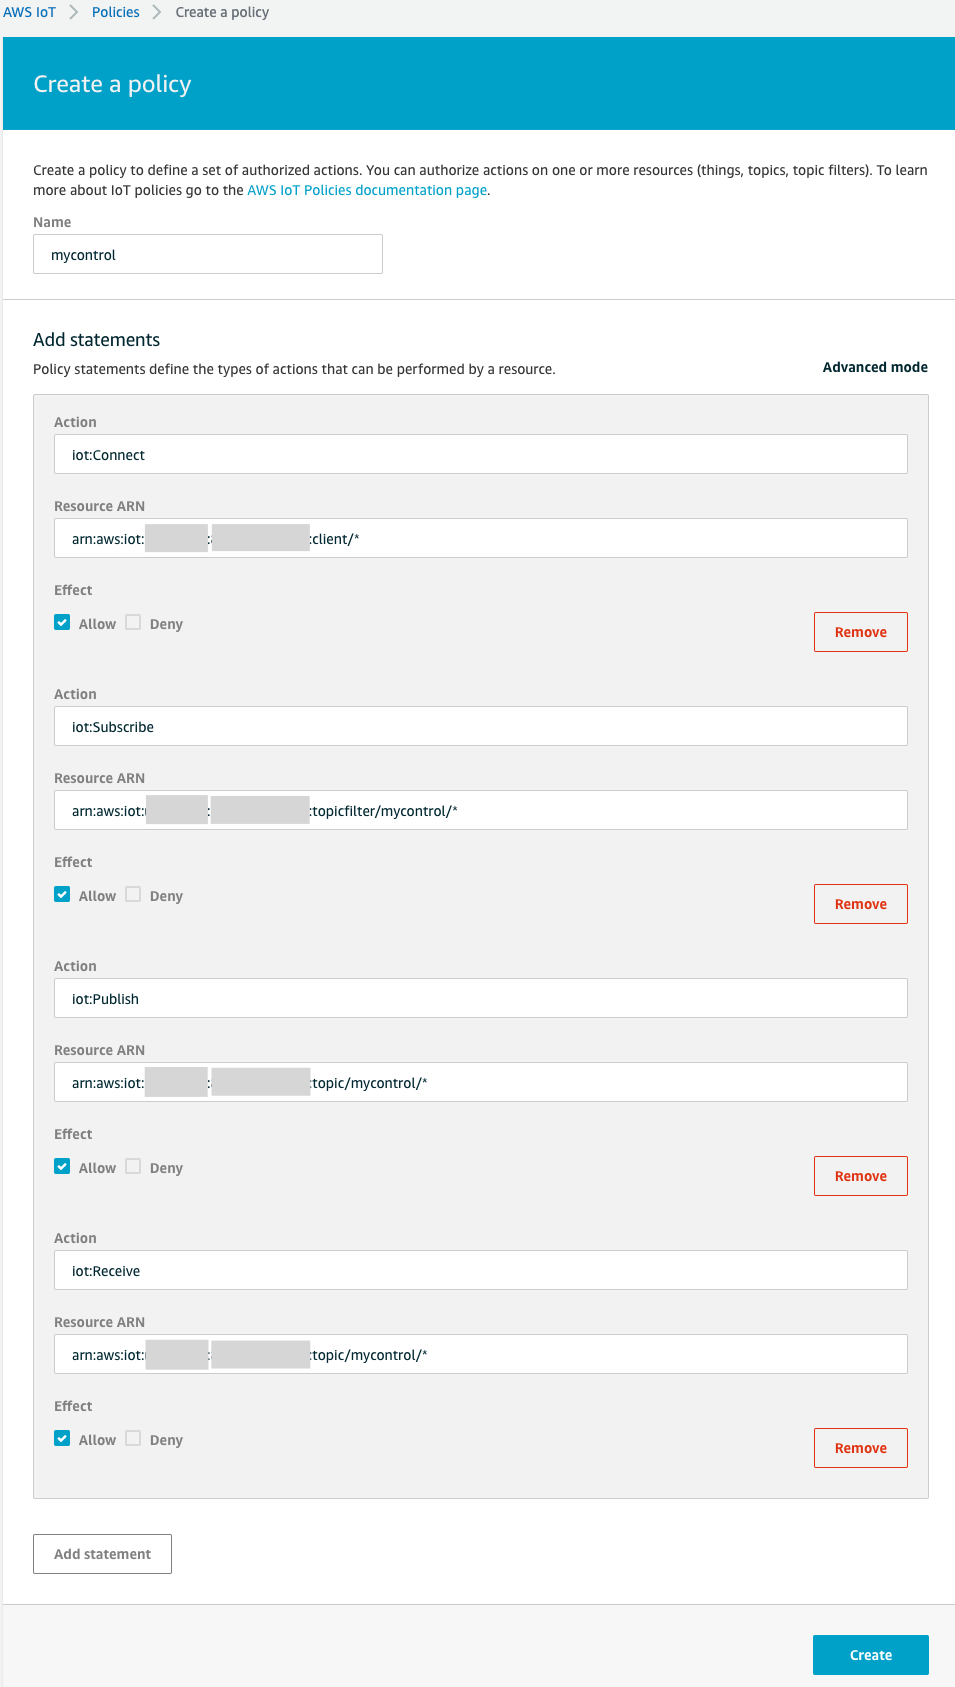
Let's give the policy a name, mycontrol. This policy needs to grant 4 different permissions.
| Action | Descriptions |
|---|---|
| iot:Connect | Determine the client IDs that are allowed to connect. Let's make a simple one by allowing all client IDs by using *. Replace replaceWithAClientId with a asterisk. |
| iot:Subscribe | Determine the topic that this client is allowed to subscribe. Since we already know the topic is mycontrol, replace replace replaceWithATopicFilter with topicfilter/mycontrol/* |
| iot:Publish | Determine the topic that the client is allowed to publish messages to. Replace replaceWithATopic with topic/mycontrol/* |
| iot:Receive | Determine the topic that the client can receive the messages from. Replace replaceWithATopic with topic/mycontrol/* |
Now you have a policy named mycontrol

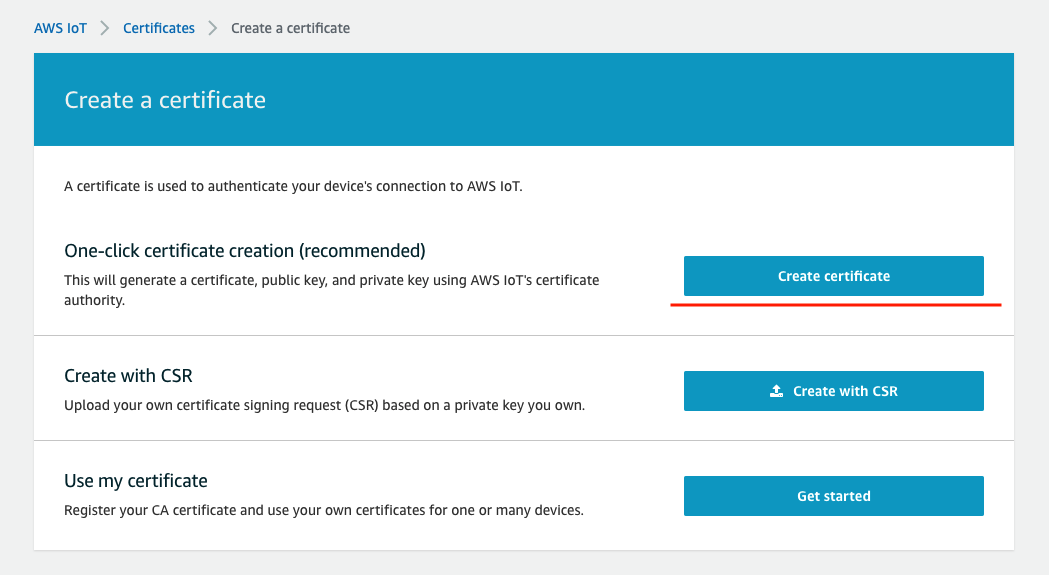
Go to Certificates -> Create a certificate.
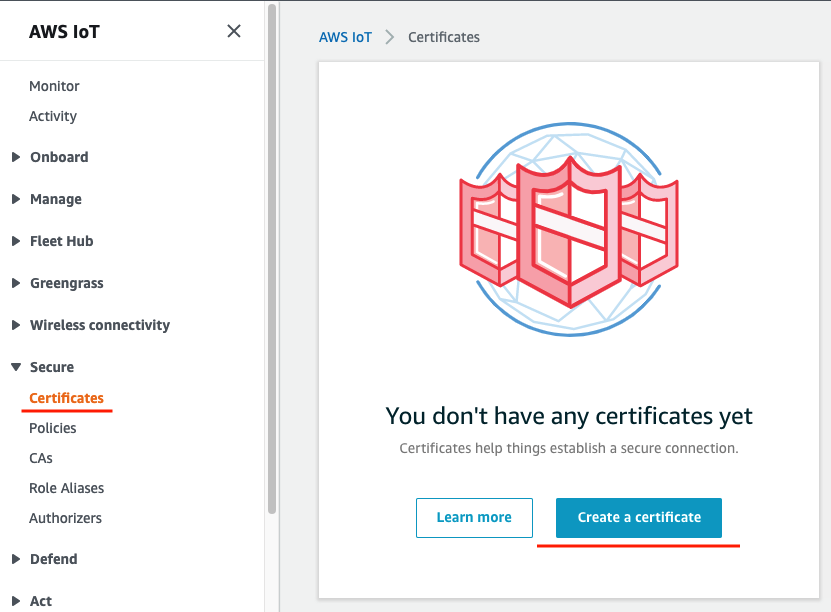
Let's use the simple step by letting AWS IoT create the certificate for us.
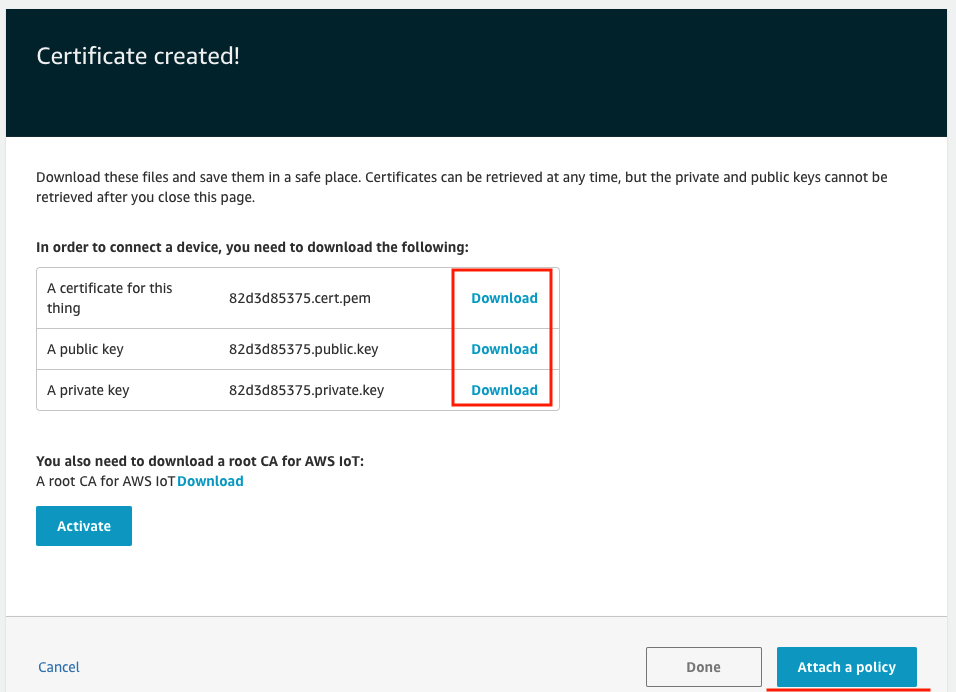
Make sure the certificate, the private key, and the public key are all downloaded. Once you leave this page, there is no way you can download them again. The public key is not actually used for this application.
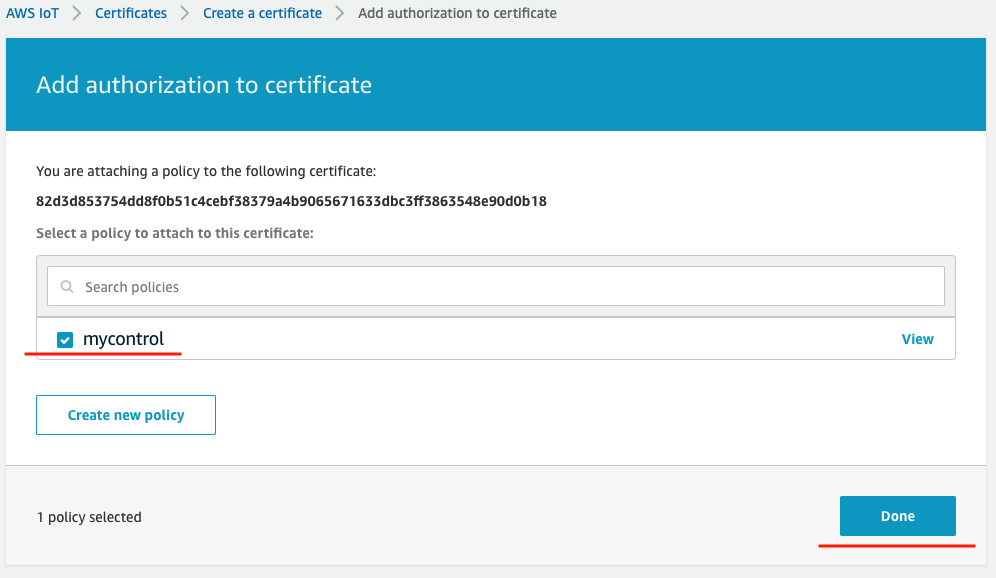
Click Attach a policy. You can see the policy, mycontrol, we just created is listed there. Check the policy, mycontrol, then click Done.
You need to activate the certificate before you can use it.
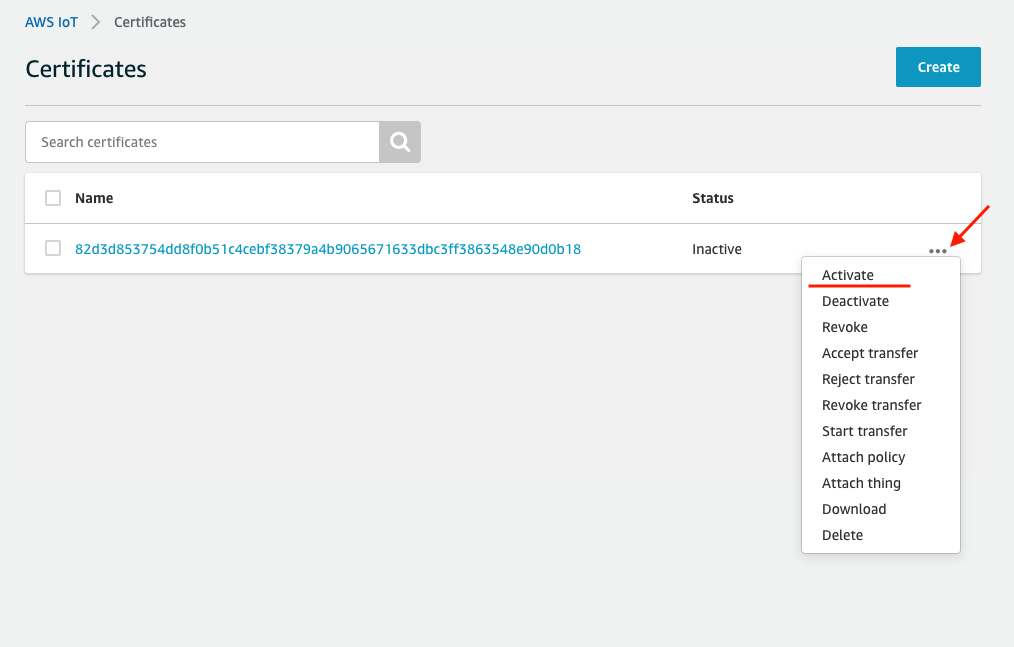
Congratulations, your X.509 certificate-key pair is ready to go.

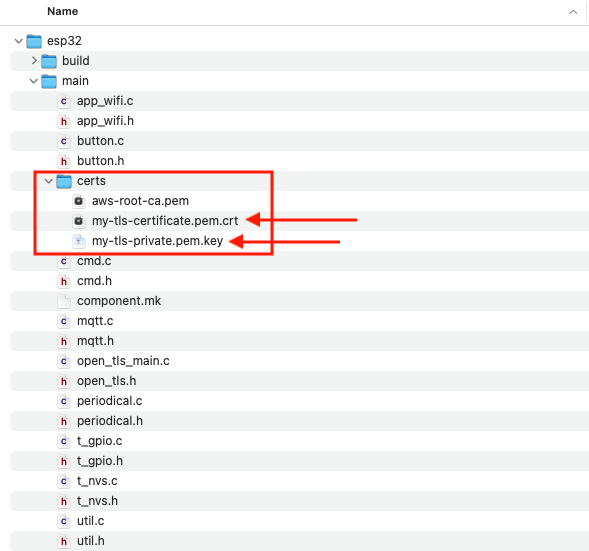
The downloaded X.509 certificate-pair shall be placed in the esp32/main/certs. Rename the certificate to my-tls-certificate.pem.crt and the private key to my-tls-private.pem.key. Build the ESP32 client with it.
The same downloaded X.509 certificate-pair is also used in the app. Paste the content of the certificate to the system settings -> Certificate and the private key to the system settings -> Private Key. You are good to go.