-
Notifications
You must be signed in to change notification settings - Fork 0
Home
sandualbu edited this page Jan 10, 2023
·
2 revisions
| Welcome to |
 |
KineSis is a project designed to be a help in presenting documents. Using Microsoft Kinect, it’s easy to control presentations using your body gestures instead of remote controls, keyboards or any other electronic devices.
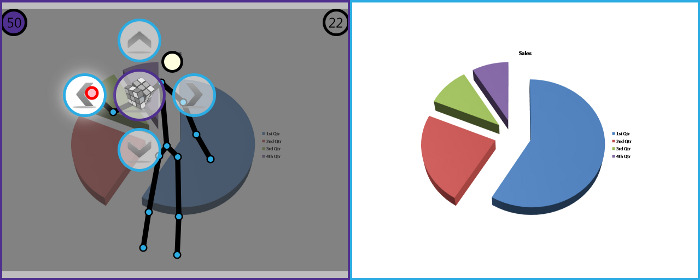
The basic presentation of KineSis is shown in the following pictures. All elements will be explained below.
 |
 |
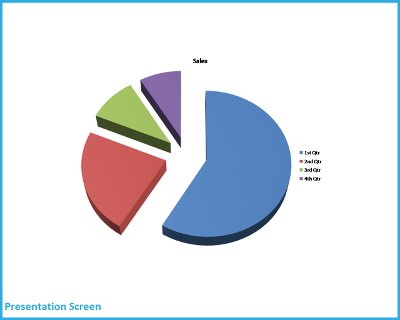 |
As you can see, there are 2 screens:
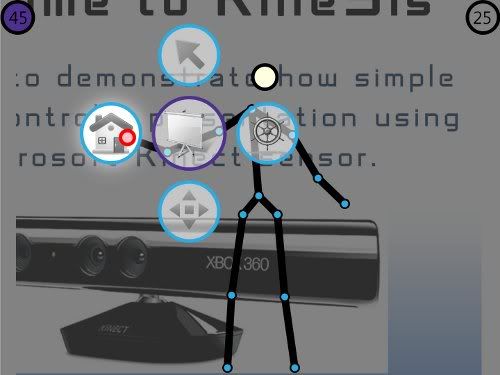
User Screen – this screen is presented to the user and displays a real-time skeleton whom actions are leading the presentation flow. The current presentation is displayed to the user in the background. The screen is preferable to be a laptop or a desktop monitor, oriented towards the presenter (user).
Presentation Screen – this screen is presented to the public (audience). It displays only the presentation. In an ideal situation, this will be presented on a projector screen or a big TV.
The presentation content from the two screens is the same. So, the screens are synchronized.
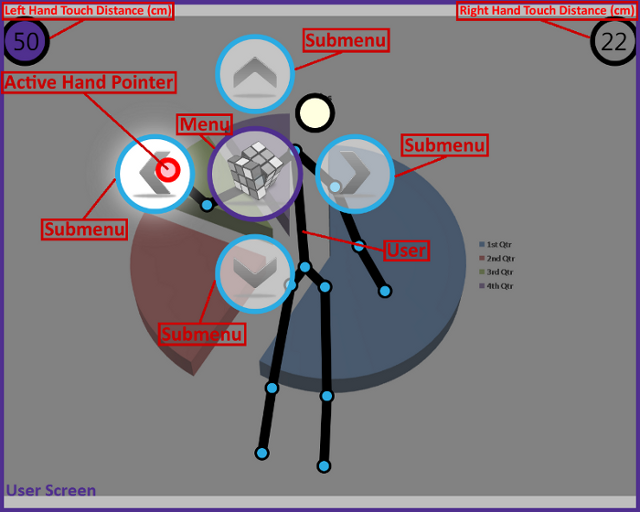
The user screen has several elements which needs explanation:
User – This is the real-time rendered skeleton of the user. As you can see, it shows the most important parts of a body: head, hands, feet. The skeleton actions basically control the presentation
Right Hand Touch Distance (cm)/ Left Hand Touch Distance (cm) – They display the distance of the right, respectively left hand distance from head. The distance is represented in centimeters and it works correctly when the user is oriented to Kinect sensor. Over a configured distance (referred to Touch Distance with a default of 45), a hand is considered active or selected. A hand remain active until the distance decreses under another configured distance (referred to Untouch Distance with a default of 30). When a hand is active, the equvalent indicator changes it’s background color (in the image, the left hand is active, and the top-left circle has a purple background)
Active Hand Pointer – Is a moving circle, representing the position of the first selected hand. It’s purpose is to help the user in menu navigation.
Menu – Appears once a hand becomes active, in the initial position of the hand. It represents the current menu through an image. Below is the list of KineSis main menus:
 |
Main menu. You can call it also Home or Root menu. |
 |
Shapes menu. You can call it also Charts menu. |
 |
Pages menu. You can call it also Presentation menu. |
 |
Paint menu. You can call it also Draw menu. |
Submenus – Each menu has a list of submenus, or action menus. The user can select one of those submenus and the selected submenu will become the main menu, with its own submenus. Abstracting the few exceptions which will be explained later, each non-home menu has a “back” submenu. The back submenu returns to the parent menu.
The menus and submenus are also called groups, respectively subgroups. The KineSis groups structure is a tree structure, which will be explained in the next sections.
The user is the controller. His hands are the pointers. The movement of his hands controls the menu. The menu controls the document.
In order to interact with the menu, one hand must be active. When a hand becomes active, the menu is expanded, centered in the position where the hand got active. So, while the hand is active, the menu doesn’t move. It can just change its content. Changing the content can be made only by selecting a submenu.
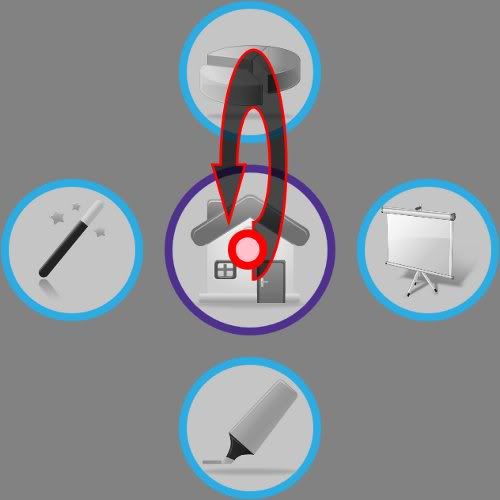
Considering an active hand and an expanded menu, the selection of a submenu can be performed in 2 steps:
- 1. Drag the hand over the submenu you want to select
- 2. Drag the hand back to center menu
The picture will show the movement graphically. Consider you are in the main group and you want to select the Shapes group, you have to move your hand from the center (Home) circle to the Shapes circle and return back to Main. When you return back to Home, the Shapes will become the main menu, in the center and will have its own submenus.
 |
In KineSis, the menus are organised as a tree of menus and submenus (groups and subgroups). Except the Home Group, each group has a parent. Also, a group can have more children, each child can be also a Group (G) or a Leaf (L). A leaf is only an action, like “Up”, “Down”, “Left” or “Right”.
Next, the groups tree:
| Level 1 Group | Level 2 Group | Level 3 Group | Level 4 Group | Alternative Group | ||||
|
||||||||
 |
|
|||||||
 |
 |
- | - |
|
||||
 |
|
|||||||
 |
 |
|
||||||
 |
 |
|
||||||
 |
 |
 |
|
|
||||
 |
 |
 |
|
|||||
 |
 |
 |
|
|||||
 |
 |
|
||||||
 |
 |
|
||||||
 |
 |
|
|
|||||
 |
 |
|
||||||
 |
 |
|
||||||
 |
 |
|
||||||
 |
|
|||||||
 |
 |
|
||||||
 |
 |
|
||||||
 |
 |
 |
|
|
||||
 |
 |
 |
|
|||||
 |
 |
 |
|
|||||
 |
 |
|
||||||
 |
 |
 |
|
|
||||
 |
 |
 |
|
|||||
 |
 |
|
||||||
 |
 |
|
|
|||||
 |
 |
|
|
|||||
 |
 |
|
|
|||||
 |
 |
|
|
|||||
 |
|
|||||||
 |
|
- |
|
|||||
 |
|
- |
|
|||||
 |
|
- |
|
|||||
 |
|
- |
|
KineSis has its menu structured in 4 levels. First level is the main Menu, or the root menu. It has 4 children, the level 2 groups. Excepting Pointer, each level 2 group has level 3 children. Level 4 children are only leafs, so just actions, like “Up” and “Down”. The Alternative groups are a kind of secondary groups. They are shown only when the user raises a hand up and acts with the other one.
The difference between opening a menu and opening the alternative menu it’s shown in the following picture. As you can see, for opening the alternative menu, the user keeps a hand in the air. All the time the user raises a hand above his head, his skeleton is colored with primary color, instead of skeleton color. This way, the user will know he is about to act on an alternative menu (if it exists) and not on a primary menu.
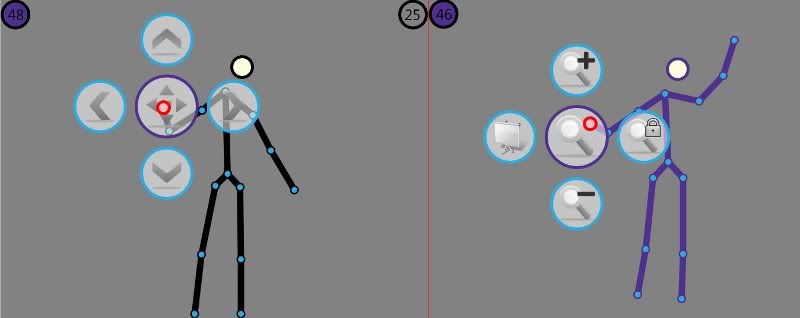 |
The maximum number of children a group can display is 4. In case of more than 4 groups, an alternative can be used. In any case, a way back to parent is ensured. In the figure above, the scroll menu is given as example. Primary actions are scrolling left, up, right and down. There is no place for more, like back to Home, so here the secondary menu comes into action. Raising a hand up, the secondary (alternative) menu is presented to the user. The options are: turning back to Home, zooming in, locking/unlocking of zoom (at page width or 100%) and zooming out. Once you’ve activated the alternative menu, you can let the raised hand down to return to the primary menu. If the active hand is no longer active, the menu (primary or alternative) will disappear until you activate it again.
Now, let’s see each menu/submenu in action!
 |
1. Pointer |
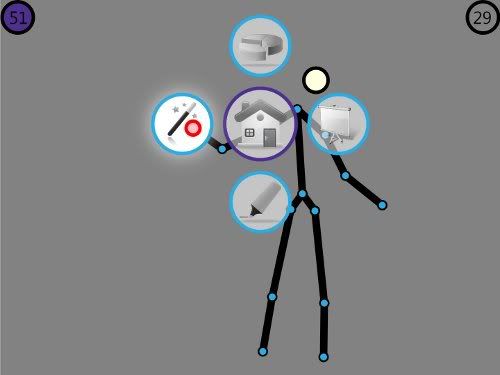
The Pointer menu is the simplest menu of KineSis. First, you have to select it from main menu. Make a hand active, drag it to the pointer icon and back to center (Home).
 |
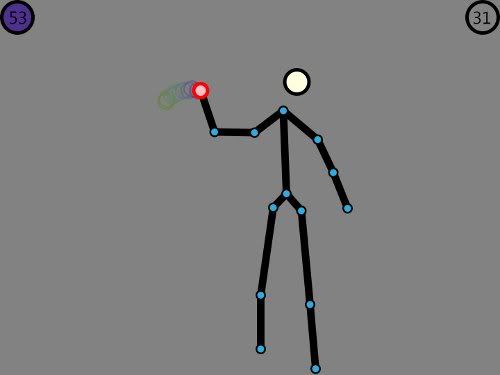
After entering in menu, as long you have one hand active, you will see a colorful slinky following your hand movement. The slinky appears on both screens, user and presentation. It is useful when you want to point something, in such a way everybody will know what exactly you are talking about. You can compare the Pointer with a hand laser used by ‘old school’ presenters on projectors.
 |
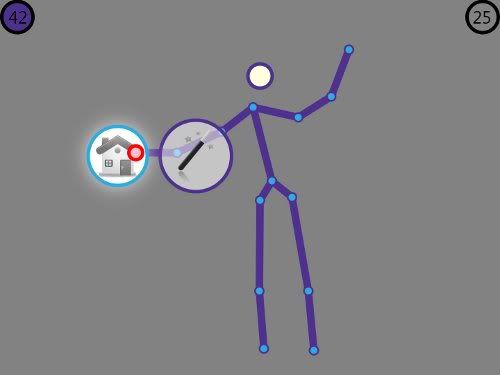
To exit from Pointer menu and return back to home, raise a hand up and make the other one active, so you can see the secondary (alternative) menu. You can only get back to Home.
 |
 |
2. Shapes |
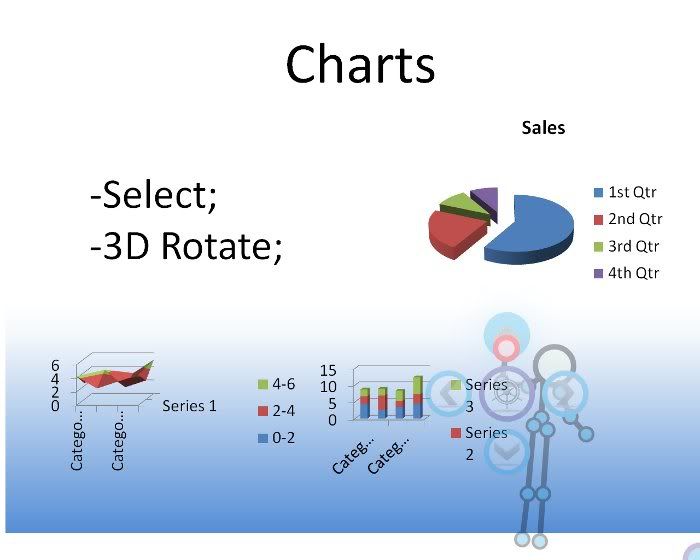
Not all menus are active anytime. For example, the Shapes menu is active only when current page of the presentation contains charts. And not any charts. KineSis supports only Microsoft Office Charts (2D and 3D).
For navigation between pages, you have to read the Pages menu. Let’s assume you are on a page which contains charts, like in the following figure.
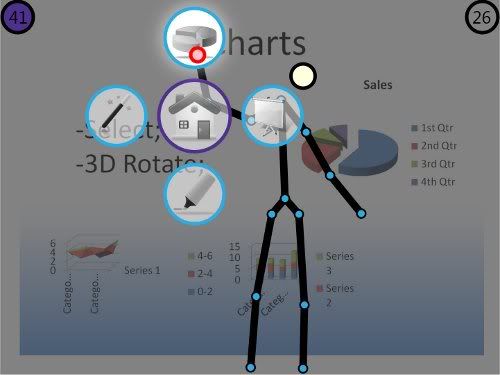 |
After you get in Shapes menu, you have 4 options: to select a chart and make it full screen, to close an opened chart, or to rotate an opened chart.
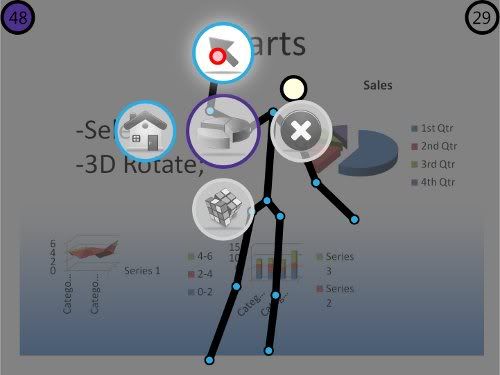 |
As you can see in the figure, no chart is opened, so you cannot close or rotate anything. So, first you have to select a chart.
 |
2.1 Select a Chart |
Selection menu have 3 major elements: the ‘select’ submenu, the navigation submenus and the preview section. You can see them in the following figure.
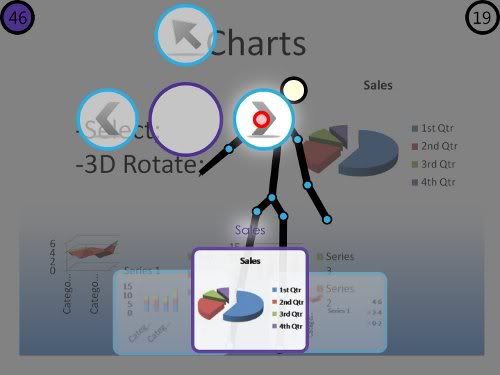 |
You have the possibility of searching through charts without making them full screen, so you will show the desired chart to the public only when you find the right chart. Navigation through charts can be made using the navigation menu. You can call ‘next’ or ‘previous’ chart. In the above figure, the user is calling the next chart. The movement is simple: drag the active hand in the corresponding circle and the back to the center circle. You can see at the bottom of screen the charts. The one inthe middle (also the title is displayed above) is the one you are looking now. Calling ‘next’ or ‘previous’ will change the preview section.
When you find the right chart and you want to show it to the public, you must drag the active hand into the ‘select’ circle, placed in the top of the screen, like in the following figure.
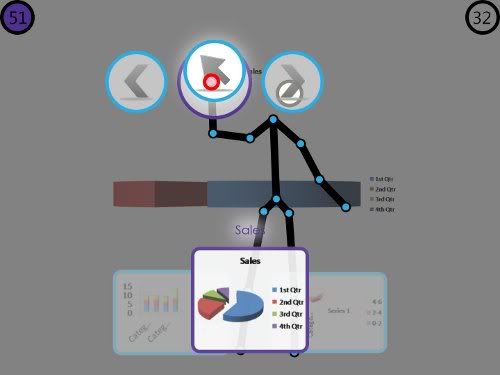 |
Now the chart is full screen and visible to everybody. To act on the selected chart you have to return back to ‘Shapes’ menu. You can do that by activating the secondary menu of select, by raising up a hand and the other one is active.
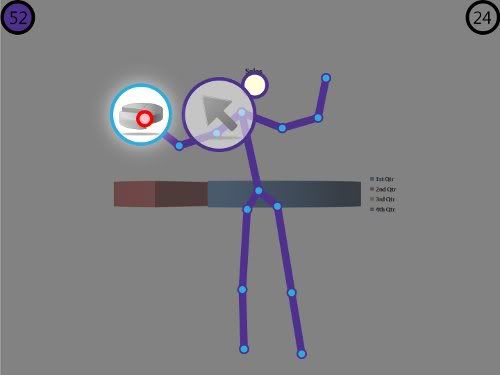 |
Now you are back to ‘Shapes’ menu. The ‘Clear’ menu is active, and if the chart is 3D, also the ‘Rotate’ menu is active.
 |
2.2 Rotate a Chart |
You can rotate a chart only if the chart is 3-dimesional and was processed previously by KineSis (More about this on Settings and Documents section). Also, the chart must be previously selected and made full screen.
First, you have to enter in ‘Rotate’ menu.
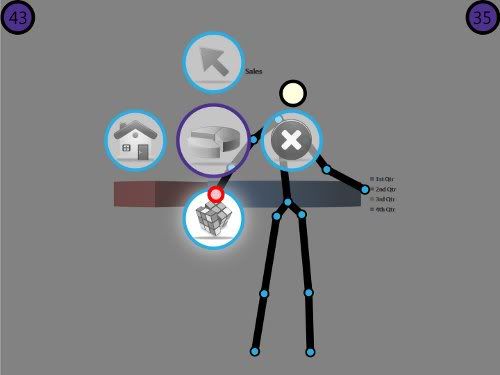 |
The ‘Rotate’ let user rotate the charts in 4 directions – to left, up, right and down.
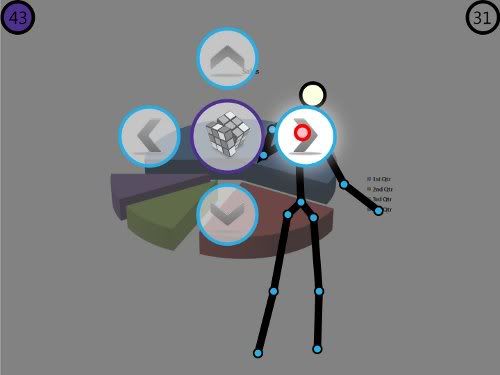 |
To return back from the ‘Rotate’ menu, you must activate the secondary menu and follow your way back.
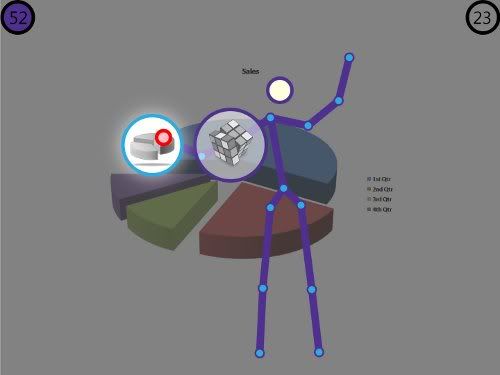 |
 |
2.3 Close a Chart |
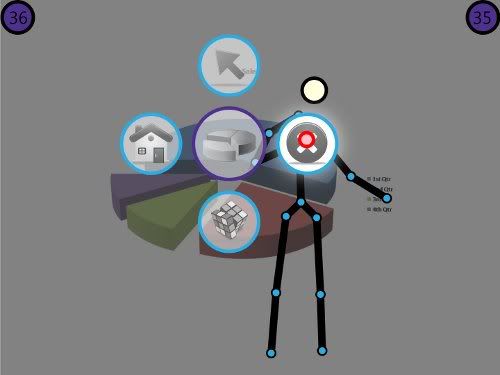
The only remaining thing to do is to close the opened chart. The ‘Close’ menu is an action menu, so it doesn’t have any children. It’s enought only to drag the active hand over it and back to the center (Shapes) circle and the opened chart is closed.
 |
 |
2.4 Go Back |
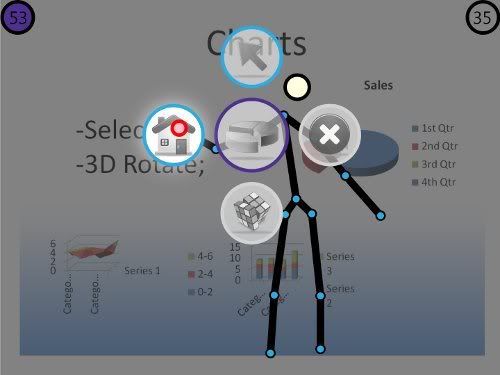
Turning back from ‘Shapes’ menu to Main menu can be made by selecting the ‘back to Home’ submenu.
 |
 |
3. Pages |
Like ‘Shapes’, the ‘Pages’ menu is not always active. You can use it only when you have a document opened. ‘Pages’ menu allows you to navigate through pages, zoom and scroll. To enter in ‘Pages’ menu, you have to select it from Main menu.
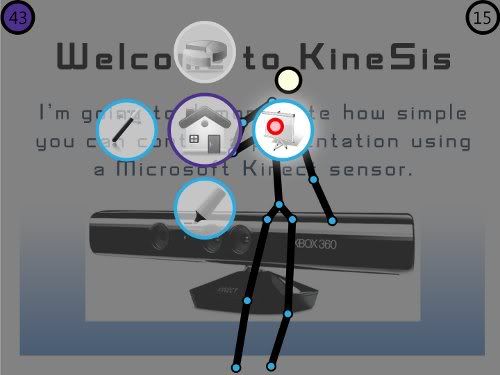 |
From here, you can go to ‘Select Page’, ‘Navigate’, ‘Scroll and Zoom’, or back to Home.
 |
3.1 Select a Page |
Selecting a page is the same as selecting a chart. First, select the ‘Select’ menu.
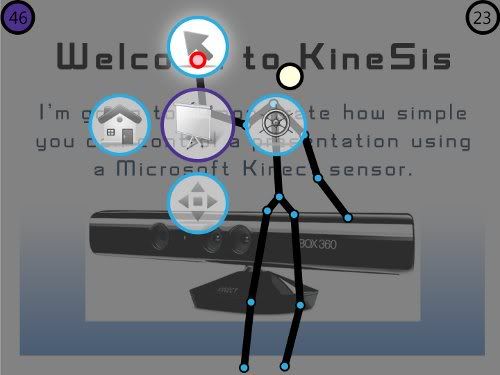 |
The only difference here is that instead of charts, now you navigate through document pages or slides.
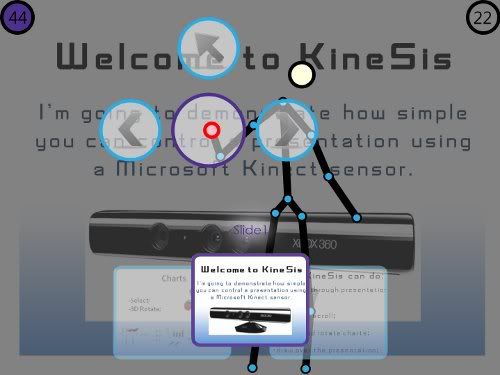 |
To return, like in ‘Select Chart’, activate the secondary menu and choose ‘Back to Pages’.
 |
3.2 Navigate |
Navigation menu is a menu for intensive usage. All you can do from here is to go to the next or previous page. Because of this, it was kept as simple as possible. To enter in Navigation menu, select it from ‘Pages’ submenus.
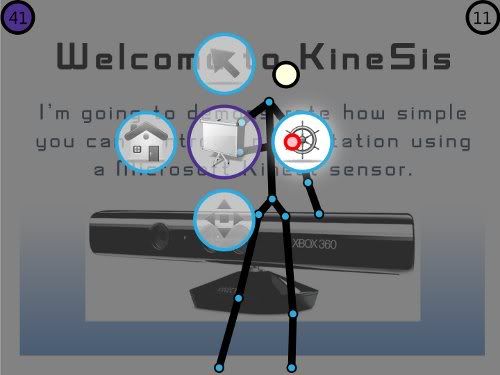 |
Here, with active hand, you can navigate to the next or previous page. The flow is simple: drag the active hand over ‘next’ or ‘previous’ circle and then back to center circle.
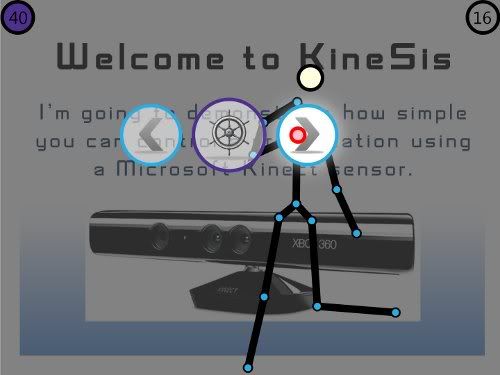 |
To return to ‘Pages’ menu, activate the secondary menu by raising a hand up and make the other hand active. Then select ‘Back to Pages’ option.
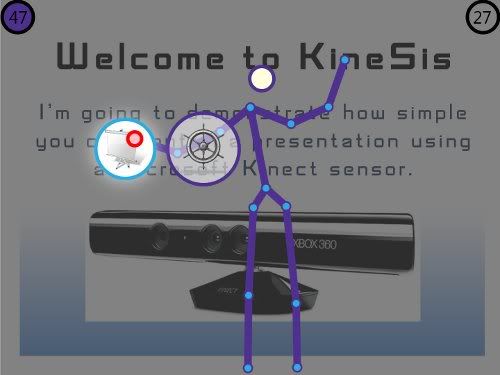 |
 |
3.3 Scroll and Zoom |
Because scrolling and zooming goes hand in hand, they were put in the same menu. If you zoom in, most probably you want to scroll right after and vice versa. To enter in this menu, select it from ‘Pages’.
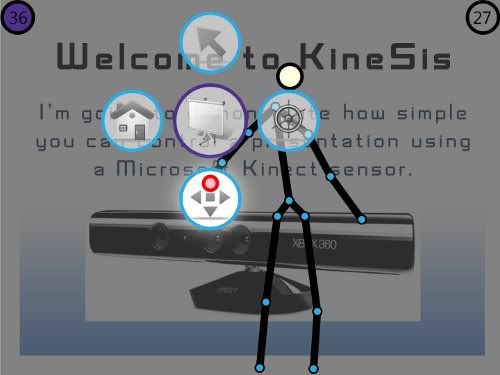 |
The primary menu here is the scroll. You can scroll in 4 directions: left, up, right and down.
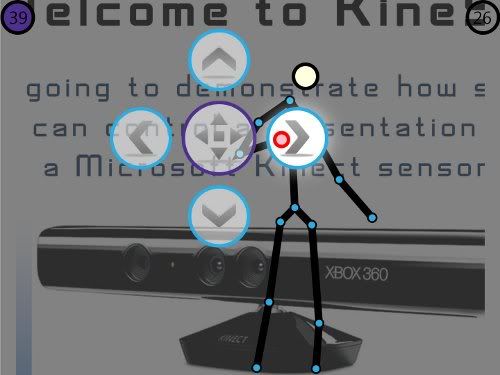 |
The secondary menu have functions for zooming in, out, locking zoom and returning back to ‘Pages’ menu. Locking zoom means fitting the page of the document to screen’s width. When the zoom is locked, the ‘Zoom In’ and ‘Zoom Out’ actions are disabled until the zoom is unlocked. Also, on zoom lock, the scroll has no effect. The same menu activates and deactivates the zoom lock. It is represented as a closed or opened lock icon (it is the menu from right).
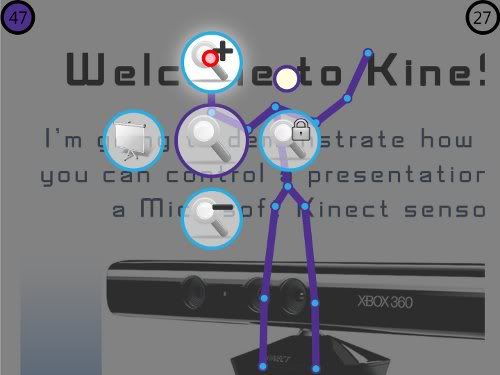 |
To return to ‘Pages’ menu, activate the alternative menu (here the alternative menu is also the zoom menu) and select ‘Back to Pages’ submenu.
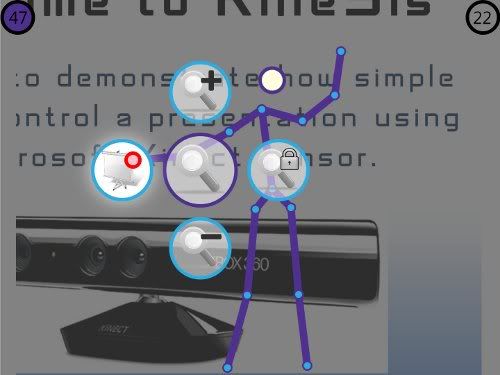 |
 |
3.4 Go Back |
Select ‘Back to Home’ to return to ‘Home’ menu.
 |
 |
4. Paint |
Paint menu is designed as a support for drawing over a presentation. You can select a color (red, green or blue), draw over presentation (everything you draw will appear on both screens), or clear the board.
Like Pointer, Paint is always available, so you don’t need a presentation opened to use it. First, select the Paint menu from Main menu.
 |
The Paint has 2 modes: “in paint” or “not in paint”. First time you enter in paint, the mode is “not in paint”. This way you can choose a color before start painting.
 |
After you have selected a color (up and down menu), the mode becomes “in paint” and an icon is displayed on top of the screen, indicating the “in paint” mode and the selected color.
 |
As long as you are in “in paint” mode, the active hand is used only for drawing. Exiting from this mode can be done by activating the alternative (secondary) menu, by raising a hand up and the other hand active. In paint, only one menu is available, the difference is only the mode it is displayed.
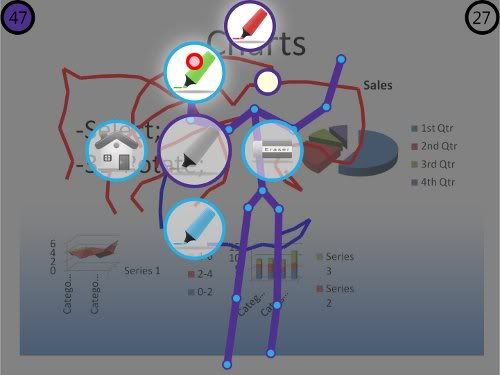 |
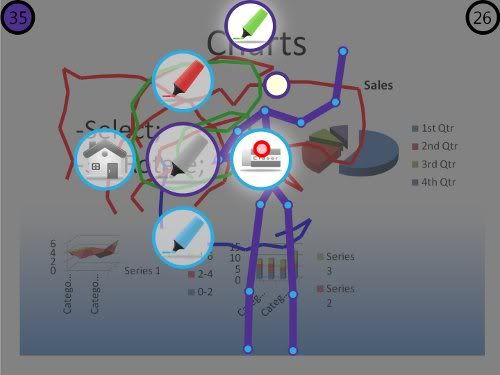
You can change the drawing color, clear the screens, or return back to Main menu. Clear menu acts like ‘Close Chart’ menu, but this clear all the lines you have drawn. It is active only when there is something to clear.
 |
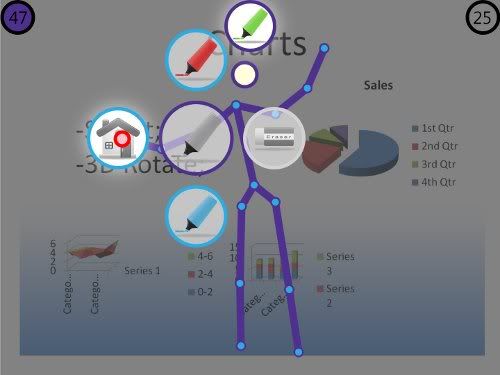
To go back to Main menu, select the submenu from Paint manu.
 |
The following section will explain how to configure KineSis and how to deal with documents.
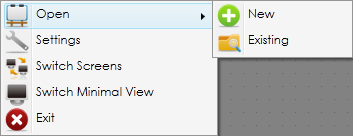
The user can interact with KineSis in 2 ways: by body gestures and with mouse, via context menu. Each type of interaction has it’s own well defined purpose. While the user gestures are used to control the documents, the context menu takes care about configuring the application and opening documents.
Performing a right click on user screen, you will expand the following context menu.
 |
 |
1. Open |
This is the interface for opening documents. You can open a new document or from archive (recent).
 |
1.1 Open a New Document |
Clicking on ‘New’ will open a dialog for selecting a file from your computer. The supported formats by KineSis are:
- Microsoft Office Documents – `[`PowerPoint (pptx), Word (docx), Excel (xlsx)`]` – documents must be supported by Office 2007 or 2010.
- Images – `[`jpg, jpeg, bmp, png, gif, tif, tiff`]`
- Text – `[`txt, source files`]` – common used ASCII files, as configured in ‘Extensions.xml’
After selecting a document, KineSis start processing it, starting with document pages. On the bottom of user screen, two loading bars are displayed: first with the progress of one page and the second with the progress of the whole document.
 |
When processing of pages is done, the document is opened and the processing of charts starts in background. Because processing charts can take a while, the user is not suposed to wait until all document is processed, he can start presenting.
 |
 |
1.2 Open an Existing Document |
KineSis saves all opened document in a directory specified in configurations. There are 2 reasons for this: all documents are converted in a common format (HTML), so images of pages and slides toghether with faces of 3D charts are stored in a well defined directory structure. More about this at Settings section.
Clicking on ‘Existing’ will open a form where you can select a document from archive and open or delete it from temporary directory.
 |
 |
2. Settings |
Clicking on ‘Settings’ will open a window where you can configure the application. KineSis works with Profiles, so more persons can use it from the same computer, each one with his own settings. A good example for this is a classroom where more teachers use the same computer for presentations.
v |
You can select and apply an existing profile or you can create your own. The settings are related to screens, locations of profile temporary directory, slides and charts sizes, color theme and touch/untouch distances.
Profiles contains a list of all KineSis profiles. Selecting a profile from the dropdown will update the entire settings form with selected profile’s data.
Screens contains 2 dropdowns containing all available system screens (monitors). You can define which screen will be used as user screen and which for presentation. When the system has more than one screen, the user and presentation screens cannot be the same. These are the defaults, the screens can be switched anytime.
Location is the place where KineSis stores all temporary files for a profile. Changing this doesn’t mean that all files will be moved to the new location.
Slides and Charts contains settings for PowerPoint slides generator and chart generator.
- Slide Width is the width of corresponding image of every generated chart. The height is adjusted automatically. The greater the value, the greater the quality of presentation with costs on performance.
- Chart Width have the same meaning as the Slide Width, but it reffers to image of a chart face size.
- Chart Horizontal Faces is the number of faces of a chart. For example, if this value is set to 4, you can think at a 3D chart as a cube, with 4 horizontal faces, each face containing a view of the chart from a different angle (90 degrees horizontally). If this is set to 0, then KineSis will not support 3D rotation for this profile.
- Chart Vertical Faces is the number of vertical views per horizontal view. Horizontal views contains images generated from Left-to-Right rotation and for each rotation, another set of views is assigned. These are the vertical views representing the Up-to-Down rotation or elevation.
To have a better idea about how KineSis generates the views of 3D charts, think at the example with 4 horizontal faces. You have four views so far, meaning you can rotate the chart only from Left to Right or from Right to Left. Add 2 vertical faces for each horizontal face and you can rotate also 2 faces up and 2 faces down, this means you can also use the positive and negative elevation (not available for all type of charts, like 3D Pie). Sum these and you have 5 views per horizontal view. Having 4 horizontal views, you have a total of 20 views of a 3D chart, proportionnaly distributed in such a way that you can rotate the chart to view it from all important angles.
Theme contains colors used by application. They can be changed by clicking on the right buttons labeled with HEX code of the color, which opens a color picker.
- Primary is the primary color of user interface. This is used to color the main menu (center circle), the main (document) loading bar and the skeleton when a hand is raised up (indicating usage of secondary menu)
- Secondary is the color used in combination with primary color. This colors the submenus, user’s joint points and the secondary (page) loading bar.
- Background is the application’s background color.
- Skeleton is the skeleton color.
Distances contains settings related to touch and untouch distances.
- Touch Distance represents the distance (in cm) from head to edge of the hand seen from above, the limit over which a hand is considered selected or active. Set this, for example at 40 and if you stretch a hand more than 40 centimeters, you can act on KineSis menus.
- Untouch Distance represents the limit under which a hand changes it’s state, from active to inactive (selected to deselected).
Save contains options for saving a new profile. To activate the ‘Save’ button, you have to fill in a name (unique) for the profile you’ve just created. After saving, your profile name appears as selected in profile’s dropdown.
Done button applies the profile changes and closes the Settings window. If you made changes on an existing profile, you’ll be asked to save the changes.
- Yes will save the changes to profile and then the changes are applied to application. You cannot change the default (KineSis) profile.
- No will discard all changes and the window will be closed.
- Cancel will not save and will not close the window. You can make more changes or save a new profile.
 |
3. Switch Screens |
This allow the user to change monitors (hardware) between user and presentation screen.
 |
4. Switch Minimal View |
Switch between Normal and Minimal view. The Minimal View is designed to systems with only one screen. The functionality is very limited, user can only navigate through pages and scroll up or down.
 |
 |
5. Exit |
Leave the application.


