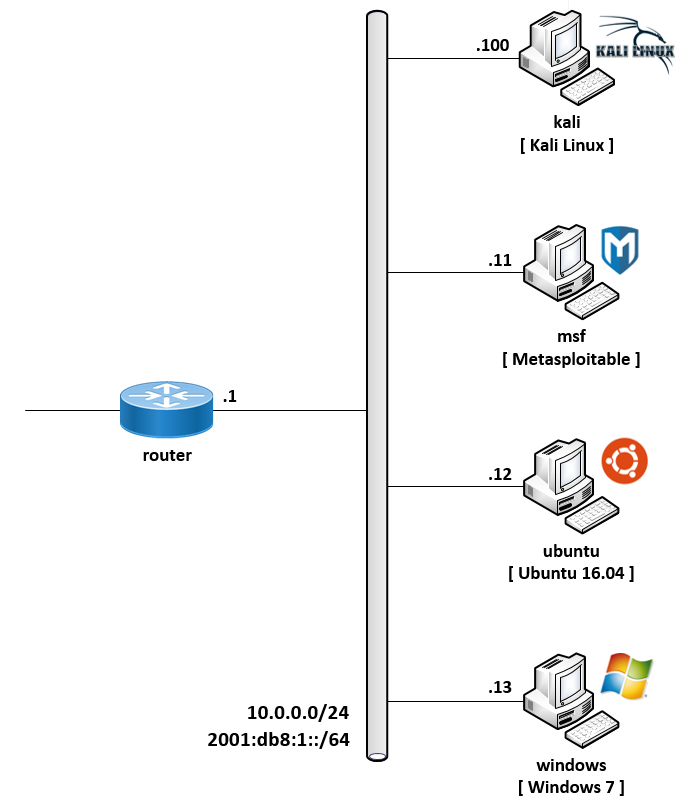
This repository provides a virtual scenario of Penetration Testing to explore vulnerabilities.
Demo scenario has been created using Virtual Networks over linuX (VNX).
Index:
- VNX installed (VNX Installation Guide)
- Operating System: Ubuntu 16.04
- Hard Drive: 40 GB avaible space (Filesystem size)
- Memory: 8 GB RAM or more
STEP 1: Clone this repository
$ git clone https://github.com/ralvarep/Penetration-Testing.git
STEP 2: Build filesystems
$ filesystems/create-rootfs_all
This step may take several minutes, depending on your Internet connection. It will download all the necessary filesystems of the virtual machines.
STEP 3: Create virtual scenario
$ sudo vnx -f Penetration-Testing.xml -t
When the scenario is created, you can login to consoles with root:xxxx.
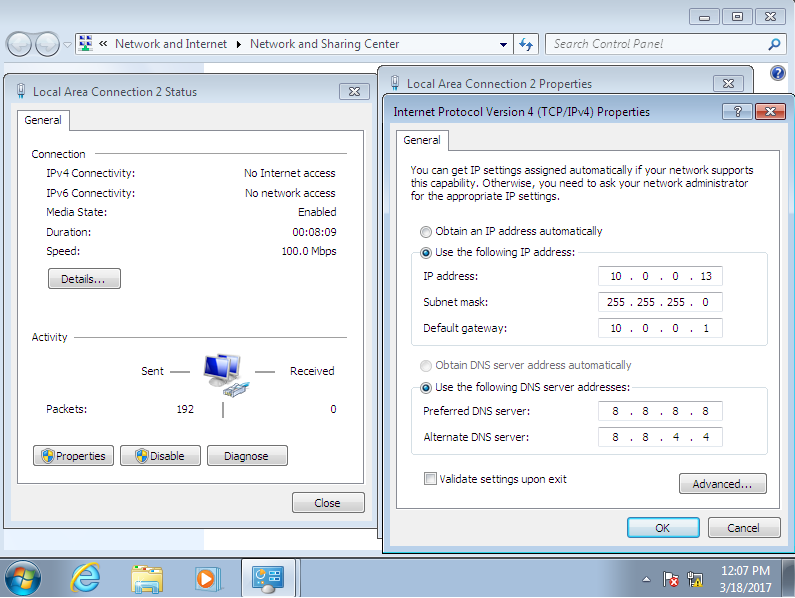
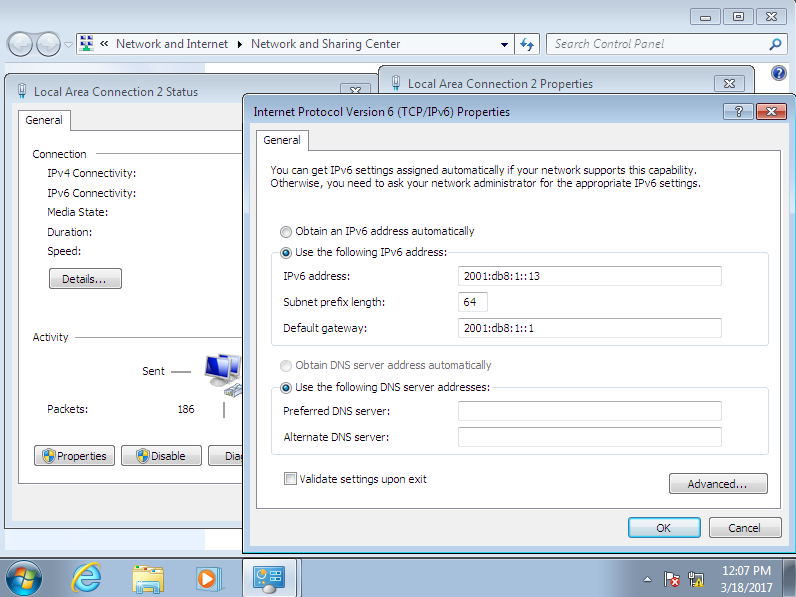
STEP 4 (Optional): Network Configuration in Windows 7
If you want to use Windows 7 in the scenario, you have to configure the following network settings:
- For IPv4:
- For IPv6:
OTHER OPTIONS:
- Launch terminal of some virtual machine
$ sudo vnx -f Penetration-Testing.xml --console -M VM-NAME
- Shutdown scenario
$ sudo vnx -f Penetration-Testing.xml --shutdown
- Start scenario that has previously been shutdown
$ sudo vnx -f Penetration-Testing.xml --start
- Destroy scenario
$ sudo vnx -f Penetration-Testing.xml -P
This project has been developed by Raúl Álvarez Pinilla as a result of the Specialit's Degree in Information and Computer Security at University of Castilla-La Mancha.


