A suite of entities, debug utilities and helper functions that will speed up your decentraland SDK development.
npm install -b dcldash@latest
- Every Wed at 5:30 PM EST we have a live stream SDK Workshop. Feel free to ask questions, show off your current project or make suggestions for future dcldash updates. Meetup
- Feel free to submit a ticket for a feature request, or submit a pull request for a feature you've made that you'd like to add.
- Join us on the DCLConnect Discord server - Discord
- Reach out to me directly on Discord (patmacs#8139)
Note Some features are in the library but are not yet documented. Start typing
Dash_in your code editor to see a list of everything available.
- Debug Utilities - Tweaker, ZoneMaker
- Entities SimplePoster, BoxHighlight, TriggerZone, Zone
- Animation AnimationQueue, OnUpdateFrame, DynamicImage, DynamicImageBar, Ease
- Materials Colors, Textures
- Utilities (Helper Functions) Cache, OnFirstMove, GlobalCanvas, Countdown, CheckWithinVolume, GetSceneData, Wait
- Utilities (UV) Dash_UV_Crop_Video, Dash_UV_Curved_Image, Dash_UV_Curved_Video, Dash_UV_Image, Dash_UV_Video, Dash_UV_Plane_Crop_Image
- Utilities (UI) Dash_UI_Crop_Image, Dash_UI_Generate_StaticButton, Dash_UI_Generate_StaticButtons, Dash_UI_Generate_StaticImages, Dash_UI_StaticImag
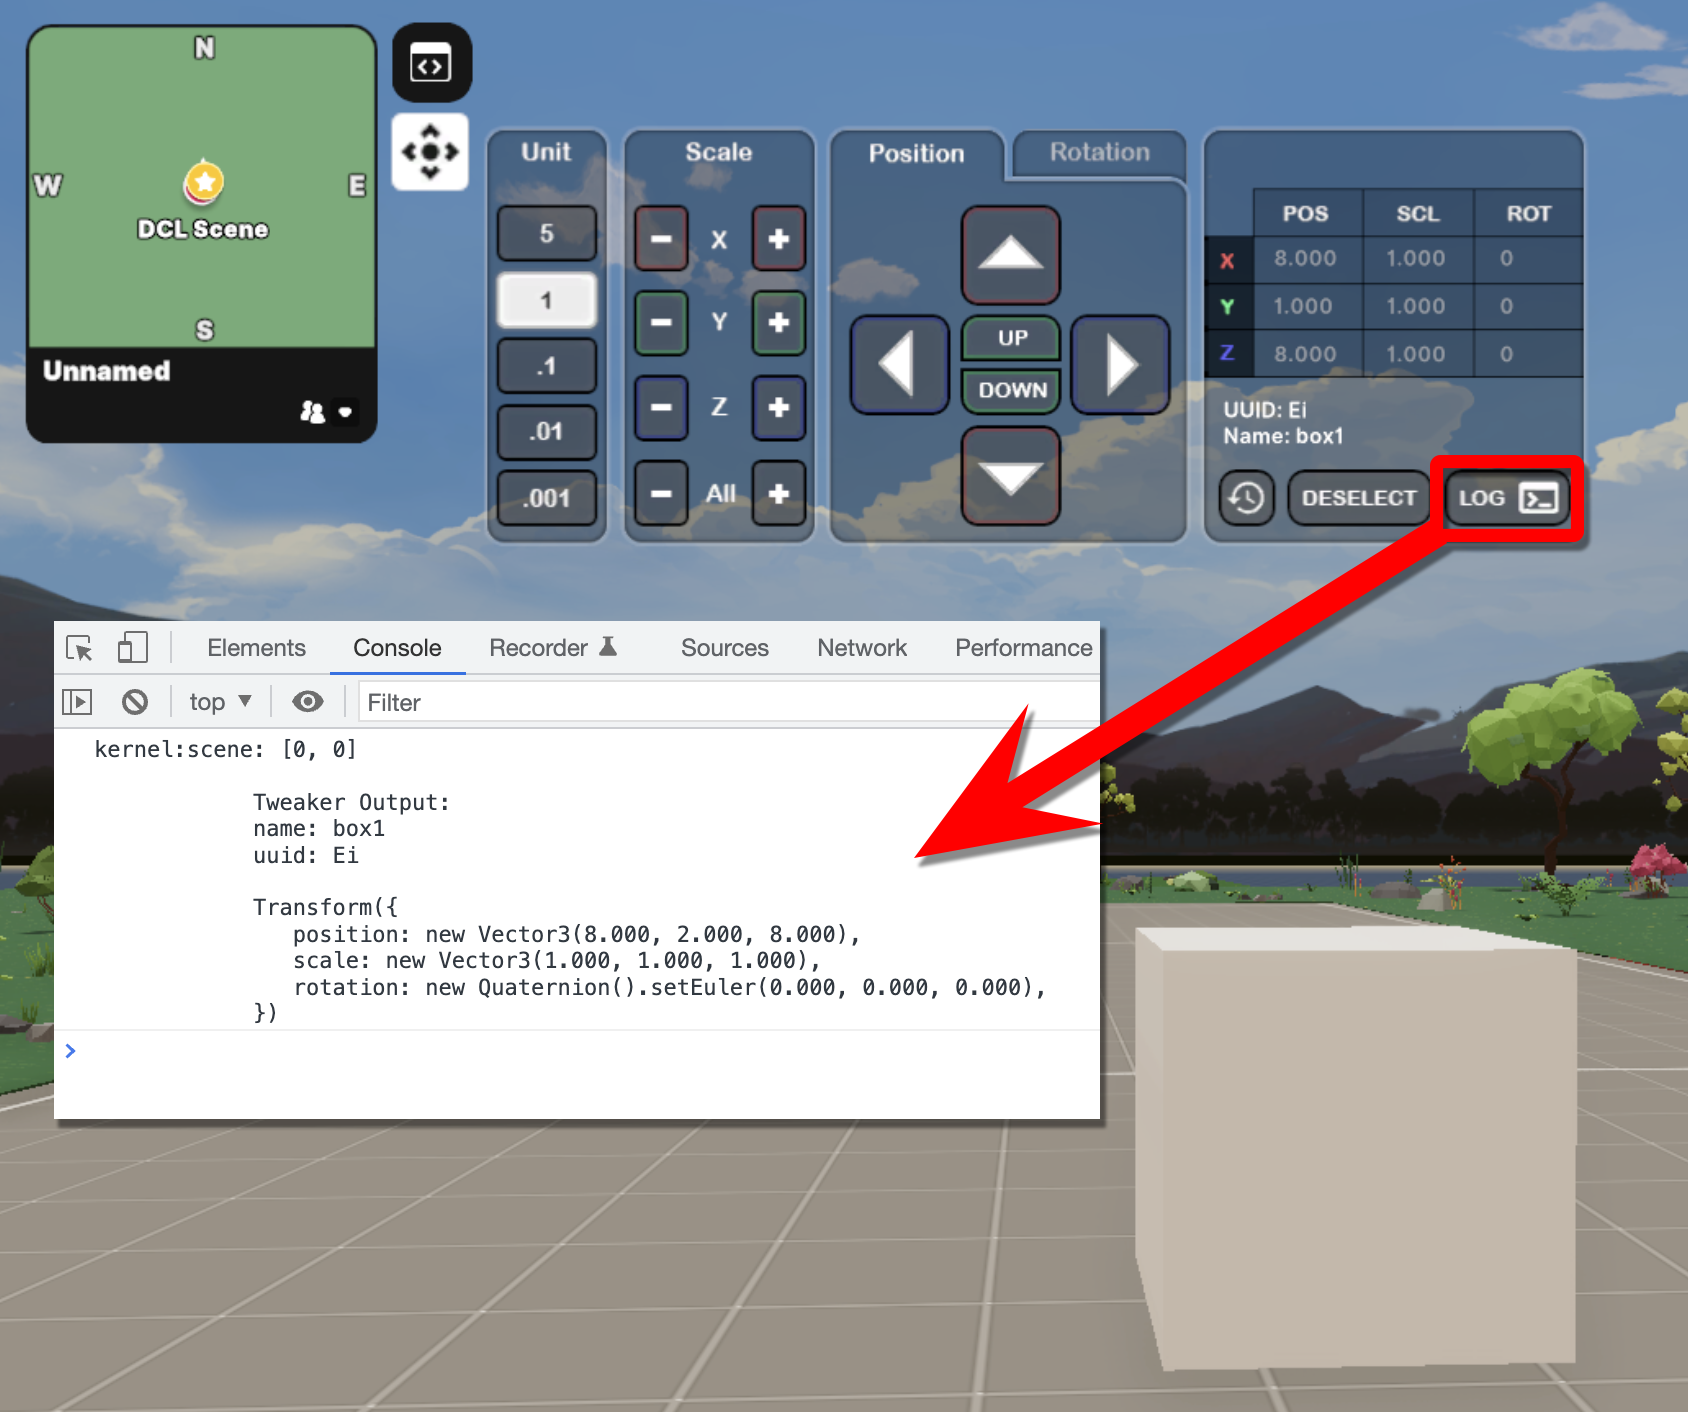
Purpose: The Tweaker is a game-changing tool, empowering users to easily control and perfect the trasnform values of different entities in their scene. With this utility you can quickly place entities exactly where you want them to be, and simply retrieve the new transform values as an outputted log in the console.
How to Set Up the Tweaker
- Using the Tweaker is as simple as importing { Dash_Tweaker}, and simply calling the function with the entity you'd like to tweak by using Dash_Tweaker(entity).
- On loading the Scene, the Tweaker will be up and running with your entity selected.
- If you'd like to change the selected entity, you can either change the entity name in the Dash_Tweaker function. You can also use the 'Select' feature in the Tweaker for entities which have colliders, without having to hotload the scene.
//First, we import the Tweaker from dcldash
import { Dash_Tweaker } from "dcldash"

//Then, we declare an Entity, which we wish to tweaked by our Tweaker
const testEntity = new Entity("testBox")
testEntity.addComponent(new BoxShape())
testEntity.addComponent(new Transform({
  position: new Vector3(8, 2, 8),
}))

//Finally, we execute a Dash_Tweaker function for the entity of our choice
Dash_Tweaker(testEntity)
Using the Tweaker
- The Tweaker allows you to dynamically impact the Transform component of an entity, right inside the scene preview.
- This effectively means you can change the Position, Rotation and Scale of an entity, at the click of a button.
- Once you've used the Tweaker to perfectly position your item, you can use the 'Log' button, which shall output the new Transform values of your entity, which can be simply carried over to your code.
- If you'd like to reset the entity's transform to it's original Transform state, simply hit the 'Revert' button.
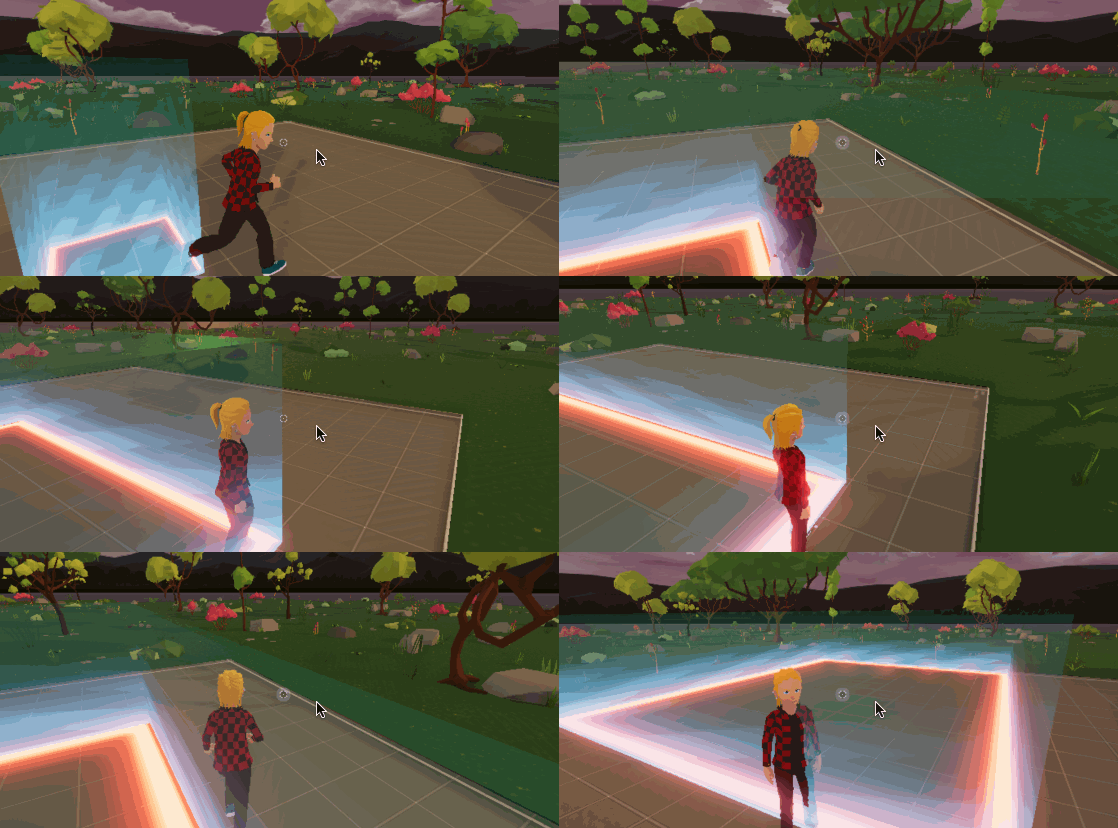
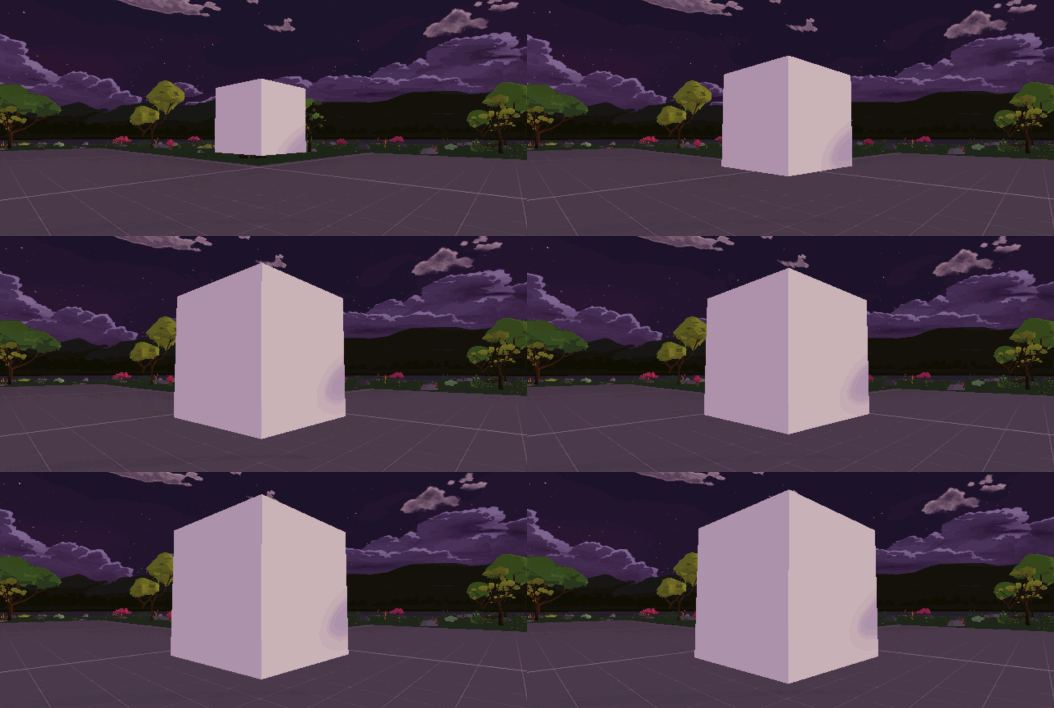
Purpose: Drop a zone creation cube into the scene and then move around the area to define the size of the zone. Then click a button to export the Transform information.
import { Dash_ZoneMaker } from 'dcldash'

const zm = new Dash_ZoneMaker(new Vector3(8,1,8))
engine.addEntity(zm)
How to use this (until the UI is out)
- Run up to the box and then click on it
- Run around in the area that you want to make into a zone
- When you are done running around (whew.) and the zone is the right size, click it. (This is sometimes tough in it's current state. Go to the edge of the zone in 3rd person view, and make sure your camera is on the outside of the zone. Click the zone.)
- In a week or so there will be UI controls to make this process super simple.
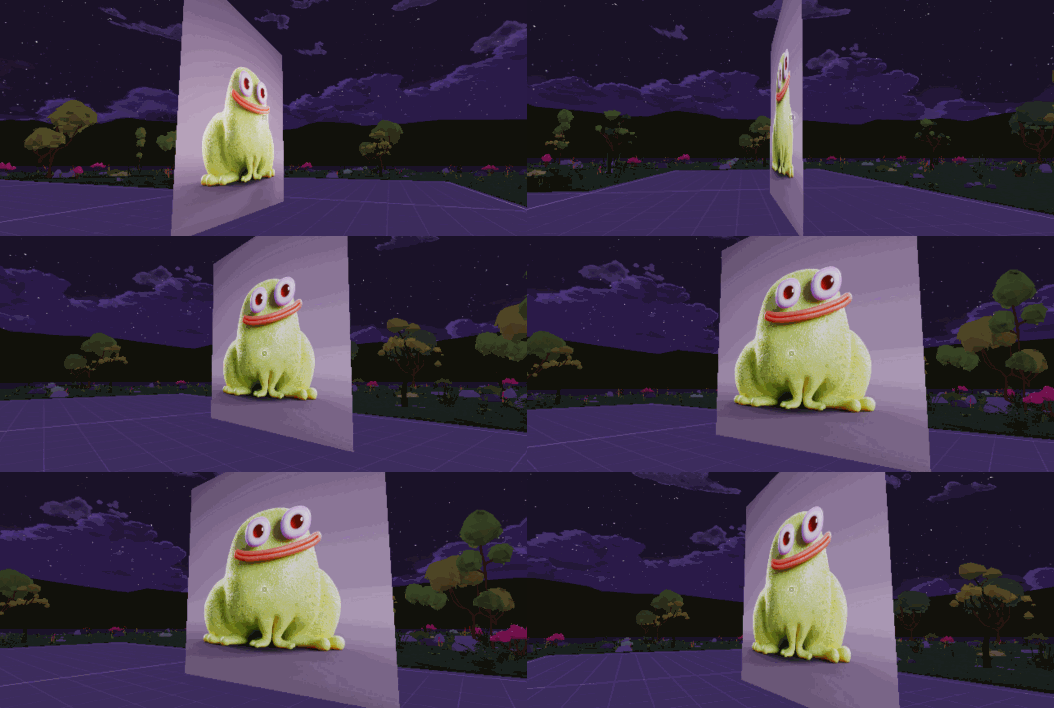
Purpose: A very simple poster that allows you to set up an image and/or hyperlink (clickable event) to go to a specific URL (optional). This component will also automatically set up the plane's UVs so that both sides are facing the correct direction.
import { Dash_SimplePoster } from 'dcldash'

const myPoster = new Dash_SimplePoster()
myPoster.addComponentOrReplace(new Transform({
    position: new Vector3(8,3,8),
    scale: new Vector3(5,5,1)
}))
myPoster.show()
// myPoster.hide()
myPoster.setHyperlink('https://github.com/pmacom/dcldash')
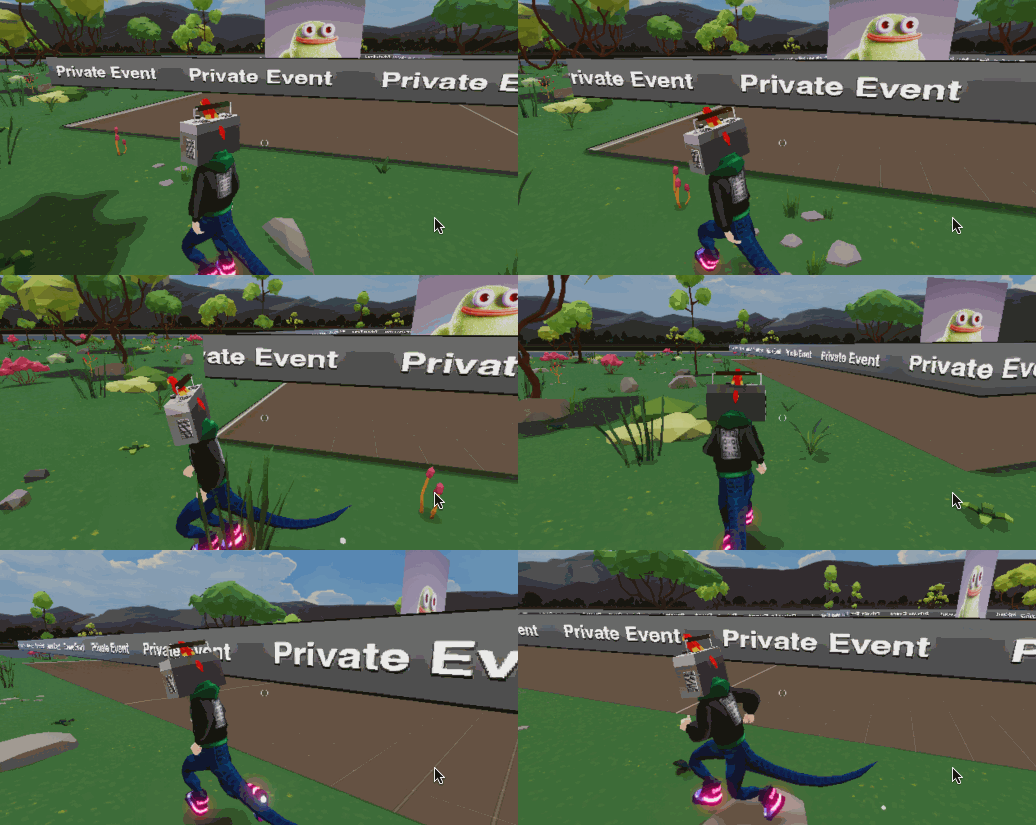
myPoster.setImageUrl('https://pmacom.github.io/assets/croakz.png')Purpose: Make your scene more private by throwing up barriers to keep people out (or kick them out if they are in the scene when it's enabled). Future updates to this barrier will include easy NFT gates, among other things.
import { Dash_LandBarrier } from 'dcldash'

const landBarrier = new Dash_LandBarrier(new Vector3(16,0,16)) // param: exitLocation
landBarrier.setMessage("comingsoon")
landBarrier.enable()
// landBarrier.disable()
landBarrier.exitLocation = new Vector3(0,0,0) // Redeclare it if you want
Params
new DashLandBarrier(exitLocation: Vector3)
Options
DashLandBarrier.setMessage(OPTION)
- comingsoon
- privateevent
- accountrequired
- nftrequired
- temporarilylocked
- outdated
- undermaintenance
- loadfully
- transparent
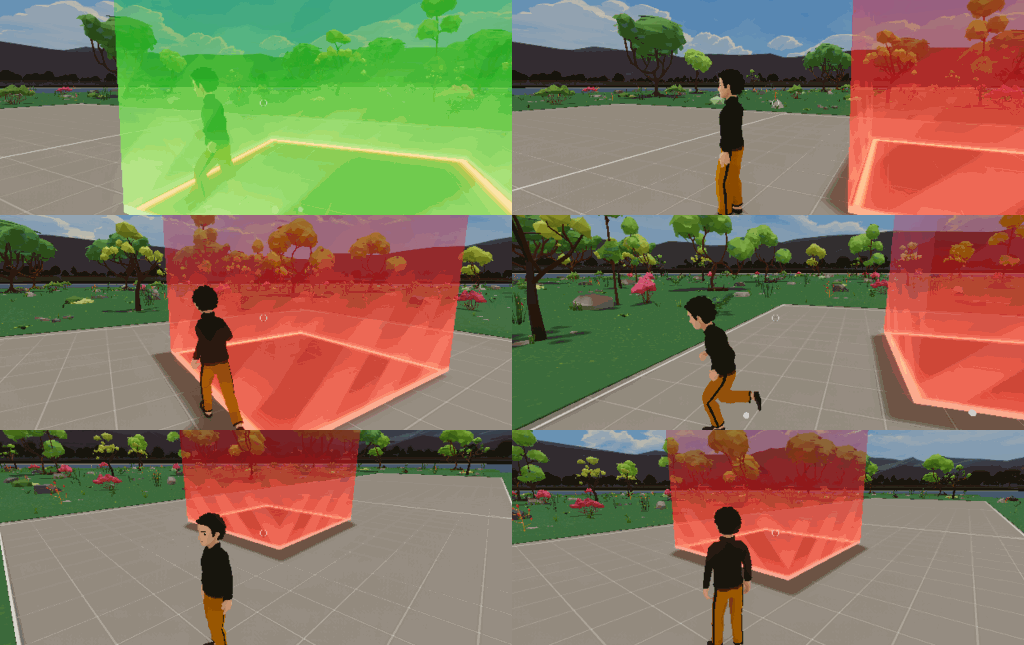
Purpose: Easily create a triggerZone with a visual indicator (debug mode) for when a user enters/leaves the zone.
Usage
import { Dash_TriggerZone } from 'dcldash'

// Create the TriggerZone (It's just like a regular Entity)
const myTriggerZone = new Dash_TriggerZone()
myTriggerZone.addComponent(new Transform({
    position: new Vector3(8,2.5,8),
    scale: new Vector3(5,5,5),
}))

// Make it visible while debugging
myTriggerZone.enableDebug()

// Turn the trigger events on
myTriggerZone.enable()

// Turn the trigger events off
// testTriggerZone.disable()

myTriggerZone.onEnter = () => {
    log('User has entered the zone')
}

myTriggerZone.onExit = () => {
    log('User has left the zone')
}
Notes
- Although it's a regular Entity, rotation seems to mess this up a bit.
Purpose: An extension of TriggerZone which hides users that are not currently in the same zone. Zones will see a massive upgrade in upcoming months. Visit our Discord channel for more inforamtion.
import { Dash_Zone } from 'dcldash'
const zone1 = new Dash_Zone('zone1', new Transform({
    position: new Vector3(3, 1.5, 3),
    scale: new Vector3(4.5, 3, 4.5)
}))
zone1.enableDebug()

const zone2 = new Dash_Zone('zone2', new Transform({
  position: new Vector3(9, 1.5, 10),
  scale: new Vector3(4.5, 3, 4.5)
}))
zone2.enableDebug()
Notes
- A tutorial/explainer video will be posted soon
Purpose: Quickly create a simple animation without having to create a new ISystem every single time. The below example uses the
Dash_Easeutil to make the animation smooth. They both work well together.
const box = new Entity()
box.addComponent(new BoxShape())
box.addComponent(new Transform({
    position: new Vector3(8, 2, 8),
    scale: new Vector3(1,1,1)
}))
engine.addEntity(box)

const startScale = 1
const endScale = 2
Dash_AnimationQueue.add({
    duration: 2,
    data: { someval: 'foo' }, // optionally pass along some data that is accessible every frame
    onFrame: (progress, data) => {
        const transform = box.getComponent(Transform)
        const easeValue = Scalar.Lerp(startScale, endScale, Dash_Ease.easeOutBounce(progress))
        transform.scale.setAll(easeValue)
    },
    onComplete: () => {
        log('Animation Done!')
    }
})Purpose: Simplify your animations/physics code by creating togglable ISystem functions (without having to set one up every single time you want to use one)
// Simple Example
const doEveryFrame : Dash_OnUpdateFrame_Instance = Dash_OnUpdateFrame.add((dt: number) => {
    log('Do something.')
    // This can start doing something every frame
})
doEveryFrame.start()
doEveryFrame.stop()
// More Practical Example, although not really a full example (Will update this soon)
const physicsCast = PhysicsCast.instance
class RayGun extends Entity {
private renderLaser: Dash_OnUpdateFrame_Instance
constructor(){
super()
this.renderLaser = Dash_OnUpdateFrame.add(this.pewpew)
}
startShooting(){
this.renderLaser.start()
}
stopShooting(){
this.renderLaser.stop()
}
pewpew(dt: number){
physicsCast.hitFirst(physicsCast.getRayFromCamera(200), (e) => {
const { didHit, entity } = e
if(didHit){
const { entityId } = entity
const obj = engine.entities[entityId] as Entity
log('PEW PEW PEW Hitting target', obj.name)
}
})
}
}
const raygun = new RayGun()
raygun.startShooting()Purpose: Animate UIImage size, position and cropping with ease.
import {
  Dash_Cache_Texture,
  Dash_Ease,
  Dash_GlobalCanvas,
  DynamicImage
} from "dcldash";

// Just a regular image as you are normally creating them. I'm using the default thumbnail here that should be in everyone's scene from the start.
const imageTexture: Texture = Dash_Cache_Texture.create('images/scene-thumbnail.png')
const image = new UIImage(Dash_GlobalCanvas, imageTexture)
image.width = 100
image.height = 100
image.sourceWidth = 100
image.sourceHeight = 100

// Create the DynamicImage from the above image
const di = new DynamicImage(image)
di.moveTo(100, 100, 2, Dash_Ease.easeOutElastic)
// di.fadeIn(duration, ease?, callback?)
// di.fadeOut(duration, ease?, callback?)
// di.fadeTo(opacity, duration, ease?, callback?)
// di.moveTo(x, y, duration, ease?, callback?)
// di.moveToX(x, duration, ease?, callback?)
// di.moveToY(y, duration, ease?, callback?)
// di.moveRelativeTo(x, y, duration, ease?, callback?)
// di.resizeTo(width, height, duration, ease?, callback?)
// di.resizeWidthTo(width, duration, ease?, callback?)
// di.resizeHeightTo(height, duration, ease?, callback?)
// di.moveSourceTo(x, y, duration, ease?, callback?)
// di.moveSourceLeftTo(x, duration, ease?, callback?)
// di.moveSourceTopTo(y, duration, ease?, callback?)
// di.resizeSourceTo(width, height, duration, ease?, callback?)
// di.resizeSourceWidthTo(width, duration, ease?, callback?)
// di.resizeSourceHeightTo(height, duration, ease?, callback?)
// di.scaleIn(startScale, duration, ease?, callback?)
// di.scaleOut(endScale, duration, ease?, callback?)
// di.scaleTo(size, duration, ease?, callback?)
Purpose: A very fast, performant and easy to implement image progress bar.
Purpose: Easily implement common materials for testing and debugging purposes. More colors, textures and patterns coming soon.
const box = new Entity()
box.addComponent(new BoxShape())
// box.addComponent(Dash_Material.Red())
// box.addComponent(Dash_Material.Green())
// box.addComponent(Dash_Material.Blue())
// box.addComponent(Dash_Material.Black())
// box.addComponent(Dash_Material.Transparent())
engine.addEntity(box)Purpose: When creating Textures, VideoClips, VideoMaterials and VideoTextures it is very easy to accidentially create unwanted duplicates in memory. The
Dash_Cache_VideoMaterialwill create all of the necessary elements automatically (VideoClip -> VideoTexture -> Material) for you, and just return the Material for you to use. Saving a lot of typing.
// Create a new cache instance or fetch the cached asset if it already exists
const myTexture: Texture = Dash_Cache_Texture.create('images/image.png')
const myVideoClip: VideoClip = Dash_Cache_VideoClip.create('videos/video.mp4')
const myVideoTexture: VideoTexture = Dash_Cache_VideoTexture.create('videos/video.mp4')

// or
const myMaterial: Material = Dash_Cache_VideoMaterial.create('videos/video.mp4')
Notes
- dcldash VideoMaterials will eventually be much more powerful. Check back soon!
Purpose: Sometimes you want to call a setTimeout function anywhere within your code and not just add it as a component to an entity.
import { Dash_Wait } from 'dcldash'

Dash_Wait(() => {
  log('This code will run after 5 seconds')
}, 5)Purpose: When you attach a video or image material to a primative shape (BoxShape, PlaneShape, ect) the rotation of the texture will be rotated or flipped incorrectly.
Instead of rotating the entire entity, you can leverage one of these functions to just alter the UVmap for how the material is applied to the entity.
import { Dash_UV_Crop_Video } from 'dcldash'

const videoPlane = new PlaneShape()
videoPlane.uvs = Dash_UV_Crop_Video(
    videoWidth: number,   // The full width of your video
    videoHeight: number,  // The full height of your video
    cropWidth: number,    // Width of the crop area
    cropHeight: number,   // Height of the crop area
    cropSourceX: number,  // The x position to start the crop
    cropSourceY: number,  // The y position to start the crop
)Purpose: Generating a new
UICanvasmore than once is not preferred for performance purposes. Use the globalcanvas whenever possible instead of generating a new one each time.
import { Dash_GlobalCanvas } from 'dcldash'

const myButtonTexture = new Dash_Cache_Texture.create('images/myButton.png')
const myUIButton = new UIImage(Dash_GlobalCanvas, myButtonTexture)Purpose: Easily add easing animations to your AnimationQueues and anywhere else you are transitioning between two values. Just make sure that the
progressvariable is from 0 - 1. Look at the AnimationQueue docs for a full usable example.
import { Dash_Ease } from 'dcldash'

const easeValue = Scalar.Lerp(
	startScale,
	endScale,
	Dash_Ease.easeOutBounce(progress) // <---- EASE
)
Options
Dash_Ease.OPTION
- Sine - easeInSine, easeOutSine, easeInOutSine
- Cubic - easeInCubic, easeOutCubic, easeInOutCubic
- Quint - easeInQuint, easeOutQuint, easeInOutQuint
- Circ - easeInCirc, easeOutCirc, easeInOutCirc
- Elastic - easeInElastic, easeOutElastic, easeInOutElastic
- Quad - easeInQuad, easeOutQuad, easeInOutQuad
- Quart - easeInQuart, easeOutQuart, easeInOutQuart
- Expo - easeInExpo, easeOutExpo, easeInOutExpo
- Back - easeInBack, easeOutBack, easeInOutBack
- Bounce - easeInBounce, easeOutBounce, easeInOutBounce
Purpose: Invoke a countdown event that allows you to listen for every frame or every second with a callback function when it is completed
import { Dash_Countdown } from 'dcldash'

const countdown = new Dash_Countdown()
countdown.setTimer(10) // In seconds
countdown.onSecond((remaining: number) => { log('Seonds Remaining:', remaining) })
countdown.onUpdate((dt: number) => { log('Time Temaining:', dt) })
countdown.onComplete(() => { log('Completed') })
countdown.start()
// countdown.stop()
Notes
- onSecond, onUpdate and onComplete are all optional. But you probably want to use one of them, otherwise why use this to begin with?
- You can set multiple callbacks to happen for each 'event' by adding another onSecond, onUpdate, or onComplete. Add as many as you want. I have no idea why thats a feature. I'm sure there was a reason. :shrug_emoji:
- Zoo, Nico, TheShoes, Texas Farmer, Alexis, Grant, Metaverse Architects, Deadfellaz + EthBuilders.NYC
