环境要求: ubuntu 64位
python3 go mongodb chrome chromedriver
git clone https://github.com/xiaopigfly/Domain-monitor.git
代码结构:
browser.py  浏览器功能 获取html、执行js等
config.py 配置文件,一些需要的功能
mongodb_con.py mongo连接文件
start.py 开始爆破和爬取子域名获取http响应入mongo库
while_update.py 域名监测功能、遍历mongo库内数据 对比出变化域名和爬取新域名
\subfinder 用来启动最初爆破子域名
\tmp 存放browser爬取的 href network请求的url
\target  存放要监测域名的配置信息
注意 因为获取http响应的是基于chrome浏览器,模拟chrome访问,并且访问后进行多个javascript执行,所以访问每个url会比普通urllib时间要长很多,所以我添加了简易版chrome线程池以便进行多线程同步访问以便加快速度,默认是5个chrome同时模拟访问。
环境搭建 必须执行 cd get_domain
sudo sh install.sh
cat install.sh:
sudo apt-get install mongodb golang git python3 python3-pip xvfb unzip libxss1 libappindicator1 libindicator7 -y
sudo pip3 install selenium pymongo
wget https://dl.google.com/linux/direct/google-chrome-stable_current_amd64.deb
sudo dpkg -i google-chrome*.deb
chmod +x chromedriver
sudo mv -f chromedriver /usr/local/share/chromedriver
sudo ln -s /usr/local/share/chromedriver /usr/local/bin/chromedriver
sudo ln -s /usr/local/share/chromedriver /usr/bin/chromedriver
sudo service mongodb stop
1、首先修改mongodb的配置文件 让其监听所有外网ip,如果不行,连接的时候肯定会有异常 编辑文件:/etc/mongodb.conf 修改后的内容如下: bind_ip = 0.0.0.0 port = 27017 auth=true (添加帐号,密码认证)
设置结束后启动mongo命令: sudo service mongodb start
进入mongo命令行: mongo
添加超级用户
use admin
db.createUser({user:’admin’,pwd:’123456aaa1xsda1A’,roles:[{role:’userAdminAnyDatabase’,db:’admin’}]})
db.auth(‘admin’,’123456aaa1xsda1A’)
添加扫描器用户
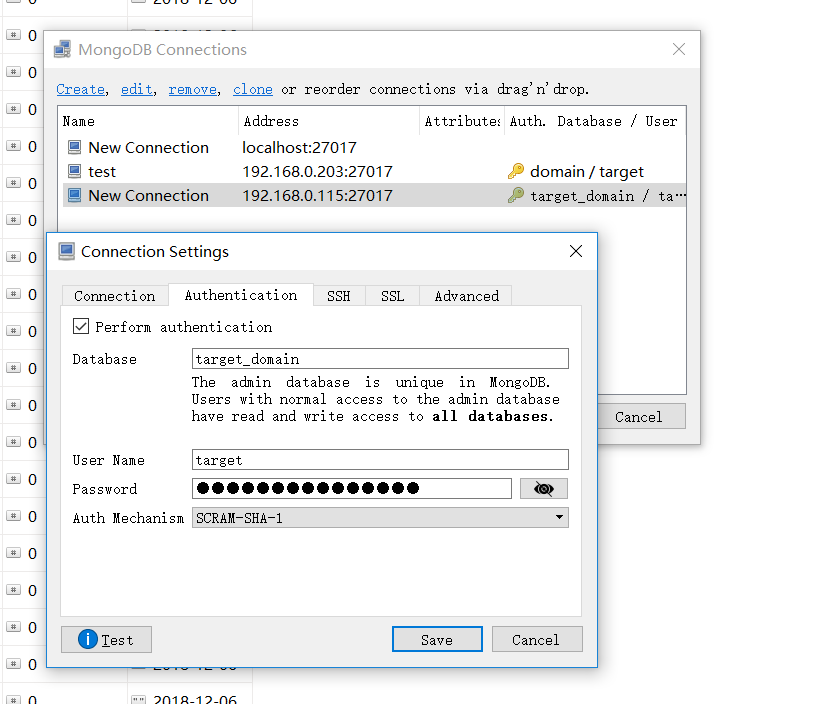
use target_domain
db.createUser({user:’target’,pwd:’123456aaaxsda1A’,roles:[{role:’readWrite’,db:’target_domain’}]})
db.auth(‘target’,’123456aaaxsda1A’)
Download mongo Client:
常用mongo命令:
sudo service mongodb start | stop | restart
db.getCollection(‘qq_com’).find({“domain”:{“$regex”:”.3g.qq.com”}}) //search
db.getCollection(‘qq_com’).remove({“domain”:{“$regex”:”.3g.qq.com”}}) //del
db.update({ “state” : 1} ,{$set:{“state”:0}}) //update
ubuntu set python3
sudo update-alternatives –install /usr/bin/python python /usr/bin/python2 100
sudo update-alternatives –install /usr/bin/python python /usr/bin/python3 150
Download subfinder
go get github.com/subfinder/subfinder
Start:
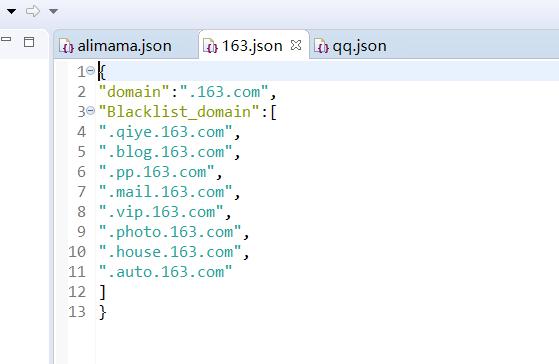
Configure domain.json (please note the format)
Domain is the target domain name to be monitored. The format must be .domain.com, such as:
.twitter.com
.facebook.com
.google.com
.gmail.com
.qq.com
……
Blacklist_domain is a subdomain blacklist
vim config.py:
        self.tar_config = 'target/qq.json'
        # code directory
        self.path = r'/home/get_domain/get_domain'
        with open('%s/%s' % (self.path, self.tar_config), 'r') as load_f:
            load_dict = json.load(load_f)
        self.domain = load_dict['domain']
        self.Blacklist_domain = load_dict['Blacklist_domain']
        self.chrome_path = r'/usr/bin/google-chrome-stable'

    def callback_mongo_config(self):
        # mongo config
        return {"ip": "192.168.0.115", "port": 27017, "name": "target", "password": "123456aaaxsda1A"}
and then
nohup python start.py
After the start.py run ends.
While_update.py compares the http response after re-crawling the subdomain in the library, and crawls the new domain name.
Reference: http://jinbitou.net/2016/02/24/1534.html
Timed execution of the while_update setting, such as: 24 hours to execute once, 12 hours to execute once, to form sub-domain monitoring.
According to the date date in the mongo library, please set your own new domain push.
Reference materials:

https://www.jianshu.com/p/71bbe8acee01
http://npm.taobao.org/mirrors/chromedriver/
https://github.com/subfinder/subfinder
https://blog.csdn.net/lishanleilixin/article/details/82908423
https://www.cnblogs.com/shileima/p/7823434.html
https://www.robomongo.org/
Bitcoin address


