-
Notifications
You must be signed in to change notification settings - Fork 0
Scanning
To scan barcodes and bring them into the database, click Scan from the User Panel. This brings up a page asking some information about where you're scanning.
At the Campus Store, we have product organized into fixtures, shelves, and boxes. A box contains product, a shelf contains boxes, and a fixture contains shelves.

Each fixture, shelf, and box is assigned a number. The first part of the scanning page asks for this information, as well as your store number and department.

Fill in and submit this information to move to the main scanning page:

Note that the current fixture, box, and shelf is displayed at the top. If this doesn't match the actual one you're scanning now, you've got a problem. See [Removing scanned data] to remove anything you've accidentally added to the wrong unit.
The text field should be automatically selected, and this is where you can enter a barcode. As long as this selected and the scanner is set up properly, you can fill this in by scanning an item's tag.
After scanning an item, a green box will come up with that item's details. This box will then fade to grey.

Once you're done scanning, click Done Scanning to confirm, or Mark Fixture Complete (see the Buttons section below).
After that, you have the option to export results or continue scanning again. You can also click the button at the bottom to return to the User Panel or log out.

This button appears when text has been entered in the main scanning text field. This field occasionally disables, to prevent double scans while data is processing. If this happens and it doesn't re-enable, click the Clear button to reset it manually.
These buttons update the fixture, shelf, or box that you're currently scanning. Note that it only changes one of the values, not the entire identifier. (So if you change the Fixture, it will not prompt you to change the shelf or box.)
Note that previous items from that scanning session will still show up, even if they're in different units than the one you're currently scanning. These are still associated with their respective fixtures, it just doesn't show up on this screen. The Quantity in the dialog box that appears after a scan contains the number in this unit, while the total is shown below.
This gives you the chance to review your scanned data before permanently submitting it to the database.

Once you've done everything in a fixture, you can mark it complete and add some comments. If someone tries scanning items in this fixture again, it will let them know that it's been completed, and show them your comments. They can then choose to append new items to the fixture, or clear the fixture and start fresh.


This lets you remove one of the items, ie decrement the quantity.
This allows you to manually enter how much of a product is in the unit, rather than scanning each individual item. To remove all of an item, hit Update Quantity and set it to 0.
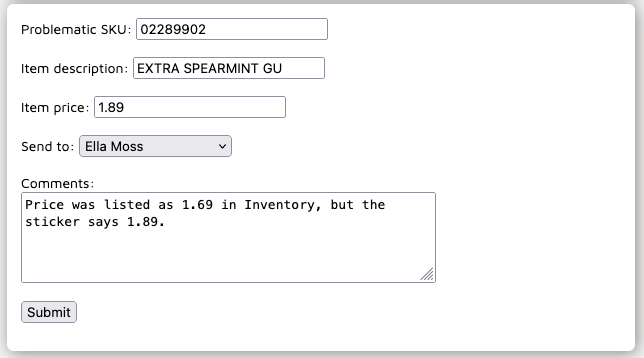
This pulls up a form allowing you to email your manager about wrong information in our ARC database (for example, a mismatched description or wrong price).

Remove all product from the selected fixture/shelf/box. Use with caution, but it will ask you to confirm:

A few errors can happen while you're scanning tags; most of these errors happen due to an invalid scan, and can be easily fixed by just scanning the tag again.

If you see this error, the scan was probably bad. Just try again in the provided text box, or type it in and press Enter.

This means that either there was a bad scan (try again), or the SKU is not in our database. Validation files are imported daily from ARC, so this probably means the product needs to be added to ARC. Click Report Invalid SKU to send a manager an email about it.