Template to get start started writing a TaskPane Outlook Add-in using python for the backend
This template is a modified version of the office Addin taskpane JS repository here: https://github.com/OfficeDev/Office-Addin-TaskPane-JS with a combination of the python webapp repository from here: https://github.com/Azure-Samples/python-docs-hello-world.
The html files are placed in the Templates folder while the assests pictures, javascript files, and css files are placed in the static folder. This is to help flask know where html, css, and javascript files would be.
- 1.0.0.1 - Integrated https into development build using office-addin-dev-certs. We re-wrote the office-addin-dev-certs from typescript to python.
- 1.0.0.0 - Initial release
You can run flask locally for development
- Download the zip or use
git clone https://github.com/Masterjx9/Outlook-Addin-TaskPane-python.gitthen go to the root of the folder and perform the following commands:
py -3 -m venv .venv
.venv\scripts\activate
pip install -r requirements.txt
- In cmd, vscode, or powershell, go to the root of your folder and type
python app.py - Go to OWA and add your maniest.xml. There are multiple methods dependings on your permissions and rights to your azure ad -
-
If you are an admin: https://docs.servicenow.com/bundle/quebec-employee-service-management/page/product/workplace-reservations-outlook-addin/task/upload-the-manifest-file-office365.html
-
If you are a normal user:
- Go to this link: https://aka.ms/olksideload
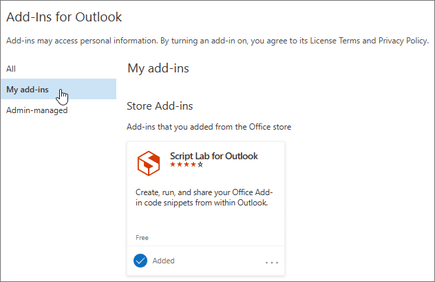
- From the “Custom Add-ins” pop-up click the “My Add-ins” tab
- On the “My Add-ins” tab scroll down to bottom of the page and click the “+ Add a Custom Add-in link.
- In the older version of Outlook web you may have to go to Add-in management is available under “Settings” > “Manage Add-Ins” > “Custom Add-ins” > “My Add-ins” > “+ Add a Custom Add-in”
- select
fileand chose yourmanifest_python.xmlfile, then chooseinstall
- Go to this link: https://aka.ms/olksideload
Note - You will have to change your manifest file to the hosting url later. So you will have to remove and readd the new manifest file later on.
Follow the same instructions given from the microsoft website: https://docs.microsoft.com/en-us/azure/app-service/quickstart-python?tabs=powershell&pivots=python-framework-flask#deploy-the-sample
Once the sample is deployed, test your webapp's urls to make sure they work.
After, you can modify the manifest_python.xml to route all https://localhost:5000 urls to your own hosted url.

