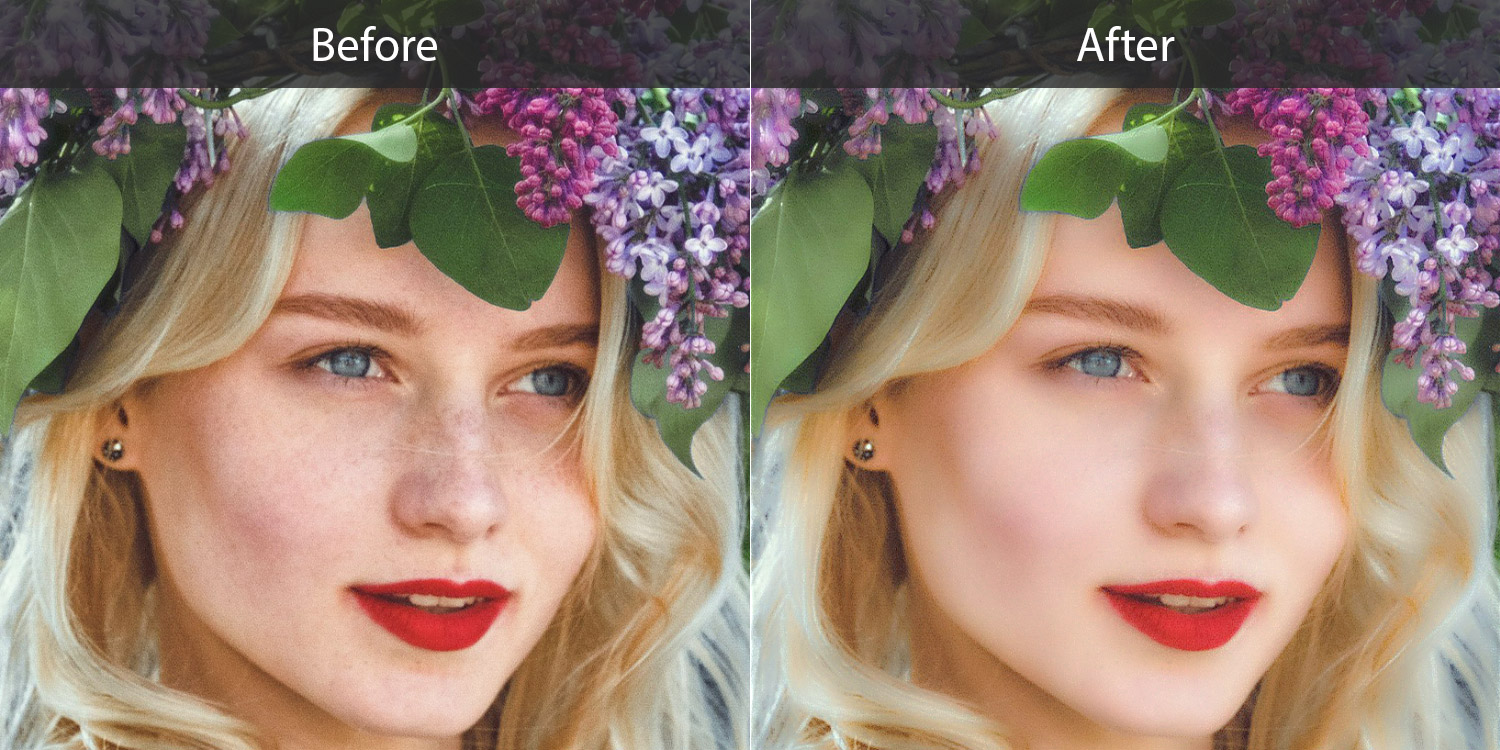
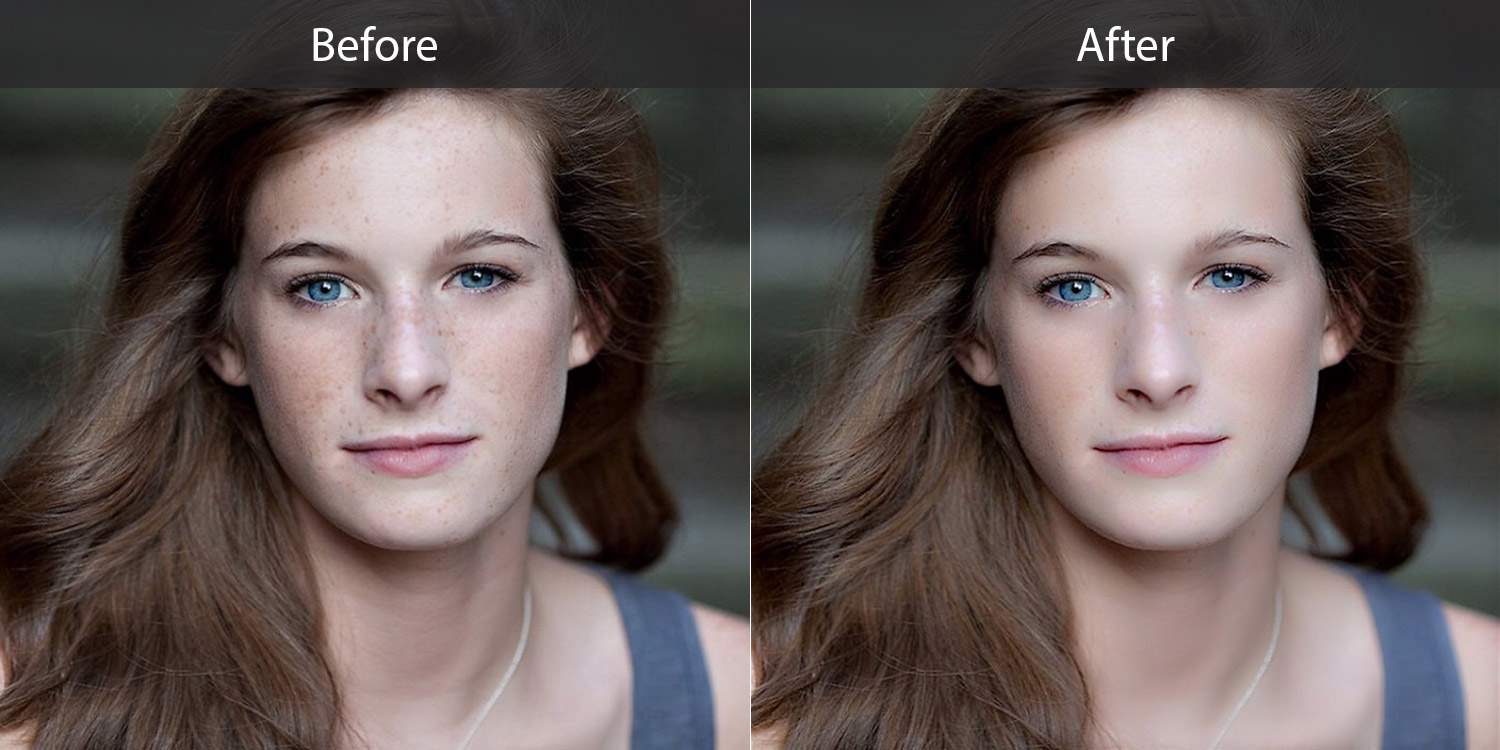
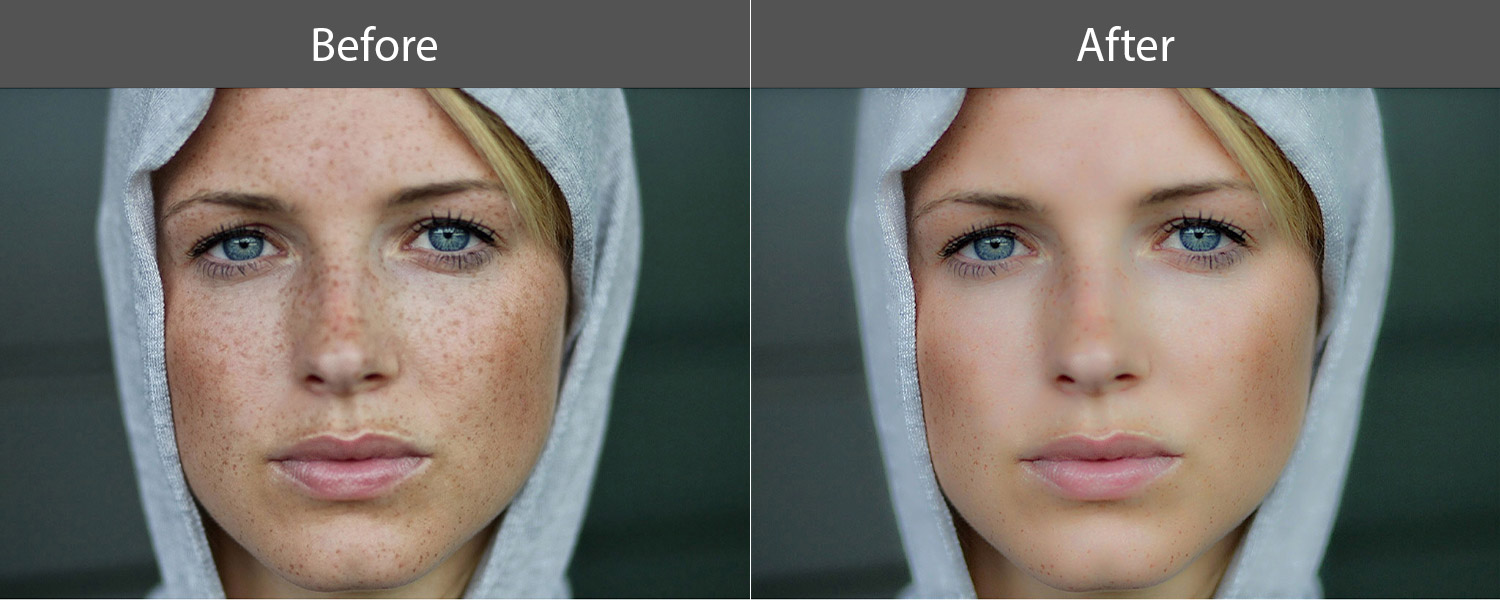
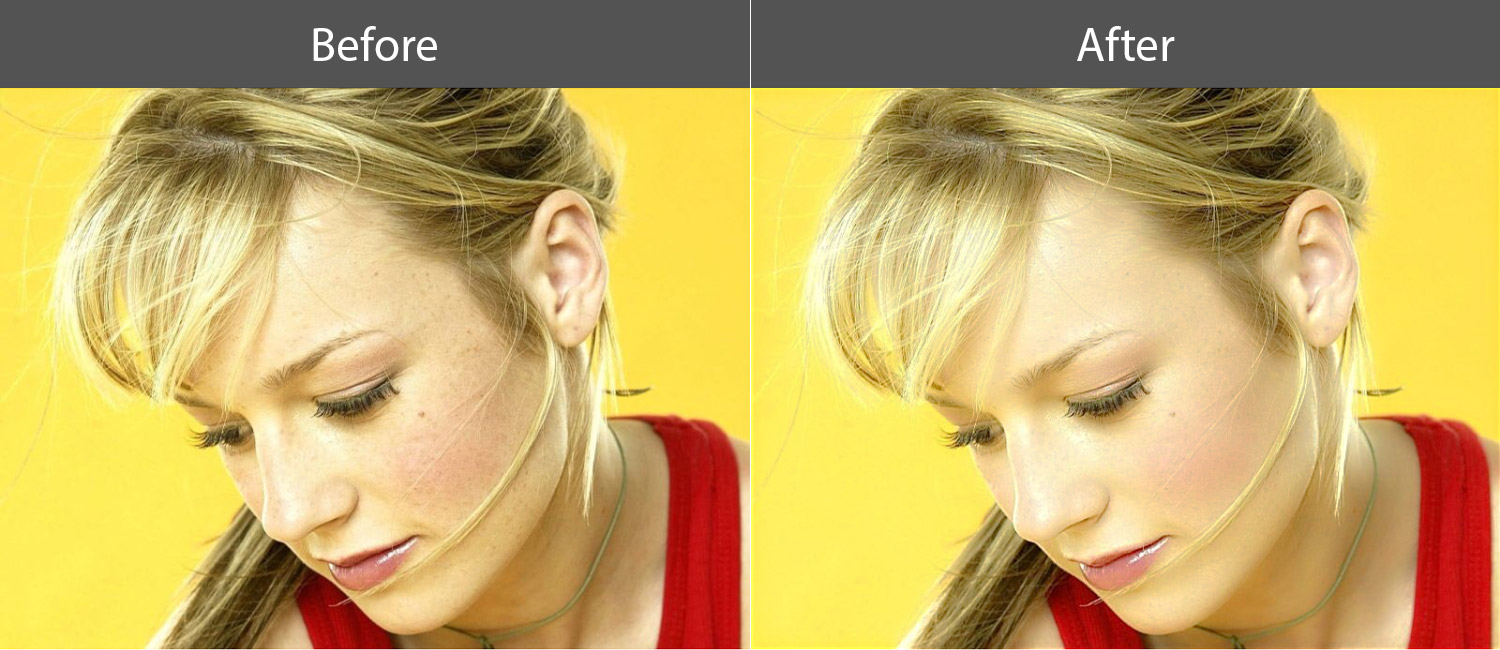
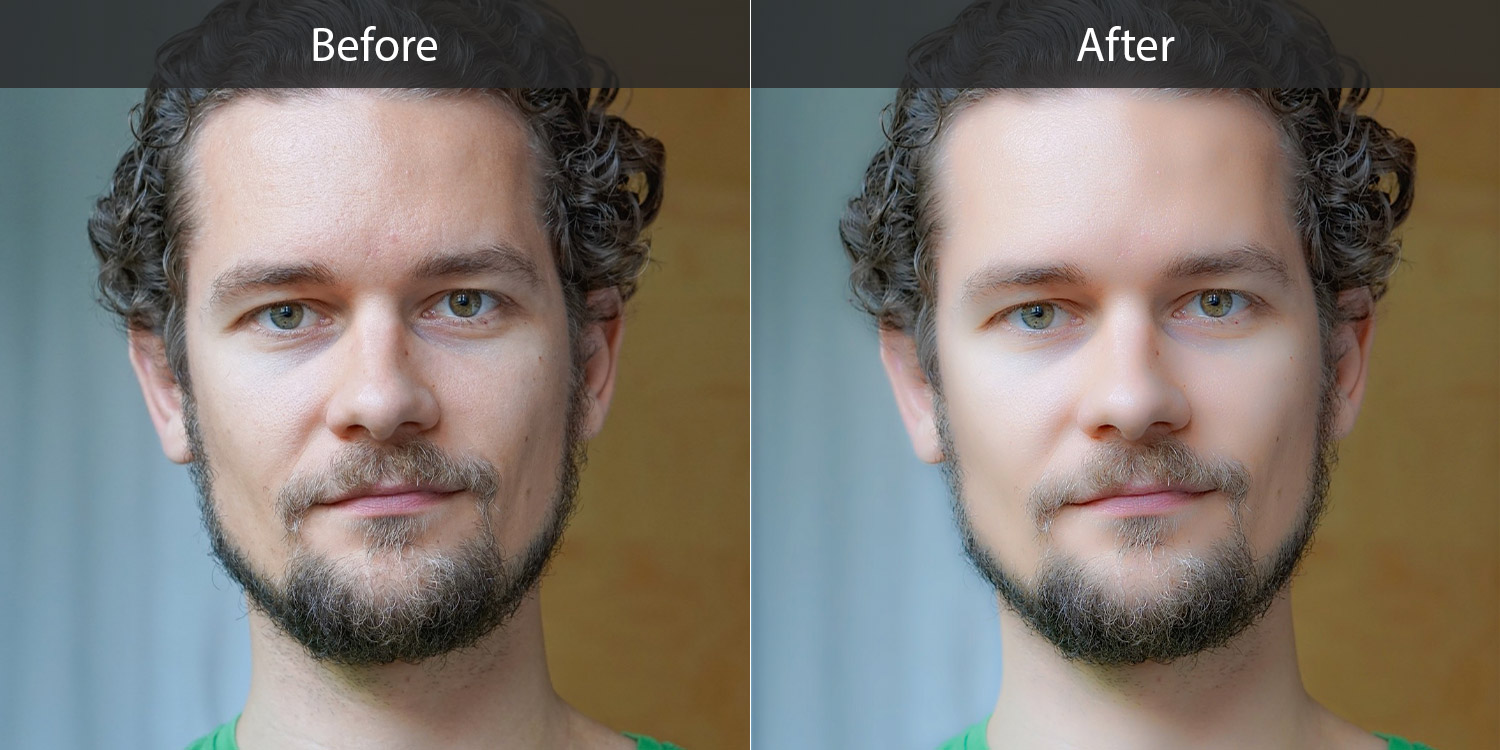
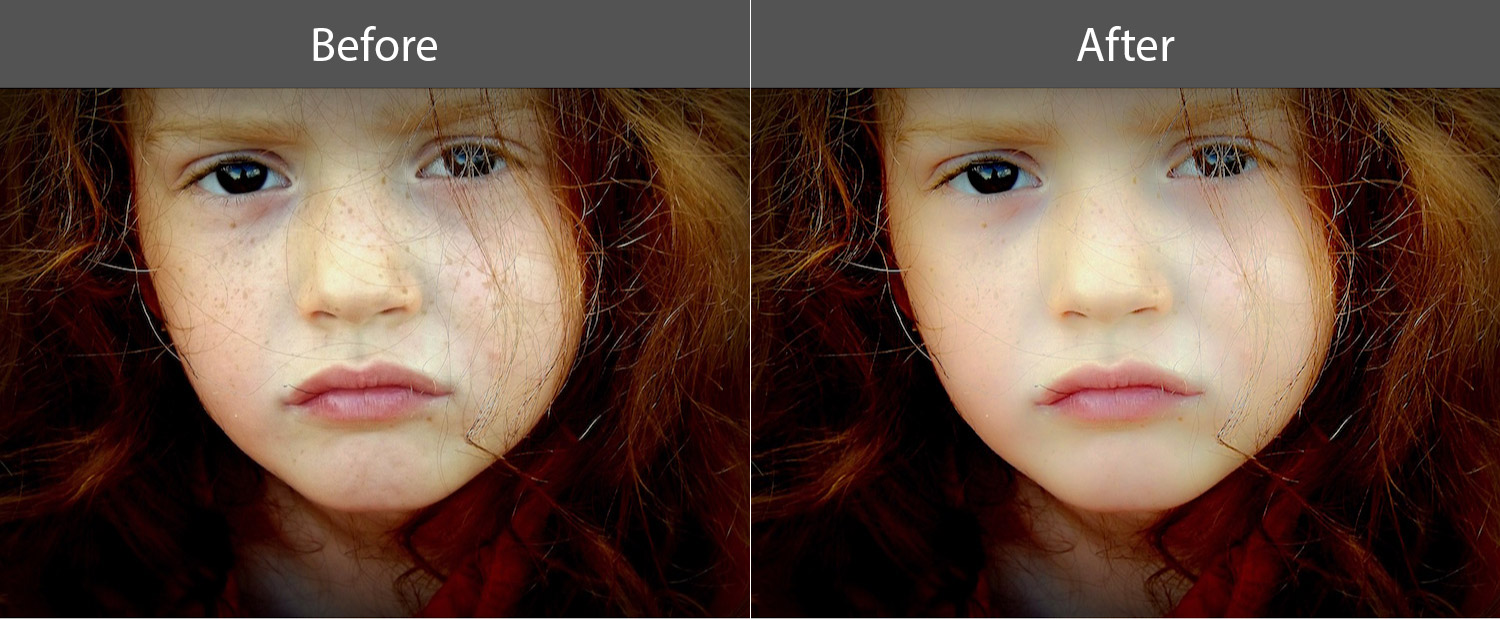
An implementation of High Pass Skin Smoothing using CoreImage.framework
Available on both OS X and iOS.
Tests are made in Instruments with the "OpenGL ES Analysis" template.
The CIContext object is created with EAGLContext and a sRGB working color space (CGColorSpaceCreateDeviceRGB()).
Image Size: 640 x 800
Input Radius: 7.0
Operating System: iOS 9

Device: iPhone 5s / FPS: 60
Device: iPhone 5  / FPS: ~24
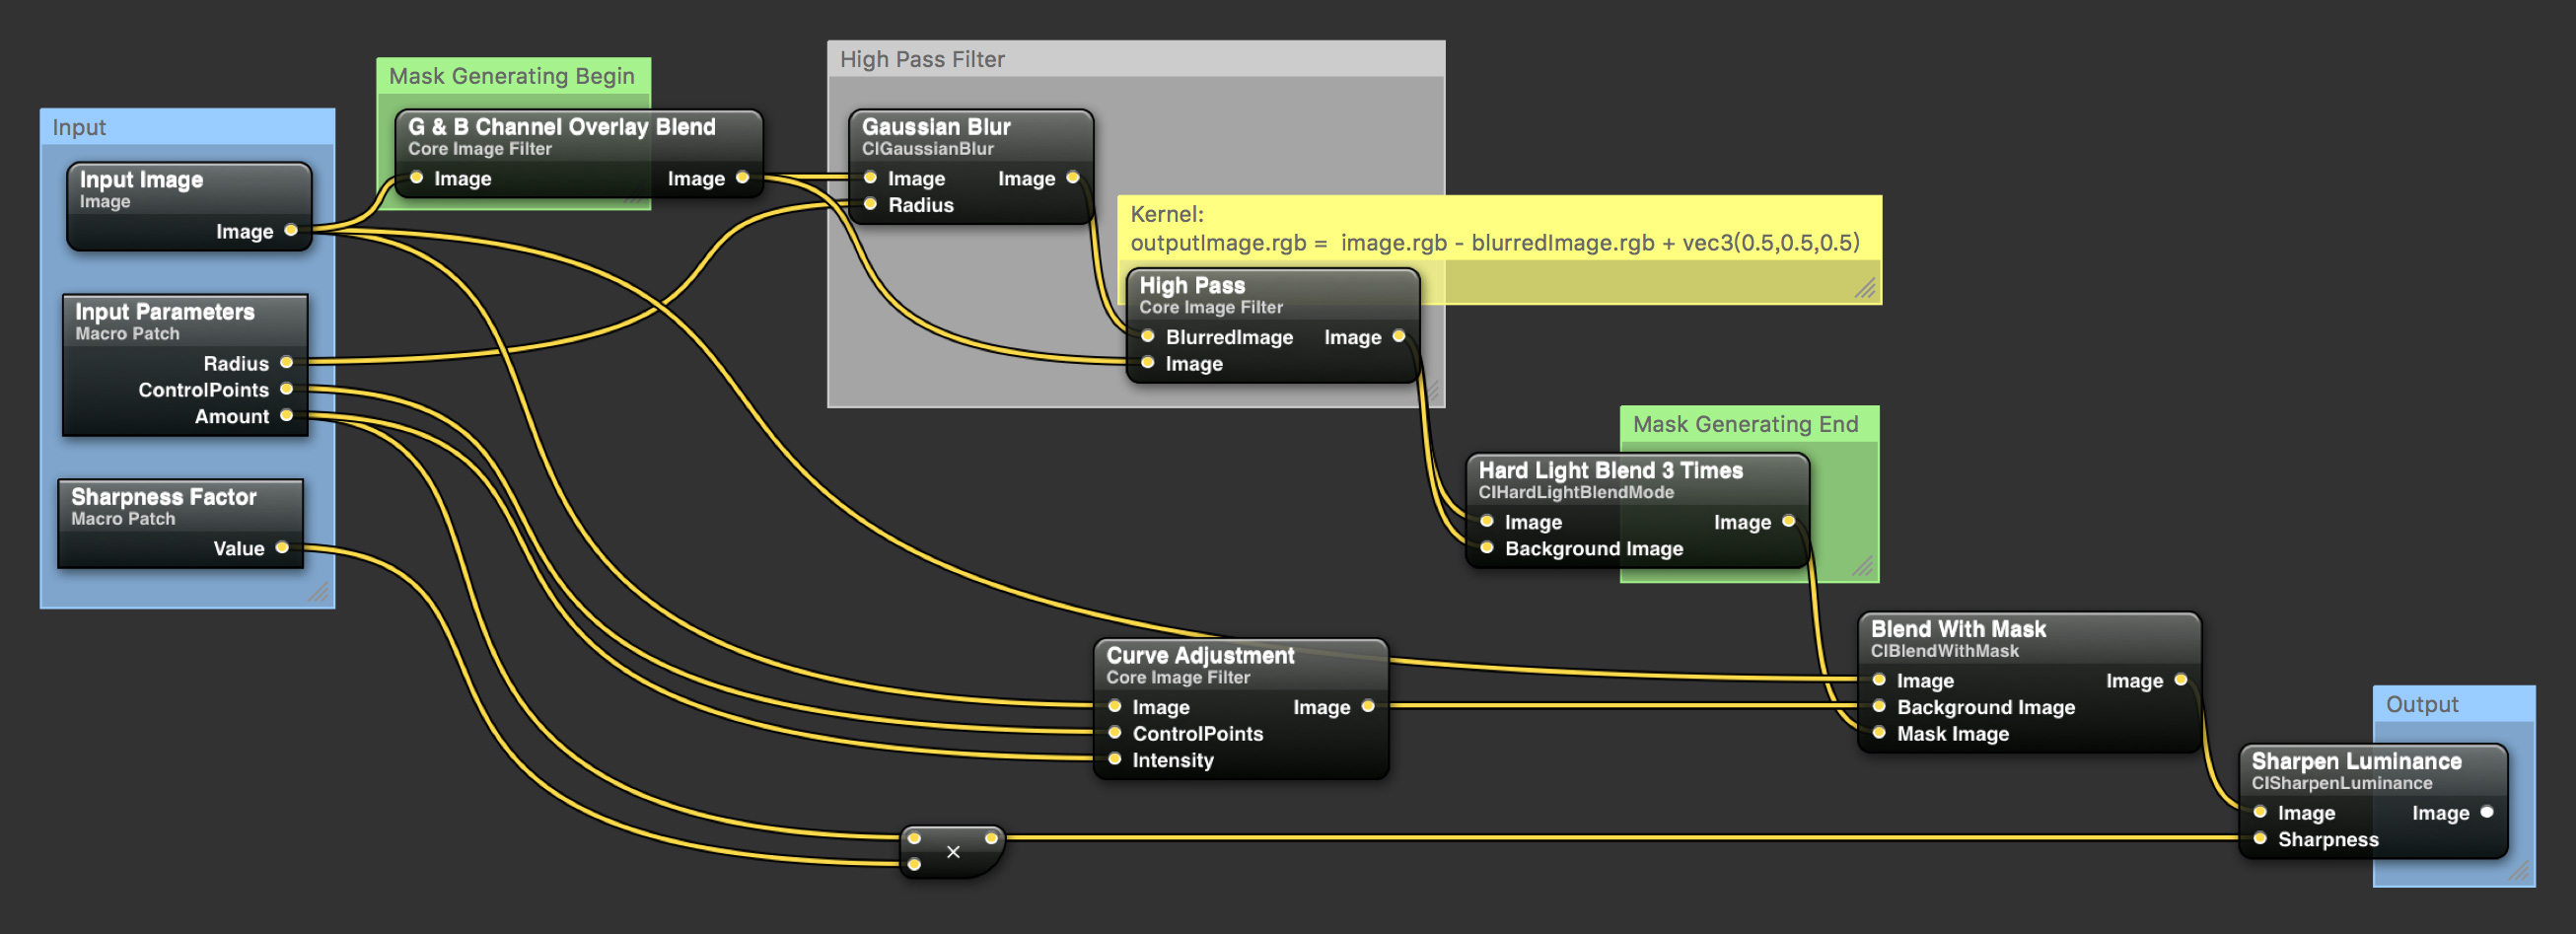
The basic routine of YUCIHighPassSkinSmoothing can be described with the following diagram.
The main theory behind High Pass Skin Smoothing is Frequency Separation.
Frequency separation splits up the tones and colors of a image from its more detailed textures. It is possible because a digital image can be interpreted as different frequencies represented as sine waves.
High frequencies in an image will contain information about fine details, such as skin pores, hair, fine lines, skin imperfections.
Low frequencies are the image data that contains information about volume, tone and color transitions. In other words: shadows and light areas, colors and tones.
https://fstoppers.com/post-production/ultimate-guide-frequency-separation-technique-8699
By using High Pass filter, the image can be separated into high and low spatial frequencies. Then we will be able to smoothing the image while preseving a fine level of detail by applying adjustments (Curve Adjustment in the diagram) to certain frequencies of the image.
There's no High Pass filter in CoreImage. Luckily it's not hard to create one (High Pass Filter section in the diagram):
highpass.rgb = image.rgb - gaussianBlurredImage.rgb + vec3(0.5,0.5,0.5)
A mask image is generated using high pass filter (Green and blue channel overlay blend -> high pass -> hard light blend X 3) for separating the parts of the image which need to be adjusted from the ones that should remain untouched.
This mask image is then used in Blend with Mask (CIBlendWithMask) filter to blend the adjusted image with the untouched one to produce the final output image.
Besides the steps in the diagram, YUCIHighPassSkinSmoothing actually has two more steps.
The exposure of the input image is decreased by 1 EV before being sent to the Mask Generating Routine (in -[YUCIHighPassSkinSmoothingMaskGenerator outputImage] method) and a RGB curve adjustment is added to the mask at the end of the Mask Generating Routine (at the end of YUCIHighPassSkinSmoothingMaskBoost.cikernel).
These steps can make the result better on the areas with high brightness. The whole process can of course work without these two steps.
inputAmount: A number value that controls the intensity of the Curve Adjustment step and affects the sharpness of the final Sharpen step. You use this value to control the overall filter strength. Valid from 0 to 1.0. The default value is 0.75.
inputControlPoints: A array of CIVector that defines the control points of the curve in Curve Adjustment step. The default value of this parameter is [(0,0), (120/255.0,146/255.0), (1,1)].
inputRadius: A number value that controls the radius (in pixel) of the High Pass filter. The default value of this parameter is 8.0. Try adjusting this value according to the resolution of the input image and the level of detail you want to preserve.
inputSharpnessFactor: A number value that controls the sharpness factor of the final Sharpen step. The sharpness value is calculated as inputAmount * inputSharpnessFactor. The default value for this parameter is 0.6. Note: Sharpen is an expensive operation (it involves convolution). The final Sharpen step will make the output image look better, however it is not necessary. Consider setting this parameter to 0 when you need to get the best performance.
For the best result, you need to create the CIContext object with a sRGB working color space instead of the default light-linear color space. You can specify a working color space when creating a context using the kCIContextWorkingColorSpace key in the options dictionary.
You can also try to apply this filter only to the skin/face area of a image, by using a skin detection filter or the core image face detector.
- iOS 8.0+ / OS X 10.11+
- Xcode 7.0+
Use the YUCIHighPassSkinSmoothing, like any other built in core image filters.
Documentation for the input parameters can be found here.
let filter = YUCIHighPassSkinSmoothing()
filter.inputImage = ...
filter.inputAmount = ...
let outputImage = filter.outputImage!

/* Or */

let filter = CIFilter(name: "YUCIHighPassSkinSmoothing")!
filter.setValue(inputImage, forKey: kCIInputImageKey)
filter.setValue(0.7, forKey: "inputAmount")
let outputImage = filter.outputImage!
Open YUCIHighPassSkinSmoothingDemo/YUCIHighPassSkinSmoothingDemo.xcworkspace to run the iOS demo app. The demo app demonstrated how to use the filter and how to use different kinds of core image context to render the output image. The Metal core image context is only available on 64-bit devices with iOS 9.
Please run the demo app on an actual device. The iOS simulator does not provide a pixel-accurate match to the graphics hardware. Rendering performance of OpenGL ES in Simulator has no relation to the performance of OpenGL ES on an actual device.
YUCIHighPassSkinSmoothing makes use of Vivid.
Add the following to your Podfile
pod 'YUCIHighPassSkinSmoothing'
Clone this repo and Vivid, then manually add the files in Sources directories to your project.
You are encouraged to try different input parameters or tweak the interal procedure to make this filter better or just fit your needs.
Don't hesitate to open an issue if you have any idea or suggestion.
If you find a bug and know exactly how to fix it, please open a pull request. Be sure to test the code on both OS X and iOS.
Thanks a lot to Yien Ma for providing a lot of suggestions and fine-tunings to the procedure.
A MetalPetal based version can be found here: MetalPetal/MTIHighPassSkinSmoothingFilter
A GPUImage based version can be found here: YUGPUImageHighPassSkinSmoothing
YUCIHighPassSkinSmoothing is MIT-licensed. See LICENSE file for detail.
Copyright © 2016 Yu Ao


