RESPIRA indoor is an open device made to monitor air quality and ventilation in indoor spaces. This project is an evolution of panStamp's RESPIRA project but focusing only on indoor air quality. RESPIRA indoor is designed to run on cheap ESP8266 boards and connect to iNubo's free RESPIRA platform via MQTT over WiFi. The whole project, firmware and software, is maintained by panStamp and iNubo. The community is invited to build their own RESPIRA indoor devices and deploy them in working and living spaces where people stay most of their time.
Health authorities claim the need to maintain proper ventilation of indoor spaces in order to minimize the risk of transmission of COVID-19. Ventilated spaces generally contain lower concentrations of volatile organic compounds, including viruses and bacteria. Thus, keeping working and living spaces ventilated might significantly reduce the risk of contagion through the air.
CO2 is probably the best indicator of quality of ventilation in indoor spaces. CO2 levels are usually around 400 ppm (parts per million) outdoors and also in well ventilated rooms. On the other hand, closed spaces with insufficient ventilation show CO2 levels rising more or less depending on the number of people staying in the room.
RESPIRA indoor is focusing on the measurement of CO2 to detect improper ventilation and thus, detect the rise of risk of contagion.
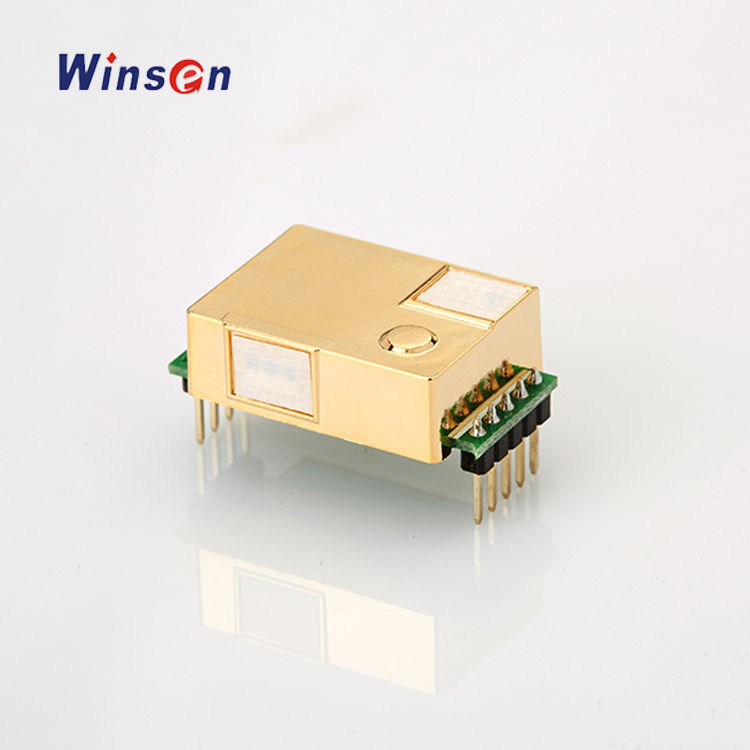
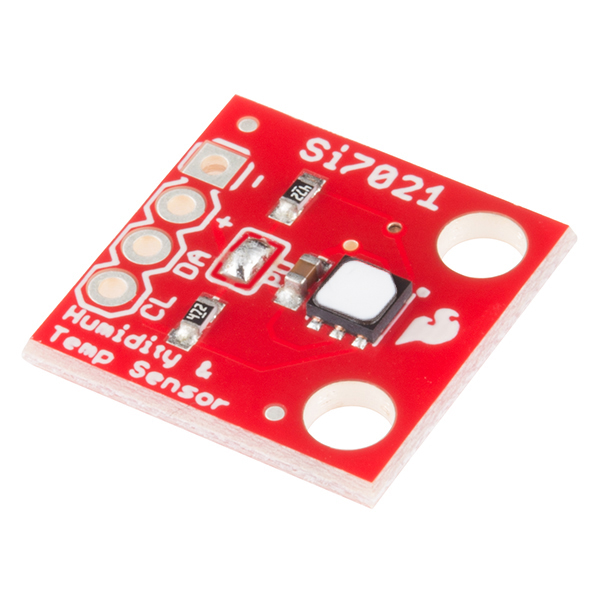
RESPIRA indoor relies on three measurements: CO2 level, relative humidity and temperature. CO2 readings are provided by the popular MH-Z19B sensor whilst temperature and humidity are provided by a SI7021 I2C IC.
This sensor, made by Winsen, is very popular and provides a good quality-price ratio. MH-Z19B can be found in two versions: one with 0-2000ppm range and other with 0-5000ppm. The second version is the most commonly found on eBay and Aliexpress and thus, this is the version used by the RESPIRA indoor code by default. You can however set the 2000ppm range in the code as shown later in this document.
MH-Z19B has three different outputs: UART, analog output and PWM output. We use the PWM output in this project since we want to keep the ESP8266 UART free for debugging purposes.
This IC made by Silicon Labs is an exceptional dual temperature-humidity sensor that can be operated via I2C. There are lots of Arduino libraries for this sensor, which is also available in the form of breakout boards so that there is no need to do any surface soldering.
The code provided in this project relies on Sparkfun’s library for the SI7021 IC so we encourage you to source the breakout board from them.
iNubo developed and deployed R!, a web-based platform that collects and registers temperature, humidity and CO2 readings via MQTT. R! was created exclusively for RESPIRA indoor and can be used free of cost.
RESPIRA indoor takes CO2 samples every 10 seconds. Once every 5 minutes these samples are processed by eliminating the minimum and maximum values and calculating the mean with the rest of values. This mean is then transmitted (every 5 minutes) along with the temperature and humidity by means of a MQTT publication. This is an example of MQTT packet transmitted:
MQTT topic:
respira-indoor/[email protected]/XXXXXXXXXXXX/network
MQTT message:
{
  "owner": "[email protected]",
  "device": "XXXXXXXXXXXX",
  "temperature": 23.56,
  "humidity": 48.31,
  "co2": 1018
}
Where “owner” is the e-mail address used to register your device and “device” is the MAC address of your device.
There is no need to build a PCB for RESPIRA-indoor. You can take an ESP8266 board such as a NodeMCU board or a Wemo D1 and then connect the sensors with wires. The following ESP8266 pinout is used by the current firmware:
| ESP8266 | SI7021 | MH-Z19B |
|---|---|---|
| Vin (5VDC) | Vin | |
| 3.3V | Vcc | |
| GND | GND | GND |
| GPIO5 (SCL) | SCL | |
| GPIO4 (SDA) | SDA | |
| GPIO14 | PWM |
A thing to bear in mind is the need to isolate the temperature and humidity sensor (SI7021) from the ESP8266 since the heat generated by the SoC will introduce important errors in the temperature readings. Keeping sensors and ESP8266 in different enclosures is generally a good practice. The CO2 sensor can also transmit heat to the T+H sensor so separating one sensor from the other is also recommended.
Source code compiles under PlatformIo but it can also be easily ported to Arduino simply by renaming main.cpp to respira-indoor.ino for example.
The following Arduino libraries are required:
- WiFimanager for ESP8266 by tzapu
- SI7021 library by Sparkfun
- PubSubClient MQTT client by Nick O'Leary
All of these libraries can be installed from the Arduino and PlatformIO library managers.
All customizable settings are found in config.h. CO2 sensor range (CO2_PPM_RANGE), transmission interval (TX_INTERVAL) or MQTT broker (MQTT_BROKER) can be modified from there. MQTT_BROKER points by default to R!’s MQTT broker and TX_INTERVAL is set to 5 minutes.
After assembling and programming the device, power it from a 5VDC power supply. If this is the first time you power the device it will deploy a simple access point with an embedded web server featuring WiFiManager on http://192.168.4.1. Then follow these instructions:
-
Connect your cell phone to the WiFi network named respira-indoor_XXXXXXXXXXXX, being XXXXXXXXXXXX the MAC address of your RESPIRA indoor device.
-
Go to http://192.168.4.1 from your cell phone browser and click on “Configure WiFi”.
- Then enter the SSID and WiFi password of the WiFi network you want the RESPIRA indoor device to connect to.
Also enter your e-mail address. This address will be used by R! To send you an e-mail with the link to your dashboard and also to verify that you are not a bot :-). At this point, you will also be allowed to name your device. After this verification you will be able to open the dashboard for the device.
- Save your settings and let your RESPIRA indoor device connect to the network. The first readings will be transmitted 5 minutes after this connection.


