Thanks to the web interface, functionality is fully guaranteed in any case.
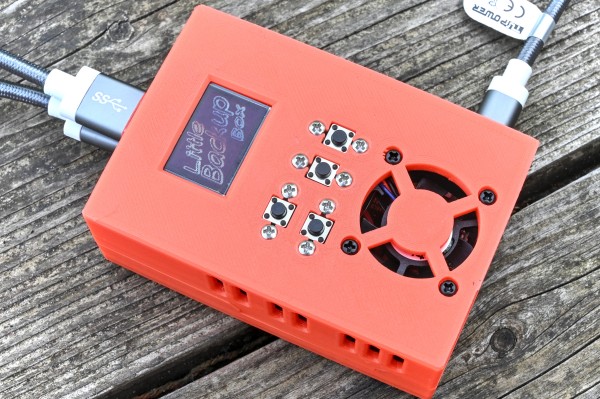
Little Backup Box in its 3D printed case

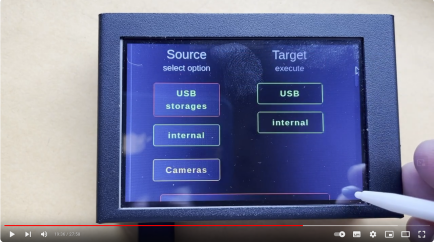
Little Backup Box in a touchscreen housing - watch Dave's video on YouTube
Little Backup Box in a tiny protected housing for Raspberry Pi zero 2W
This software turns a single-board computer into a versatile, pocket-sized backup solution.
Especially for digital photography, this is the solution for backing up images and media files on mass storage devices when traveling or at events.
Backups can be made directly from many cameras and smartphones. Of course, USB storages (card reader) can also serve as a source.
Your valuable data can be backed up on cloud storage from numerous providers - even with VPN protection if necessary.
Media content can be viewed and rated for the subsequent process.

|

|

|

|
Changelog
Have a look at the gallery
Web resources
Some of the features of the web user interface are
-
automate backup from
- usb storage
- camera
- internal storage
- NVMe SSD storage
- cloud storage
- usb storage
- internal storage
- NVMe SSD storage
- rsync server
- cloud storage
-
Tools for memory management
- manual mount local and cloud stoarges
- check disk integrity
- format disks
- check USB device for authenticity
- cloud storage
- Email information about the backup success
- Preview and rate images
- Manage files by file manager
- Convenient configuration via web interface
Please test your Installation carefully before productive use!
Little Backup Box has undergone massive development over the past few months. At the moment, no further major innovations are planned. Instead, the focus should now be on finding and correcting any errors and making the system even more reliable.
Hence the request: Test, test, test!
Please give feedback on problems or translation errors but also on the successful use, if possible with details of your equipment.
As there is no manual available anymore, the github-wiki should replace it one day: https://github.com/outdoorbits/little-backup-box/wiki. It's not particularly detailed yet, but it can certainly help with the most common questions.
-
Create a bootable SD card with Raspberry Pi OS (bookworm or bullseye) for use with Little Backup Box. If you don't plan to use a graphic environment on a regular monitor, you are recommended to use the lite version.'
An easy way is to use Raspberry Pi Imager. Please select "Raspberry Pi OS (other)" > "Raspberry Pi OS Lite (32-bit)" or "Raspberry Pi OS Lite (64-bit)".
In Raspberry Pi Imager you can define options for your image. Shift+Ctrl+x opens the options-dialog. Here you can ...- enable ssh (obligatory!)
- set a password for user pi (obligatory!)
- define wifi settings (optional)
- Keep user pi!!!
- Do not change any more settings (language!).
- Make sure that your Raspberry Pi is connected to the internet.
- Login to your Raspberry Pi. If you are using ssh, there is a report about problems using WINSCP. While WINSCP itself uses putty, it's reported to work with native putty.
-
Run the following command on the Raspberry Pi:
branch='main'; curl -sSL https://raw.githubusercontent.com/outdoorbits/little-backup-box/${branch}/install-little-backup-box.sh | bash -s -- ${branch} 2> install-error.log
Errors are reported into ./install-error.log. -
You will be asked for the default backup mode.
This is the action started automatically after boot. -
You will be asked if you want to install comitup.
The comitup service establishes wifi connectivity for a headless Linux system, using wifi as the only access mechanism to the system. Access the box by its own wifi hotspot or connect it to a local wifi access point. -
Don't worry: Please note this in case you installed via wifi/ssh and decided to install comitup. If your installation-screen scrolls down and seems to freeze at something like Setting up python3-networkmanager (2.2-1) ..., this doesn't mean anything went wrong. Comitup is installed at the end of the process and when it's coming up, it changes your wifi-network. Your ssh-session is broken and you will not get any more information. In the background the installation finishes and a few seconds later the pi reboots. What you can't see anymore is a short information, how to access Little Backup Box. In your setting, this would be the information you need:
******************************************************************************************
*** How to proceed:
***
*** Your raspberrys wifi-configuration has been removed by comitup now. Because comitup has no
*** access-data for your wifi yet, it can't connect to it and will start as a wifi-hotspot:
*** ssid=little-backup-box-nnnn (nnnn is a random number).
***
*** Please connect your mobile or notebook to this wifi.
***
*** There are two options now:
***
*** 1. If you want to configure comitup now, navigate to http://10.41.0.1 (http, not https!)
*** and connect your lbb to your wifi.
*** Connect your mobile or notbook to the same wifi. If you use a display on your lbb, it will
*** tell you its new IP. Connect to lbb:
*** https://IP.IN.YOUR.WIFI (secure, certificate can't be verified automatically, please confirm it)
*** http://IP.IN.YOUR.WIFI:8080 (insecure)
***
*** 2. Alternatively can reach the web UI of Little Backup Box when you are connected to its
*** hotspot as follows:
***
*** https://10.41.0.1 (secure, certificate can't be verified automatically, please confirm it)
*** http://10.41.0.1:8080 (insecure)
***
*** Please use the settings of the web UI to optimally adapt the Little Backup Box for you.
***
*** If you have further questions, please check the wiki first:
*** https://github.com/outdoorbits/little-backup-box/wiki
***
*** We are always happy to receive your feedback!
******************************************************************************************
Have fun!
- Updates can be carried out quickly and easily via the WebUI. Just follow the instructions in the wiki.
- Alternatively just login via ssh and execute the installation-command from above. It will run in update-mode.
- If you've found a bug or have suggestions for improvements, open an issue in the Issues section.
- If you could spend a bit of time and add a new language - great, just tell me, it's easy!
- To add new features or fix issues yourself, follow the following steps.
- Open an issue to discuss your idea.
- Fork the project's repository.
- Create a feature branch using the
git checkout -b new-featurecommand. - Add your new feature or fix bugs and run the
git commit -am 'Add a new feature'command to commit changes. - Push changes using the
git push origin new-featurecommand. - Submit a pull request (in your fork at github.com).
- Dmitri Popov
- Kerry Staite (STL files)
- munecito (corrections of the Spanish translation)
