❤️💕💕CS自学指南,大学教育无论是深度还是广度都没有办法支撑我们的职业素养,这个板块算是自己在CS学习中额外补充和记录的。个人博客:http://nsddd.top
[TOC]
Algolia 为构建者提供构建世界级体验所需的搜索和推荐服务。Algolia 是一个数据库实时搜索服务,能够提供毫秒级的数据库搜索服务,并且其服务能以 API 的形式方便地布局到网页、客户端、APP 等多种场景。
Algolia是一个托管搜索引擎,提供全文,数字和分面搜索,能够从第一次击键提供实时结果。Algolia强大的API可让您在网站和移动应用程序中快速无缝地实施搜索。我们的搜索 API 每月为数千家公司提供数十亿次查询支持,在世界任何地方的 100 毫秒内即可提供相关结果。
方法:
npm i -D @vuepress/plugin-docsearch@next
import { docsearchPlugin } from '@vuepress/plugin-docsearch'

export default {
  plugins: [
    docsearchPlugin({
      // 配置项
    }),
  ],
}
你可以通过 themeConfig.algolia 选项来用 Algolia 搜索 (opens new window)替换内置的搜索框。要启用 Algolia 搜索,你需要至少提供 apiKey 和 indexName:
// .vuepress/config.js
module.exports = {
  themeConfig: {
    algolia: {
      apiKey: '<API_KEY>',
      indexName: '<INDEX_NAME>'
      // 如果 Algolia 没有为你提供 `appId` ,使用 `BH4D9OD16A` 或者移除该配置项
      appId: '<APP_ID>',
    }
  }
}
注意:
不同于开箱即用的 内置搜索,Algolia 搜索 (opens new window)需要你在使用之前将你的网站提交给它们用于创建索引。
或者,你也可以 运行你自己的爬虫在新窗口打开 来创建索引,然后使用你自己的 appId, apiKey 和 indexName 来配置该插件。
new Crawler({
  appId: 'YOUR_APP_ID',
  apiKey: 'YOUR_API_KEY',
  rateLimit: 8,
  startUrls: [
    // 这是 Algolia 开始抓取网站的初始地址
    // 如果你的网站被分为数个独立部分,你可能需要在此设置多个入口链接
    'https://YOUR_WEBSITE_URL/',
  ],
  sitemaps: [
    // 如果你在使用 Sitemap 插件 (如: vuepress-plugin-sitemap2),你可以提供 Sitemap 链接
    'https://YOUR_WEBSITE_URL/sitemap.xml',
  ],
  ignoreCanonicalTo: false,
  exclusionPatterns: [
    // 你可以通过它阻止 Algolia 抓取某些 URL
  ],
  discoveryPatterns: [
    // 这是 Algolia 抓取 URL 的范围
    'https://YOUR_WEBSITE_URL/**',
  ],
  // 爬虫执行的计划时间,可根据文档更新频率设置
  schedule: 'at 02:00 every 1 day',
  actions: [
    // 你可以拥有多个 action,特别是你在一个域名下部署多个文档时
    {
      // 使用适当的名称为索引命名
      indexName: 'YOUR_INDEX_NAME',
      // 索引生效的路径
      pathsToMatch: ['https://YOUR_WEBSITE_URL/**'],
      // 控制 Algolia 如何抓取你的站点
      recordExtractor: ({ $, helpers }) => {
        // @vuepress/theme-default 的选项
        return helpers.docsearch({
          recordProps: {
            lvl0: {
              selectors: '.sidebar-heading.active',
              defaultValue: 'Documentation',
            },
            lvl1: '.theme-default-content h1',
            lvl2: '.theme-default-content h2',
            lvl3: '.theme-default-content h3',
            lvl4: '.theme-default-content h4',
            lvl5: '.theme-default-content h5',
            lvl6: '.theme-default-content h6',
            content: '.theme-default-content p, .theme-default-content li',
          },
          indexHeadings: true,
        })
      },
    },
  ],
  initialIndexSettings: {
    // 控制索引如何被初始化,这仅当索引尚未生成时有效
    // 你可能需要在修改后手动删除并重新生成新的索引
    YOUR_INDEX_NAME: {
      attributesForFaceting: ['type', 'lang'],
      attributesToRetrieve: ['hierarchy', 'content', 'anchor', 'url'],
      attributesToHighlight: ['hierarchy', 'hierarchy_camel', 'content'],
      attributesToSnippet: ['content:10'],
      camelCaseAttributes: ['hierarchy', 'hierarchy_radio', 'content'],
      searchableAttributes: [
        'unordered(hierarchy_radio_camel.lvl0)',
        'unordered(hierarchy_radio.lvl0)',
        'unordered(hierarchy_radio_camel.lvl1)',
        'unordered(hierarchy_radio.lvl1)',
        'unordered(hierarchy_radio_camel.lvl2)',
        'unordered(hierarchy_radio.lvl2)',
        'unordered(hierarchy_radio_camel.lvl3)',
        'unordered(hierarchy_radio.lvl3)',
        'unordered(hierarchy_radio_camel.lvl4)',
        'unordered(hierarchy_radio.lvl4)',
        'unordered(hierarchy_radio_camel.lvl5)',
        'unordered(hierarchy_radio.lvl5)',
        'unordered(hierarchy_radio_camel.lvl6)',
        'unordered(hierarchy_radio.lvl6)',
        'unordered(hierarchy_camel.lvl0)',
        'unordered(hierarchy.lvl0)',
        'unordered(hierarchy_camel.lvl1)',
        'unordered(hierarchy.lvl1)',
        'unordered(hierarchy_camel.lvl2)',
        'unordered(hierarchy.lvl2)',
        'unordered(hierarchy_camel.lvl3)',
        'unordered(hierarchy.lvl3)',
        'unordered(hierarchy_camel.lvl4)',
        'unordered(hierarchy.lvl4)',
        'unordered(hierarchy_camel.lvl5)',
        'unordered(hierarchy.lvl5)',
        'unordered(hierarchy_camel.lvl6)',
        'unordered(hierarchy.lvl6)',
        'content',
      ],
      distinct: true,
      attributeForDistinct: 'url',
      customRanking: [
        'desc(weight.pageRank)',
        'desc(weight.level)',
        'asc(weight.position)',
      ],
      ranking: [
        'words',
        'filters',
        'typo',
        'attribute',
        'proximity',
        'exact',
        'custom',
      ],
      highlightPreTag: '<span class="algolia-docsearch-suggestion--highlight">',
      highlightPostTag: '</span>',
      minWordSizefor1Typo: 3,
      minWordSizefor2Typos: 7,
      allowTyposOnNumericTokens: false,
      minProximity: 1,
      ignorePlurals: true,
      advancedSyntax: true,
      attributeCriteriaComputedByMinProximity: true,
      removeWordsIfNoResults: 'allOptional',
    },
  },
})
上述 recordProps 是用于默认主题的配置,你可以根据你使用的主题来修改它们。
注意 initialIndexSettings.YOUR_INDEX_NAME.attributesForFaceting 字段必须包含 'lang',否则该插件将无法正常工作。
如果您想通过更强的控制力更新结果,或者您不符合我们的清单,或者您的网站位于防火墙后面,则可能需要自己运行爬网程序。
DocSearch的整个代码库都是开源的,我们将其打包为Docker映像,以便您更轻松地使用它。
使用爬虫就可以去除徽章,注意:徽标将自动添加到下拉列表中,并带有默认样式。这是我们让更多人了解我们工作的方式,以及他们如何从其网站上的快速相关搜索中受益。
文档搜索抓取器是用Python编写的,并受到Crapy框架的启发。它遍历您网站的所有页面,并从HTML结构中提取内容以填充Algolia索引。
它会自动跟随每个内部链接,以确保我们没有遗漏任何内容,并使用HTML结构的语义来构建其记录。这意味着 h1,h2 等(selectors)标题用作层次结构,并且每个 p 都用作潜在结果。
这些CSS选择器可以被覆盖,每个网站都有自己的JSON配置文件,更详细地描述了抓取器的行为方式。您可以在相关部分找到完整的选项列表.
如果你想自己运行文档搜索,所有的代码都是开源的,甚至打包成一个 Docker 映像。下载它,并使用您自己的凭据运行它。
您需要将algolia应用程序 ID 和管理 API 密钥设置为环境变量。如果您没有algolia帐户,则需要创建一个
APPLICATION_ID设置为您的阿尔戈利亚应用程序 IDAPI_KEY设置为您的 API 密钥。请确保使用对索引具有写入访问权限的 API 密钥。它需要 ACL addObject、editSettings和deleteIndex.
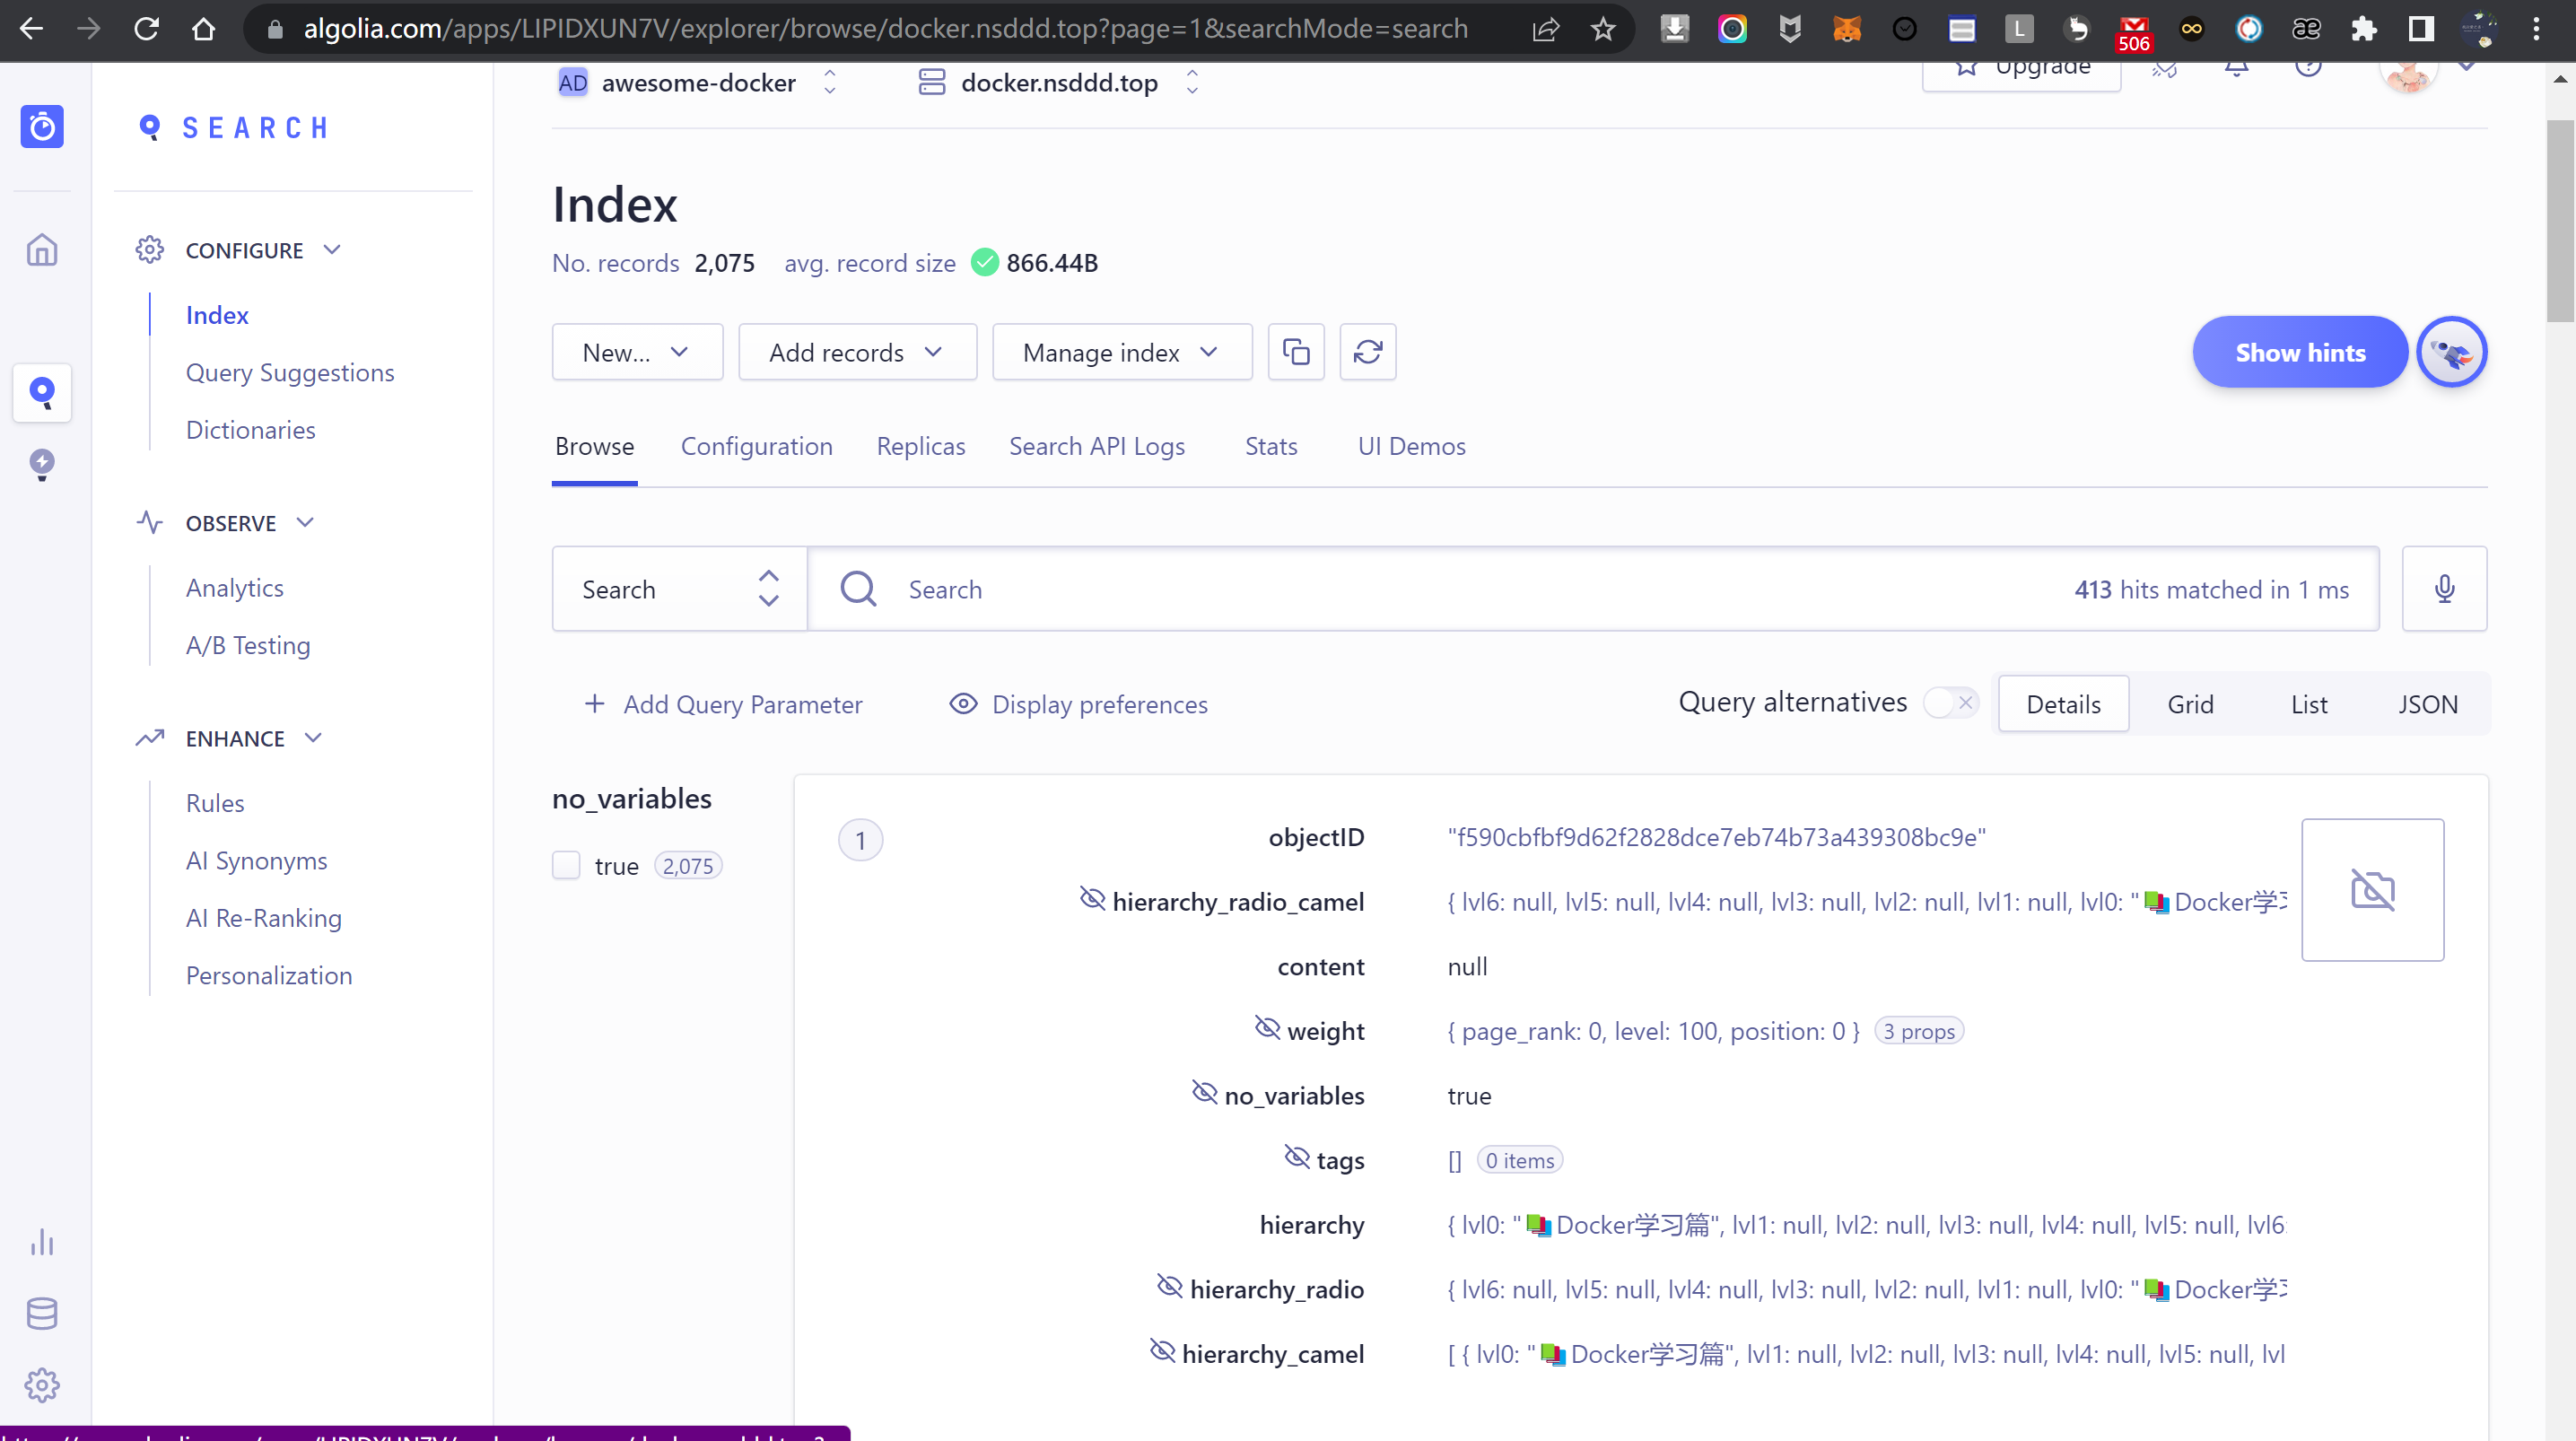
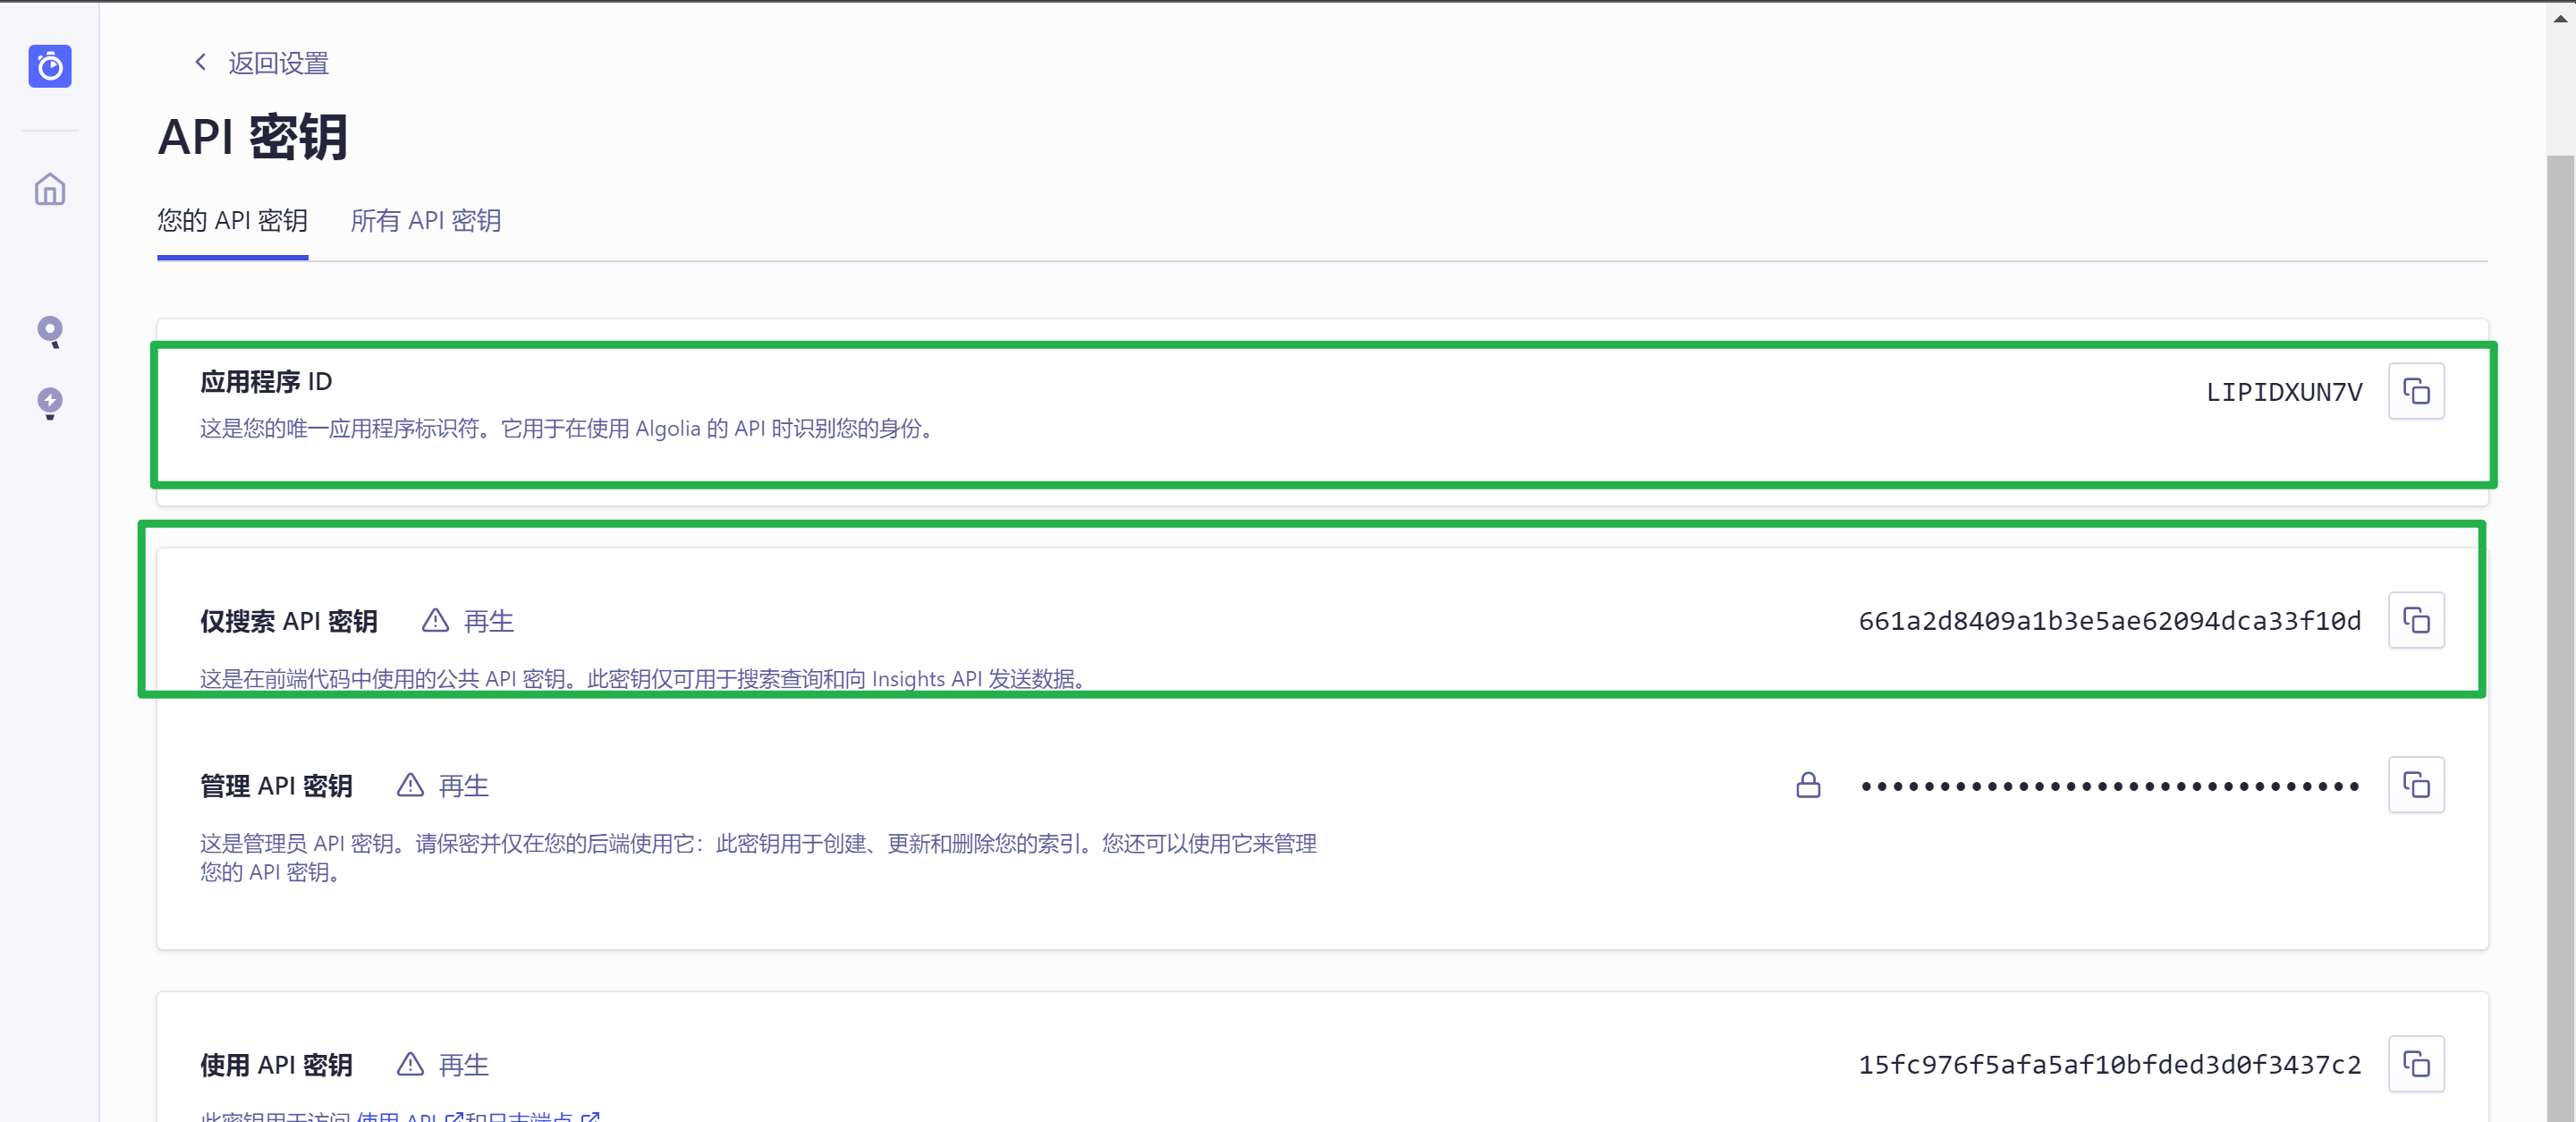
创建完索引后,来到设置——API Keys 获取 Application ID 和 Admin API Key。创建 .env 文件,将两个参数填入。
为方便起见,您可以在存储库根目录中创建.env 文件。
APPLICATION_ID=LIPIDXUN7V
API_KEY=e0bc57bb5910bb4cbaff54471af173d4
配置完 API,接下去需要配置爬虫的选项。创建 config.json 文件,对于 VuePress 可以用以下配置,修改 index_name 为之前创建的索引名称,start_urls 为网站的首页地址,其余选项可保持默认。
{
  "index_name": "docker.nsddd.top",
  "start_urls": [{ "url": "https://docker.nsddd.top/", "variables": { "lang": ["zh-CN"] } }],
  "selectors": {
    "lvl0": ".sidebar-heading.active",
    "lvl1": ".theme-default-content h1",
    "lvl2": ".theme-default-content h2",
    "lvl3": ".theme-default-content h3",
    "lvl4": ".theme-default-content h4",
    "lvl5": ".theme-default-content h5",
    "lvl6": ".theme-default-content h6",
    "text": ".theme-default-content p, .theme-default-content li"
  },
  "initialIndexSettings": {
    "attributesForFaceting": ["type", "lang"],
    "attributesToRetrieve": ["hierarchy", "content", "anchor", "url"],
    "attributesToHighlight": ["hierarchy", "hierarchy_camel", "content"],
    "attributesToSnippet": ["content:10"],
    "camelCaseAttributes": ["hierarchy", "hierarchy_radio", "content"],
    "searchableAttributes": [
      "unordered(hierarchy_radio_camel.lvl0)",
      "unordered(hierarchy_radio.lvl0)",
      "unordered(hierarchy_radio_camel.lvl1)",
      "unordered(hierarchy_radio.lvl1)",
      "unordered(hierarchy_radio_camel.lvl2)",
      "unordered(hierarchy_radio.lvl2)",
      "unordered(hierarchy_radio_camel.lvl3)",
      "unordered(hierarchy_radio.lvl3)",
      "unordered(hierarchy_radio_camel.lvl4)",
      "unordered(hierarchy_radio.lvl4)",
      "unordered(hierarchy_radio_camel.lvl5)",
      "unordered(hierarchy_radio.lvl5)",
      "unordered(hierarchy_radio_camel.lvl6)",
      "unordered(hierarchy_radio.lvl6)",
      "unordered(hierarchy_camel.lvl0)",
      "unordered(hierarchy.lvl0)",
      "unordered(hierarchy_camel.lvl1)",
      "unordered(hierarchy.lvl1)",
      "unordered(hierarchy_camel.lvl2)",
      "unordered(hierarchy.lvl2)",
      "unordered(hierarchy_camel.lvl3)",
      "unordered(hierarchy.lvl3)",
      "unordered(hierarchy_camel.lvl4)",
      "unordered(hierarchy.lvl4)",
      "unordered(hierarchy_camel.lvl5)",
      "unordered(hierarchy.lvl5)",
      "unordered(hierarchy_camel.lvl6)",
      "unordered(hierarchy.lvl6)",
      "content"
    ]
  }
}您可以从打包的 Docker 映像运行爬网来抓取您的网站。您将需要安装 jq,这是一个轻量级命令行 JSON 处理器
centos一行命令就能搞定:
yum install jq用 Dockerfile 直接安装发布二进制文件:
ENV JQ_VERSION='1.5'

RUN wget --no-check-certificate https://raw.githubusercontent.com/stedolan/jq/master/sig/jq-release.key -O /tmp/jq-release.key && \
    wget --no-check-certificate https://raw.githubusercontent.com/stedolan/jq/master/sig/v${JQ_VERSION}/jq-linux64.asc -O /tmp/jq-linux64.asc && \
    wget --no-check-certificate https://github.com/stedolan/jq/releases/download/jq-${JQ_VERSION}/jq-linux64 -O /tmp/jq-linux64 && \
    gpg --import /tmp/jq-release.key && \
    gpg --verify /tmp/jq-linux64.asc /tmp/jq-linux64 && \
    cp /tmp/jq-linux64 /usr/bin/jq && \
    chmod +x /usr/bin/jq && \
    rm -f /tmp/jq-release.key && \
    rm -f /tmp/jq-linux64.asc && \
    rm -f /tmp/jq-linux64
然后,您需要根据您的配置启动爬网。您应该查看专用的配置文档.
docker run -it --env-file=.env -e "CONFIG=$(cat ./config.json | jq -r tostring)" algolia/docsearch-scraper我成功的样子多酷?
抓取完成后,您可以跳转到集成步骤。
安装插件:
npm i -D @vuepress/plugin-docsearch@next
导入插件:
hugo等其他的框架参考对应的插件,我们在vuepress配置文件中导入下面的内容
关键字:
apiKey
类型:
string是否必需:
true详情:
从 DocSearch 团队收到的
apiKey,或者由你自己生成。参考:
#indexName
类型:
string是否必需:
true详情:
从 DocSearch 团队收到的
indexName,或者由你自己生成。参考:
#appId
类型:
string是否必需:
true详情:
用于设置你的 Application ID。
参考:
#searchParameters
类型:
SearchParameters详情:
Algolia 搜索 API 参数。
参考:
#placeholder
类型:
string默认值:
'Search docs'详情:
搜索输入框的 placeholder 属性。
参考:
#disableUserPersonalization
类型:
boolean默认值:
false详情:
是否禁用所有的个性化功能:最近的搜索、收藏的搜索结果等。
参考:
#initialQuery
类型:
string详情:
打开弹窗时的初始请求。
参考:
#translations
类型:
Partial<DocSearchTranslations>详情:
允许替换 DocSearch 按钮和弹窗内的默认文字。
参考:
#locales
类型:
Record<string, DocsearchPluginOptions>详情:
在不同 locales 下对该插件进行不同的配置。
该插件的所有其他选项都可以在 locale 中进行配置。
配置
注意配置文件中的api地址:
 docsearchPlugin({
      apiKey: "661a2d8409a1b3e5ae62094dca33f10d",
      appId: "LIPIDXUN7V",
      indexName: "docker.nsddd.top",
      searchParameters: {
        attributesToSnippet: ["lvl1:30", "content:25"],
      },
      locales: {
        "/": {
          placeholder: "搜索文档",
          translations: {
            button: {
              buttonText: "搜索文档",
              buttonAriaLabel: "搜索文档",
            },
            modal: {
              searchBox: {
                resetButtonTitle: "清除查询条件",
                resetButtonAriaLabel: "清除查询条件",
                cancelButtonText: "取消",
                cancelButtonAriaLabel: "取消",
              },
              startScreen: {
                recentSearchesTitle: "搜索历史",
                noRecentSearchesText: "没有搜索历史",
                saveRecentSearchButtonTitle: "保存至搜索历史",
                removeRecentSearchButtonTitle: "从搜索历史中移除",
                favoriteSearchesTitle: "收藏",
                removeFavoriteSearchButtonTitle: "从收藏中移除",
              },
              errorScreen: {
                titleText: "无法获取结果",
                helpText: "你可能需要检查你的网络连接",
              },
              footer: {
                selectText: "选择",
                navigateText: "切换",
                closeText: "关闭",
                searchByText: "搜索提供者",
              },
              noResultsScreen: {
                noResultsText: "无法找到相关结果",
                suggestedQueryText: "你可以尝试查询",
                reportMissingResultsText: "你认为该查询应该有结果?",
                reportMissingResultsLinkText: "点击反馈",
              },
            },
          },
        },
      },
}),你可以通过 @docsearch/css在新窗口打开 提供的 CSS 变量来自定义样式:
:root {
  --docsearch-primary-color: rgb(84, 104, 255);
  --docsearch-text-color: rgb(28, 30, 33);
  --docsearch-spacing: 12px;
  --docsearch-icon-stroke-width: 1.4;
  --docsearch-highlight-color: var(--docsearch-primary-color);
  --docsearch-muted-color: rgb(150, 159, 175);
  --docsearch-container-background: rgba(101, 108, 133, 0.8);
  --docsearch-logo-color: rgba(84, 104, 255);

  /* modal */
  --docsearch-modal-width: 560px;
  --docsearch-modal-height: 600px;
  --docsearch-modal-background: rgb(245, 246, 247);
  --docsearch-modal-shadow: inset 1px 1px 0 0 rgba(255, 255, 255, 0.5), 0 3px
      8px 0 rgba(85, 90, 100, 1);

  /* searchbox */
  --docsearch-searchbox-height: 56px;
  --docsearch-searchbox-background: rgb(235, 237, 240);
  --docsearch-searchbox-focus-background: #fff;
  --docsearch-searchbox-shadow: inset 0 0 0 2px var(--docsearch-primary-color);

  /* hit */
  --docsearch-hit-height: 56px;
  --docsearch-hit-color: rgb(68, 73, 80);
  --docsearch-hit-active-color: #fff;
  --docsearch-hit-background: #fff;
  --docsearch-hit-shadow: 0 1px 3px 0 rgb(212, 217, 225);

  /* key */
  --docsearch-key-gradient: linear-gradient(
    -225deg,
    rgb(213, 219, 228) 0%,
    rgb(248, 248, 248) 100%
  );
  --docsearch-key-shadow: inset 0 -2px 0 0 rgb(205, 205, 230), inset 0 0 1px 1px
      #fff, 0 1px 2px 1px rgba(30, 35, 90, 0.4);

  /* footer */
  --docsearch-footer-height: 44px;
  --docsearch-footer-background: #fff;
  --docsearch-footer-shadow: 0 -1px 0 0 rgb(224, 227, 232), 0 -3px 6px 0 rgba(69, 98, 155, 0.12);
}scraper 是一个基于 scrapy的 python 工具。我们推荐使用pipenv来安装 python 环境。
- 克隆scraper存储库。
- 安装 pipenv
pipenv installpipenv shell
git clone https://github.com/algolia/docsearch-scraper
pip install --user pipenv
pipenv install
pipenv shell如果计划使用浏览器仿真(js_render设置为 true),则需要执行此额外步骤。如果不这样做,则可以关闭此步骤。
某些网站呈现需要脚本。我们的履带依赖于无头镀铬仿真。您需要设置一个浏览器驱动程序。
- 安装适合您的操作系统和 Chrome 版本的驱动程序。我们建议使用最新版本。
- 在
.envCHROMEDRIVER_PATH环境变量CHROMEDRIVER_PATH。此路径必须以下载的解压缩驱动程序为目标。
你准备好了。
运行pipenv shell将启用您的虚拟环境。从那里,您可以使用以下命令运行一个爬网:
./docsearch run /path/to/your/config.json或者从 Docker 映像中:
./docsearch docker:run /path/to/your/config.json这将启动爬网。它从解析的页面中提取内容,并将构建的记录推送到Algolia。
要创建配置,请运行 ./docsearch bootstrap。提示将要求您提供一些信息,并将创建可用作基础的 JSON 配置。
$ ./docsearch bootstrap
# Enter your documentation url
start url: http://www.example.com/docs/
# Pick another name, or press enter
index_name is example [enter to confirm]: <Enter>

=================
{
  "index_name": "example",
  "start_urls": [
    "http://www.example.com/docs/"
  ],
  "stop_urls": [],
  "selectors": {
    "lvl0": "FIXME h1",
    "lvl1": "FIXME h2",
    "lvl2": "FIXME h3",
    "lvl3": "FIXME h4",
    "lvl4": "FIXME h5",
    "lvl5": "FIXME h6",
    "text": "FIXME p, FIXME li"
  }
}
=================
将此文本创建一个文件到文件名 example.json 中,我们稍后将使用它来启动爬网。您可以浏览实时配置列表.
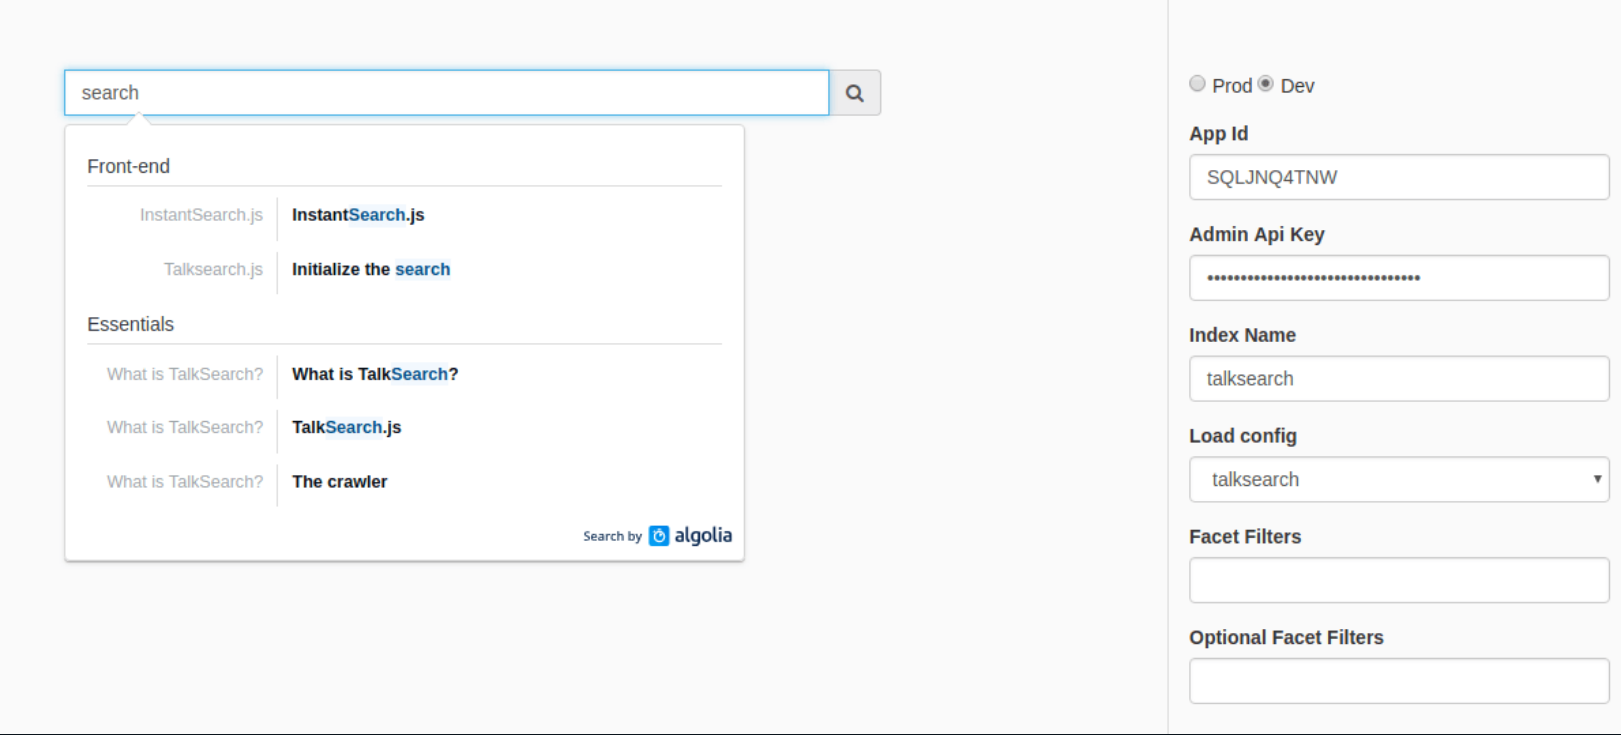
您可以通过运行 ./docsearch playground来测试结果。这将打开一个包含搜索输入的网页。您可以针对索引结果执行实时测试。
请注意,如果命令失败(它可能发生在非 Mac 计算机上),则可以通过在 ./playground 子目录中运行实时服务器来获得相同的结果。
一旦您对配置感到满意,就可以按照此处的说明将下拉菜单集成到您的网站中.
不同之处在于,您还必须将 appId 密钥添加到docsearch() 实例中。另外,不要忘记在此处使用搜索 API 密钥(换句话说,不是用于爬网的写入 API 密钥)。
docsearch({
  appId: '<APP_ID>', // Add your own Application ID
  apiKey: '<API_KEY>', // Set it to your own *search* API key
  […] // Other parameters are the same
});您可以在没有任何参数的情况下运行 ./docsearch 来查看所有可用命令的列表。
请注意,我们在Algolia内部使用此命令行工具来运行免费托管版本,因此您可能不需要所有列出的命令。


