-
Notifications
You must be signed in to change notification settings - Fork 6.3k
Setting up IntelliJ IDEA
Android Studio is version of IntelliJ specifically tailored for Android development. Installation instructions for Android Studio can be found here.
IntelliJ IDEA contains all the features found in Android Studio. Setup for Android development is, however, a bit more involved than Android Studio.
- Install Java 7 JDK
- Install IntelliJ IDEA
- Option 1: Homebrew
- Install Homebrew - package manager for OSX
- run
brew install android-sdk - This will install the Android SDK tools in
/usr/local/Cellar/android-sdk/<version number>
- Option 2: Download and unzip
- Download the Android SDK Tools
- Unzip files to an easy to access/find location. The location will be required later E.g.,
~/android-sdk/
- Install at least one version of the Android Platform
- At a terminal prompt, issue the following command to open the Android SDK Manager:
<location of Android SDK Tools>/android sdk

- Ensure the following are installed:
Tools > Android SDK ToolsTools > Android SDK Platform-toolsTools > Android SDK Build-tools- One version of the Android Platform. E.g.,
Android 5.1.1 (API 22)
- Install any required components by checking the component and clicking Install packages
- At a terminal prompt, issue the following command to open the Android SDK Manager:
- Install Genymotion
- Open IntelliJ IDEA
- Close all open project windows
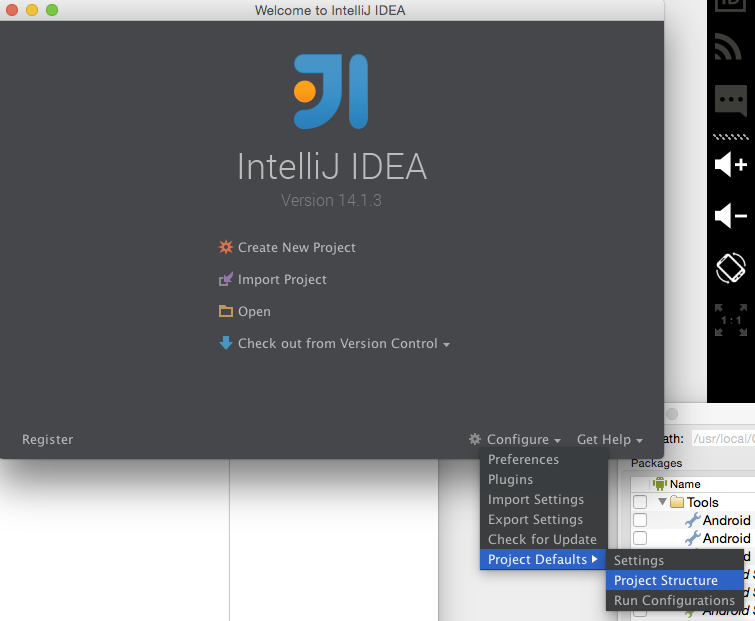
- The IntelliJ Welcome screen will be displayed
- Add required SDKs
- Click on
Configure > Project Defaults > Project Structure - Select
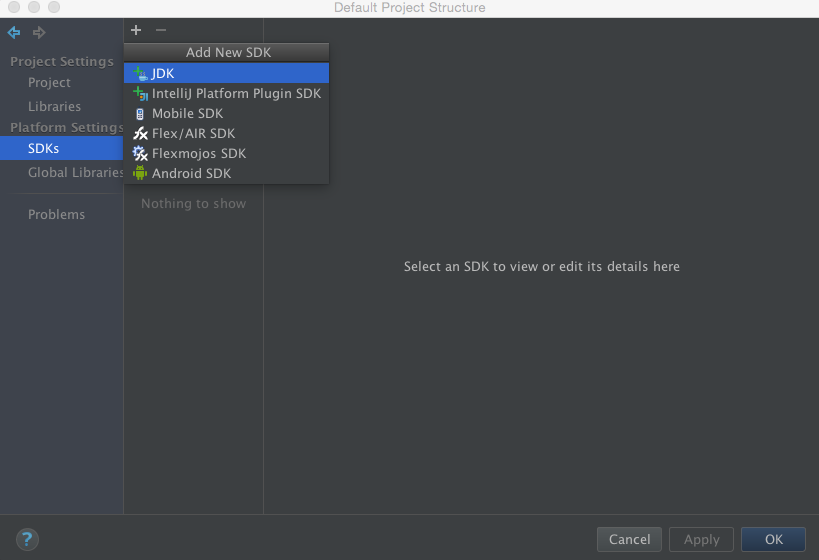
SDKs - Add Java Development Kit
- Click
+ > JDK - Navigate to the JDK location. E.g.,
/Library/Java/JavaVirtualMachines/jdk1.7.0_79.jdkon OSX. - Select the JDK folder
- Click
- Add Android SDK
- Click
+ > Android SDK - Navigate to the Android SDK location. E.g., for Homebrew installations, use
/usr/local/Cellar/android-sdk/<sdk-tools-version> - Select the Android SDK version folder and accept the defaults presented
- Click
- Click OK
- On the welcome screen, click Create new project or select
File > New Projectfrom the menu bar. - Select Android from the Project Type List on the left
- Select Gradle:Android Module from the options on the right

- On the project details screen, specify:
- Application name
- Package name
- Minimum, Target, Compile SDKs

- Select Blank Activity from the template screen.
- Accept or modify the subsequent defaults as necessary.
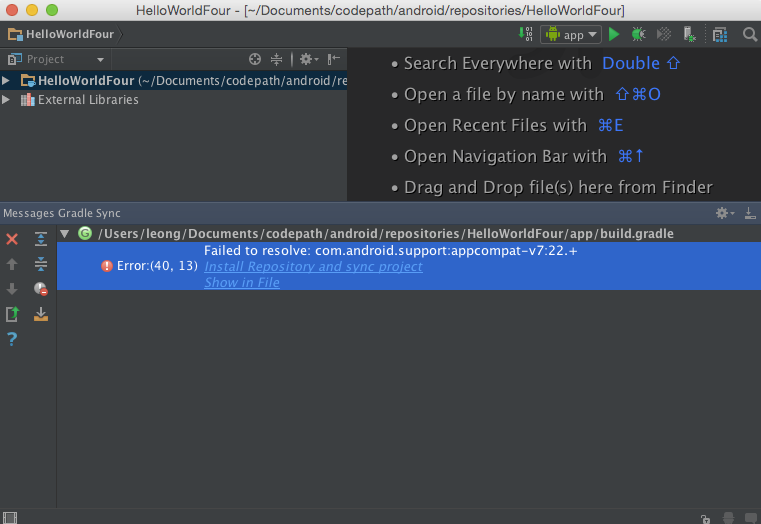
- When the project is opened, Gradle attempts to pull in any dependencies. If there are errors:
- In the error log, click on the recommended resolution.

- Instructions are similar to running Genymotion with Android Studio
Created by CodePath with much help from the community. Contributed content licensed under cc-wiki with attribution required. You are free to remix and reuse, as long as you attribute and use a similar license.
Finding these guides helpful?
We need help from the broader community to improve these guides, add new topics and keep the topics up-to-date. See our contribution guidelines here and our topic issues list for great ways to help out.
Check these same guides through our standalone viewer for a better browsing experience and an improved search. Follow us on twitter @codepath for access to more useful Android development resources.
