This repository has been archived by the owner on Jul 8, 2023. It is now read-only.
-
-
Notifications
You must be signed in to change notification settings - Fork 90
Camera calibration guide
Elvin edited this page Aug 21, 2022
·
5 revisions
Warning: This is outdated information. Find the Gyroflow software here: https://github.com/gyroflow/gyroflow and the docs here: https://docs.gyroflow.xyz/
Accurate image stabilization requires the knowledge of distortions caused by the camera system, as well as the focal length and resolution of the footage. Gyroflow has a built-in calibration tool built on OpenCV that is able to determine these parameters using a clip of a calibration target. The default target is a chessboard pattern with 9x6 corners. The target can be found here or alternatively from file->calibration target in the Gyroflow calibrator utility.
- Display the 9x6 calibration pattern on a flat computer monitor, preferably in full screen. You can also print it out if you're old school.
- Select the desired camera settings to calibrate for. Most importantly the field of view/focal length and aspect ratio, if applicable. Framerate and resolution doesn't matter, only if the resolution changes the field of view. Too low shutter speed may also cause undesirable motion blur, but it's usually fine.
- Record your screen from a bunch of different angles and distances in one clip. 10-20 is more than enough. Hold the camera still in each angle to avoid motion blur and make sure the full chessboard is in view. The following angles are recommended for getting distortion information from the full frame:
- Chessboard filling whole frame
- Chessboard seen from distance.
- Chessboard seen at an angle.
- Each edge of video frame aligned with edge of chessboard.
- Corner of chessboard aligned with corner of video.
- Start the Gyroflow tool, preferably the newest version
- Open the camera calibrator utility.
- Open calibration video file using
File > Open fileorCtrl + O. - Use the buggy seek bar to find clear frames of the chessboard.
- Click
Add current framefor each frame. - After adding the first couple frames, it can be useful to click
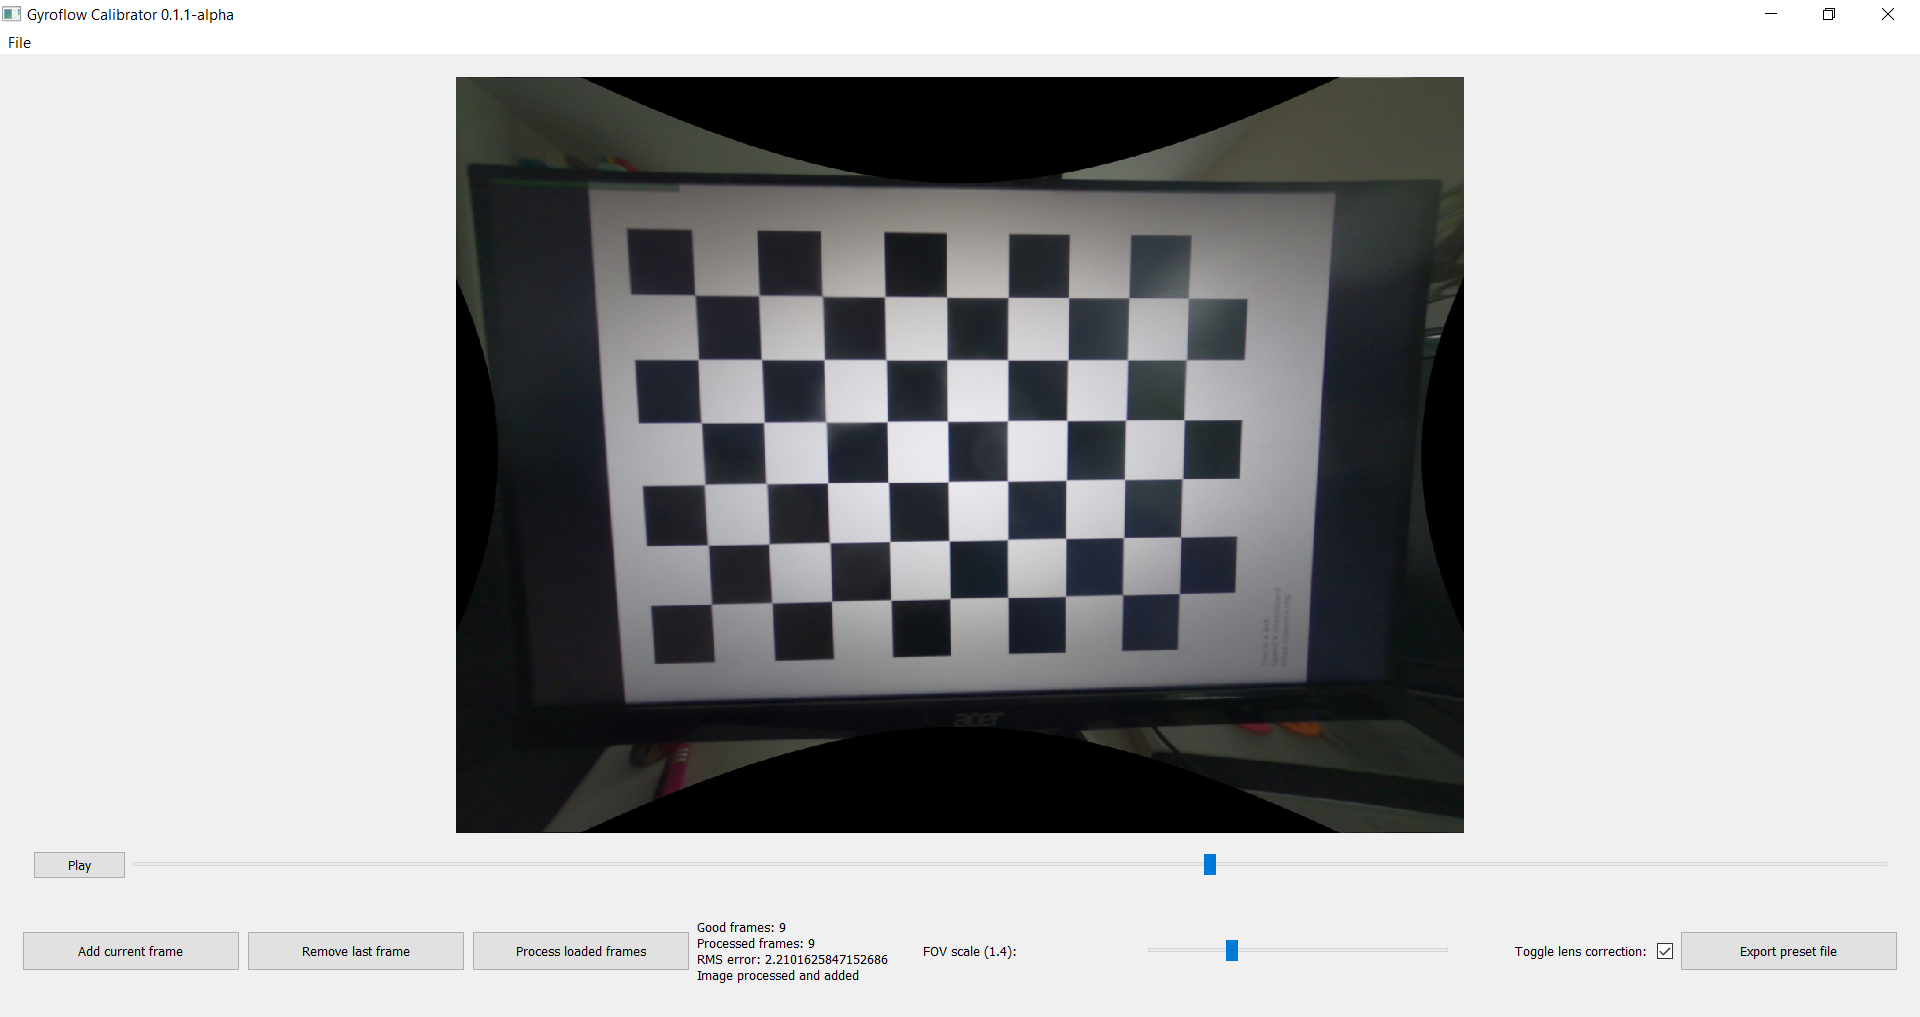
Process loaded framesand checkToggle lens correctionto check the undistorted result. - If result is totally wrong or the
RMS erroris very high after adding a frame, clickRemove last frameor reopen file to reset calibration. - After all required frames are added and processed, the straight lines should be straight in the undistorted video. RMS error should be under 5 (pixels).
- Click
Export preset fileand save the preset as a JSON file. - Feel free to send the file to be included as a default preset. Try to name the file something that uniquely identifies the camera + settings, e.g.
GoPro_Hero_8_4K_4by3_wide.json. At the moment you shouldn't go ahead and make a profile for every single setting, only the one or two you'll be testing out. The information contained in the preset may change, and it would suck to have to redo every single preset.
Example of what calibration result should look like:
