-
Notifications
You must be signed in to change notification settings - Fork 17
Netgear ReadyNAS start up & shutdown
I thought I would write up the steps on how to shutdown a Netgear ReadyNAS as they are quite involved. For completeness I include how to perform start up too, although that is very trivial.
The solution to remotely shutting down a Netgear ReadyNAS is to use ssh to connect to the NAS using a trusted session encrypted using public / private key pair. As explained on the ssh-keygen web page, the SSH protocol uses public key cryptography for authenticating hosts and users. The authentication keys, called SSH keys, are created using the ssh-keygen program.
The steps to set up remote shutdown are as follows:
Start a root bash session inside the docker container which hosts home assistant. If you do not know the name of the docker container, use
docker ps*
to find it.
docker exec -it homeassistant sudo bash
Generate a new public / private key pair WITHOUT a passphrase using
ssh-keygen
You should see messages such as
Your identification has been saved in /root/.ssh/id_rsa.
Your public key has been saved in /root/.ssh/id_rsa.pub.
Copy the public key somewhere accessible for the next step
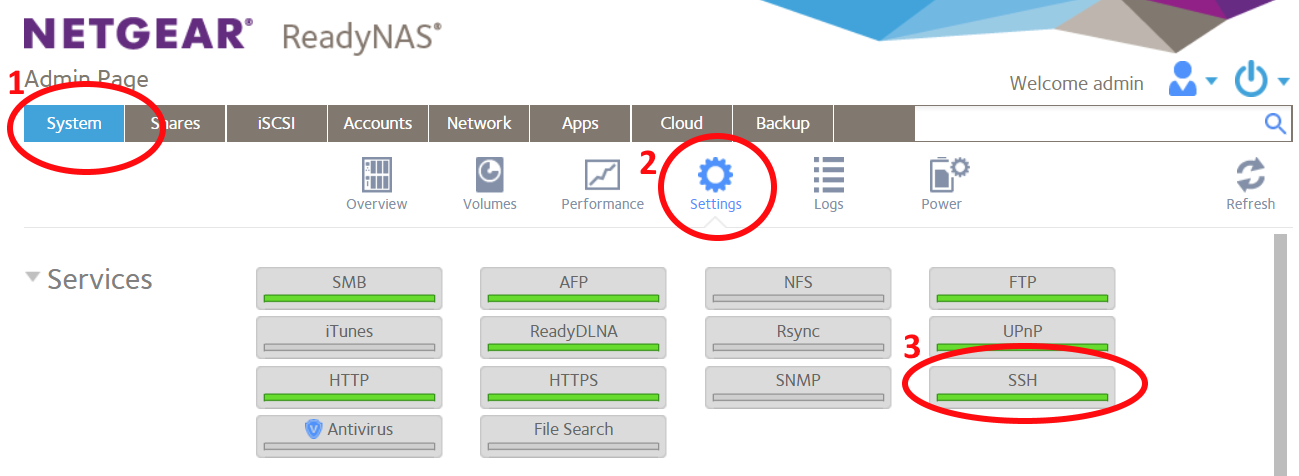
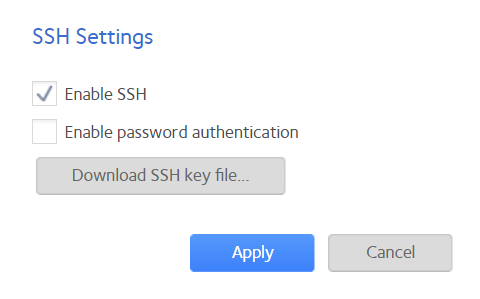
Connect to your ReadyNas admin page. On the System tab, select Settings. Select SSH and Enable SSH, but do not enable password authentication as shown below.


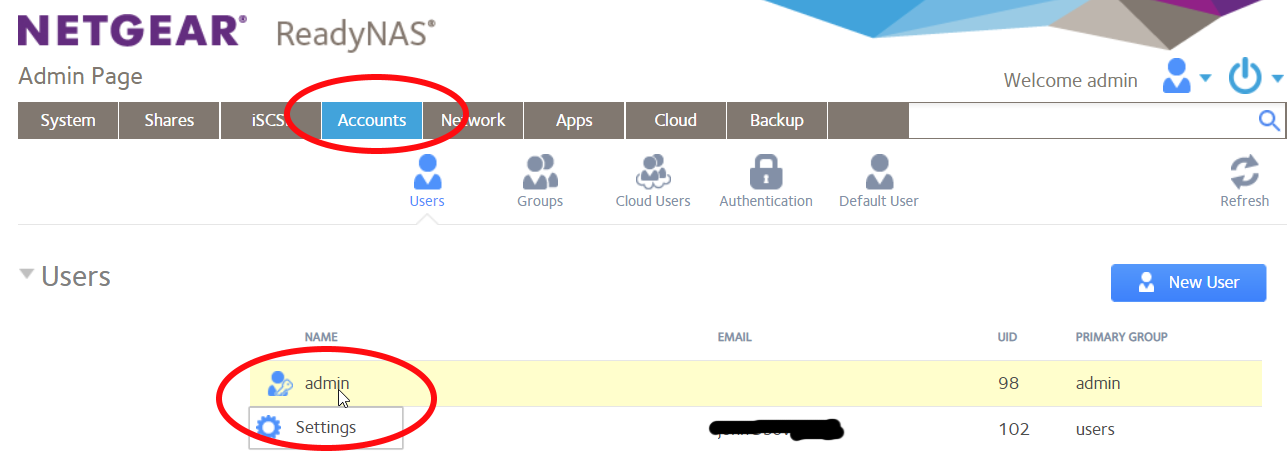
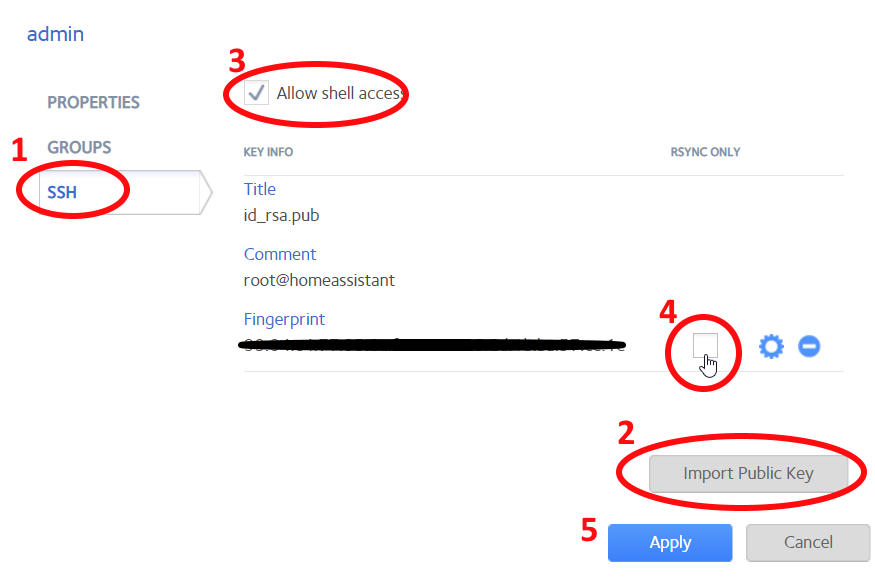
On the Accounts tab, click on the admin user and you should see a Settings drop-down. Click Settings. On the ssh tab, import the public key generated above. Tick Allow shell access and untick the RSYNC only checkbox.


Back in the root bash session inside the docker container, type
ssh root@your_nas_ip rnutil rn_shutdown
Where your_nas_ip is change for your ReadyNas IP address. Run the command and watch the ReadyNas admin page. You should see the message "Shutting down". If so, all well and good.
Configure Home Assistant to use the new functionality. In configuration.yaml add
wake_on_lan:

shell_command:
  nas_shutdown: ssh root@your_nas_ip rnutil rn_shutdown
Then in your scripts.yaml add two new scripts:
wake_on_lan_nas:
  alias: 'Wake on LAN: NAS'
  sequence:
  - data:
	mac: your_nas_mac
	service: wake_on_lan.send_magic_packet
shutdown_nas:
  alias: 'Shutdown: NAS'
  sequence:
  - service: shell_command.nas_shutdown
Use the Home Assistant developer page to test your new scripts.